INTRODUCTION
I show how to set up a software development environment for macOS and Ubuntu Linux. When we're done, we'll be able to develop programs in C, C++, Python, Javascript, and Lisp using Unix tools.
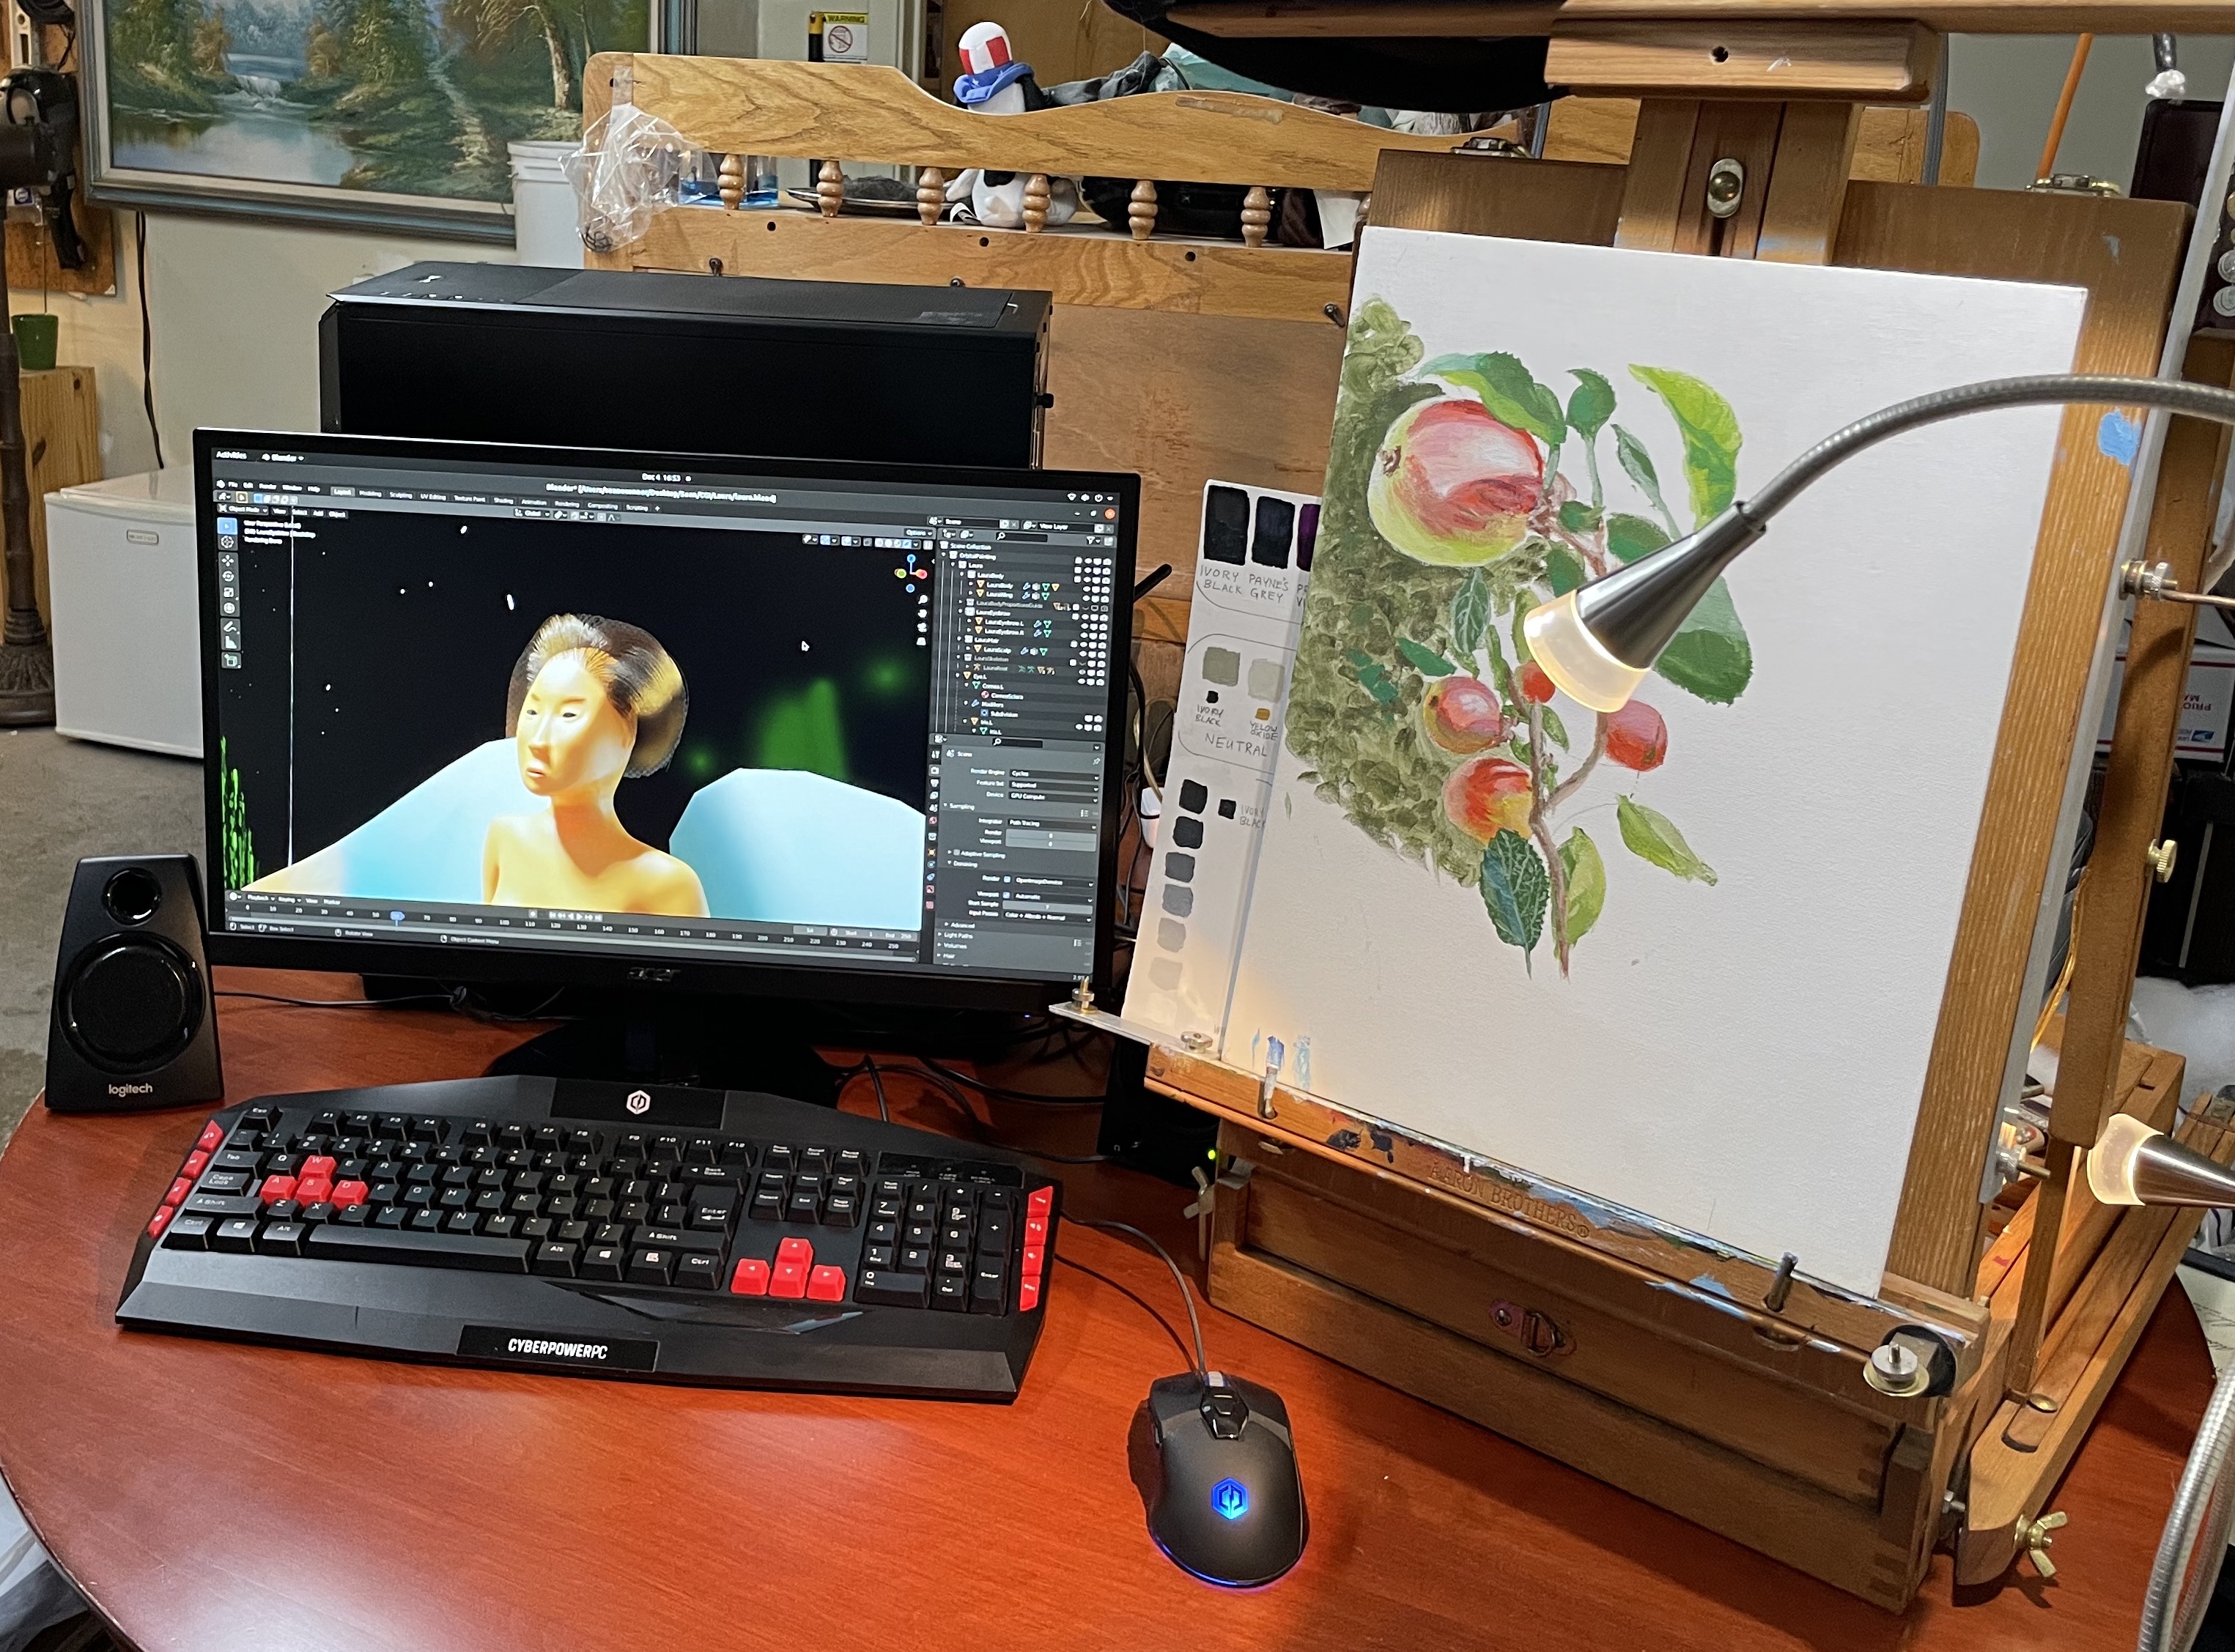
SYSTEM SETUP - Ubuntu Linux
Ubuntu Linux on a CyberPower PC
This platform is a CyberPowerPC Series C 2019 ET8880-1202 with an AMD motherboard, 1TB SATA disk drive, wireless PCI module, GPU card, Acer monitor, USB keyboard and three button mouse. To install Ubuntu Linux 22.04.1 LTS (Jammy Jellyfish) follow the excellent Ubuntu Desktop Installation instructions.
Here are the steps I used:
- Download the Ubuntu distribution for an Intel PC ubuntu-22.04.1-desktop-amd64
-
Download and install Balena Etcher balenaEtcher-1.7.9.dmg for Mac OS.
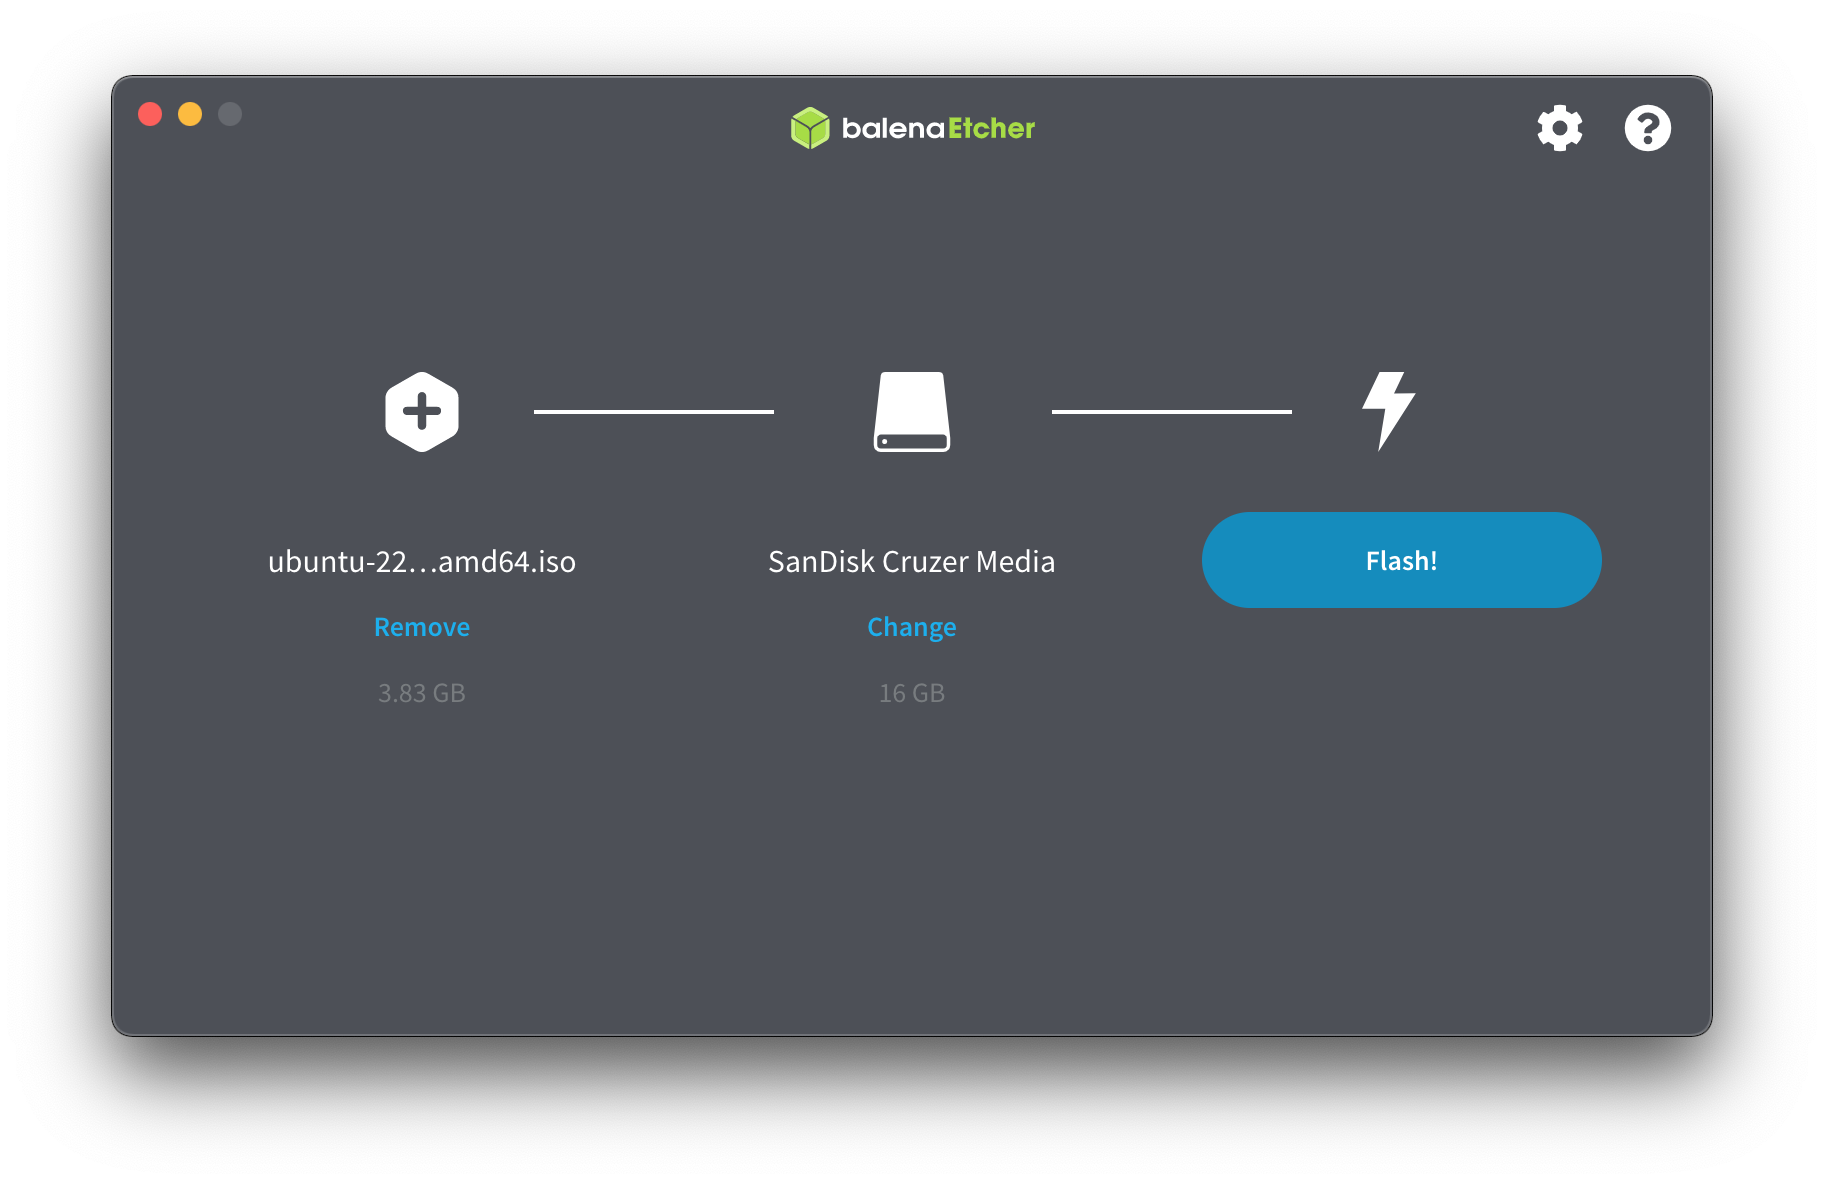 Plug in a 16GB USB Drive into my MacBook Pro. Select the ISO and Drive and copy Ubuntu to USB drive.
-
When etched, insert the USB drive into the PC, hold down the F2 key and boot into the boot loader screen.
Make the USB drive the first option.
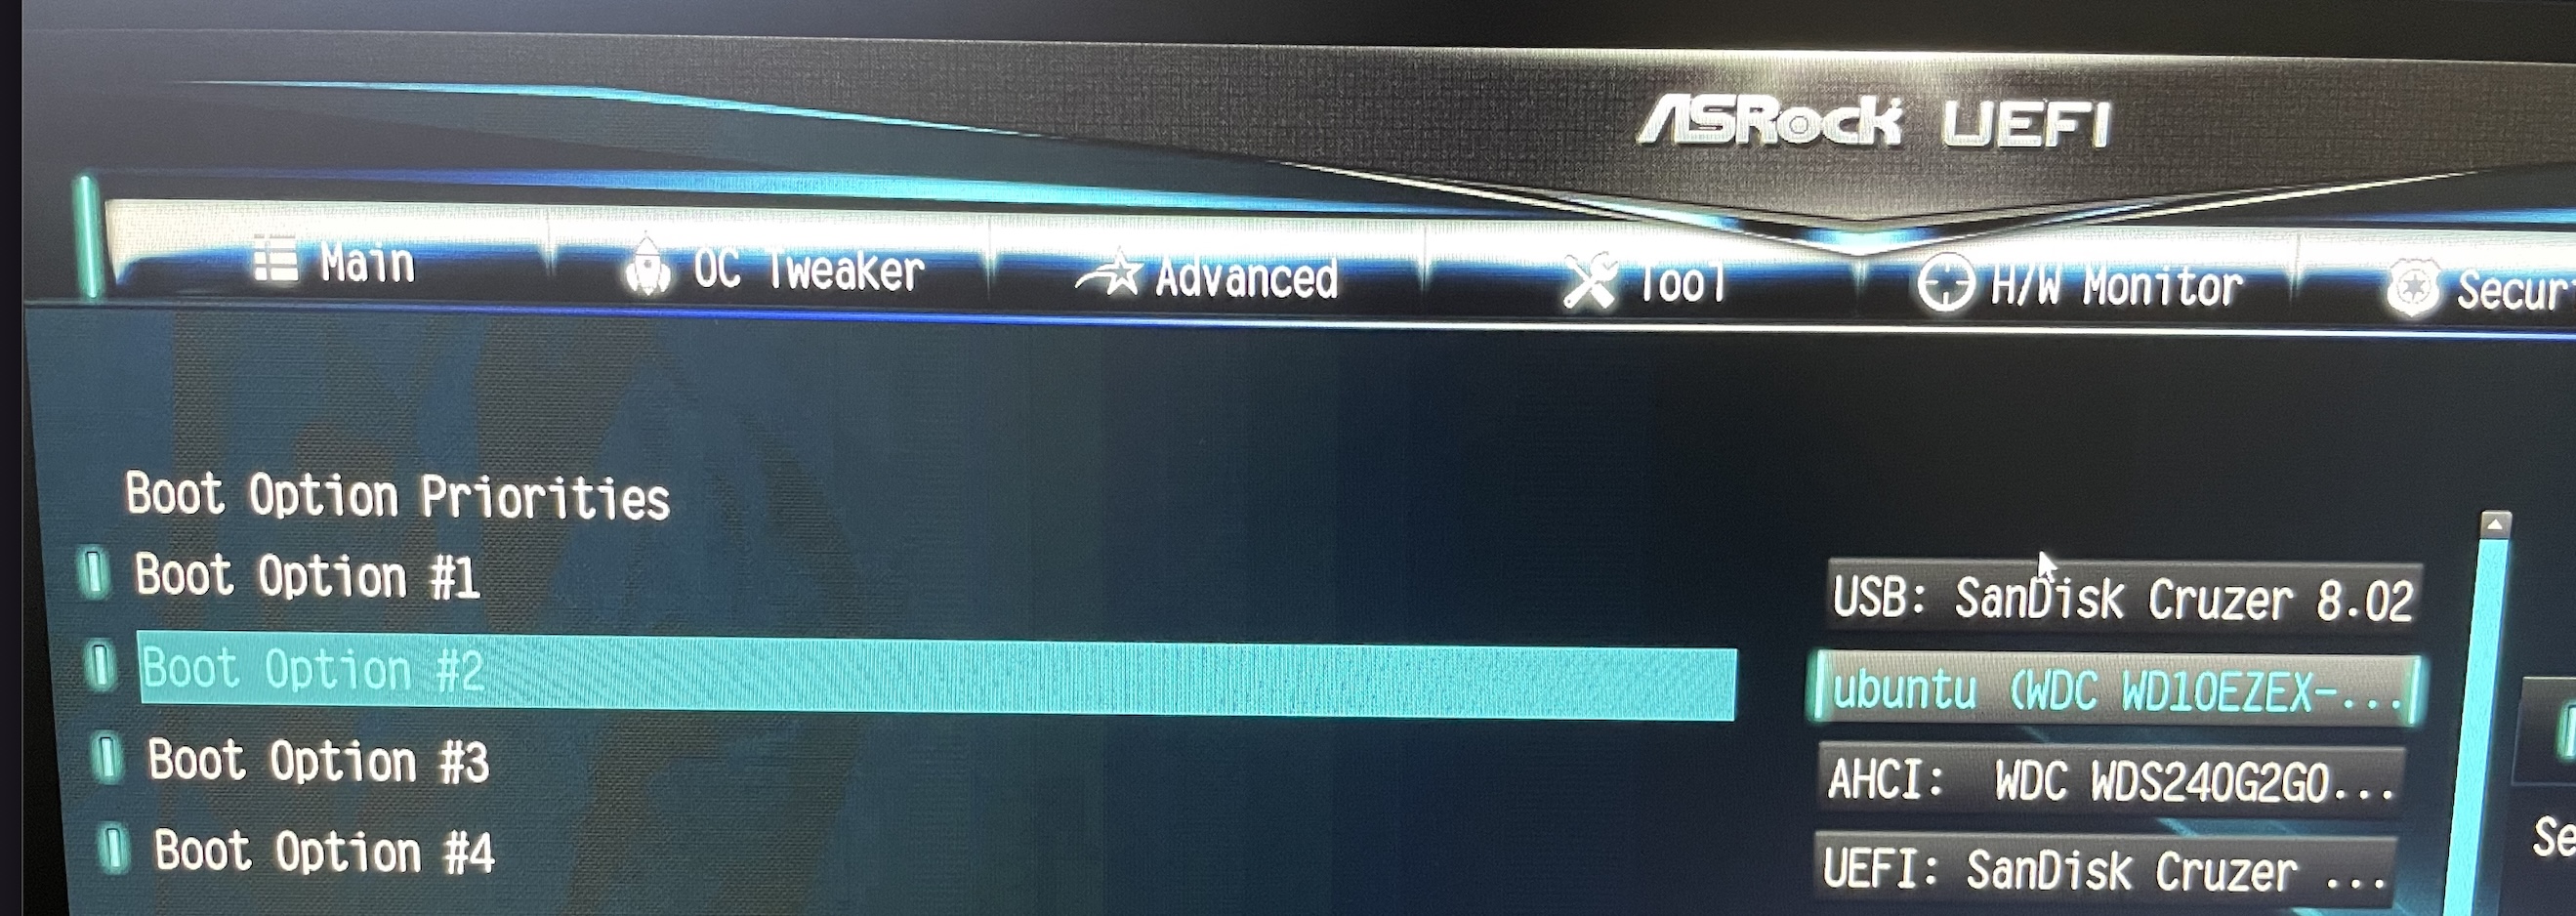 Exit and reboot.
-
Click on the Install Ubuntu button on the screen.
-
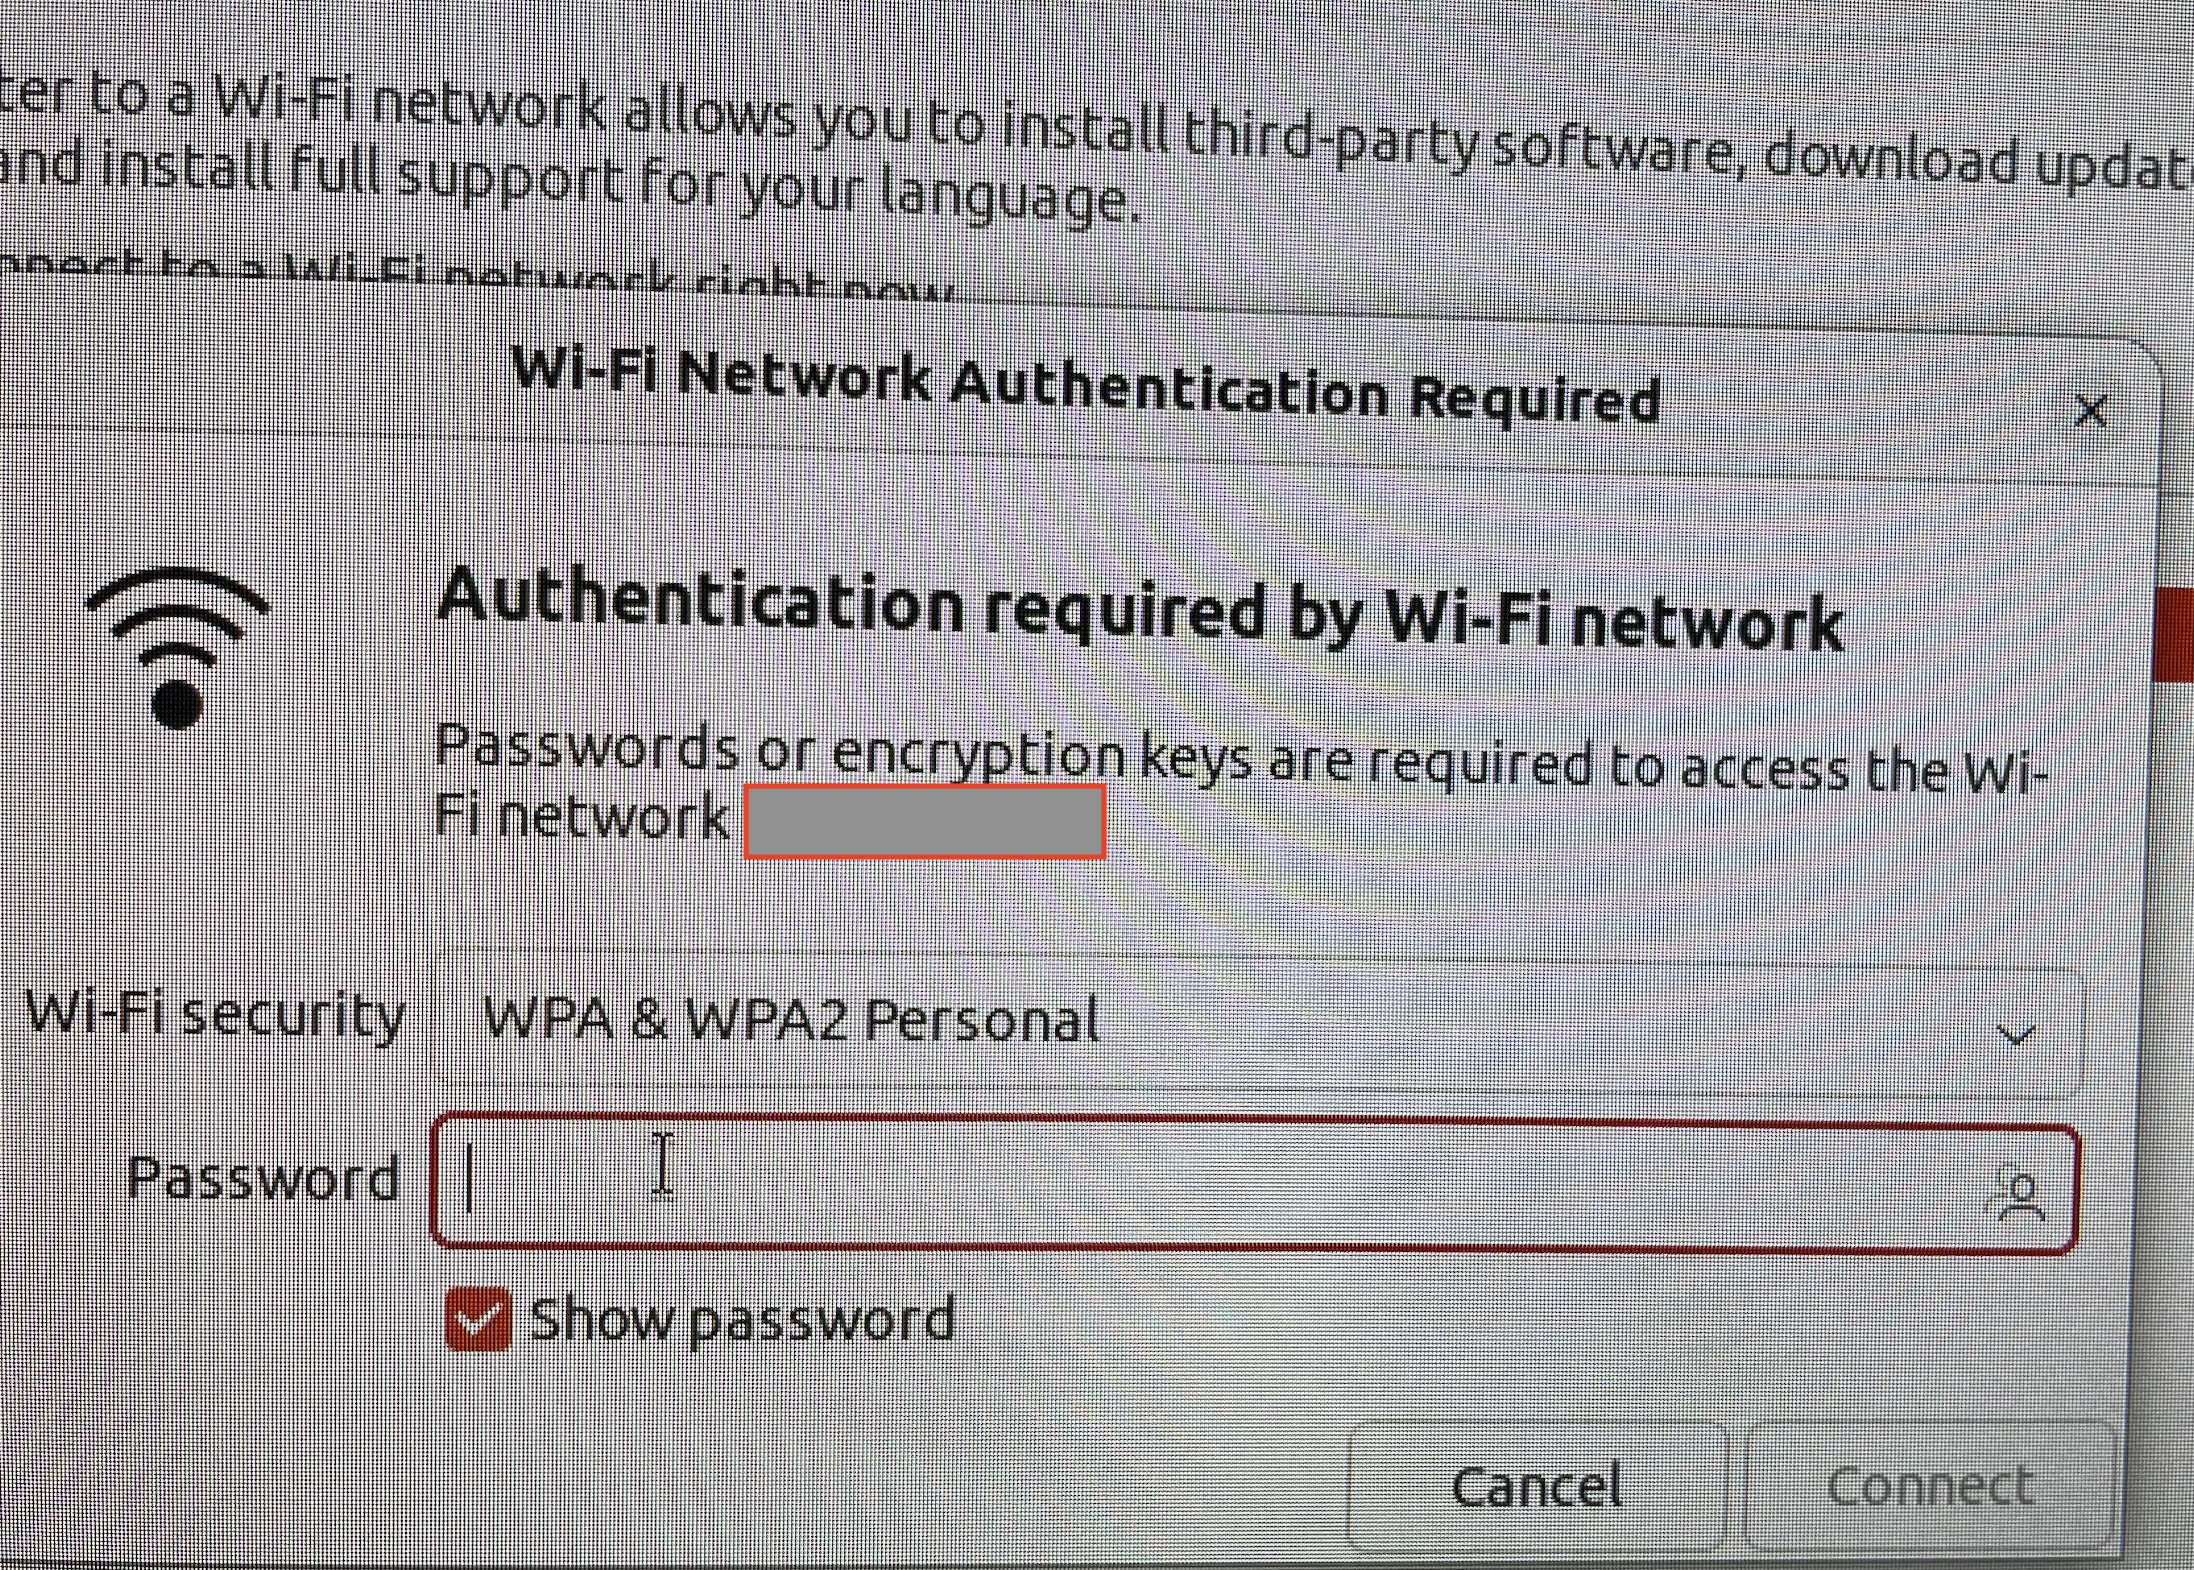
Connect to wireless hub.
-
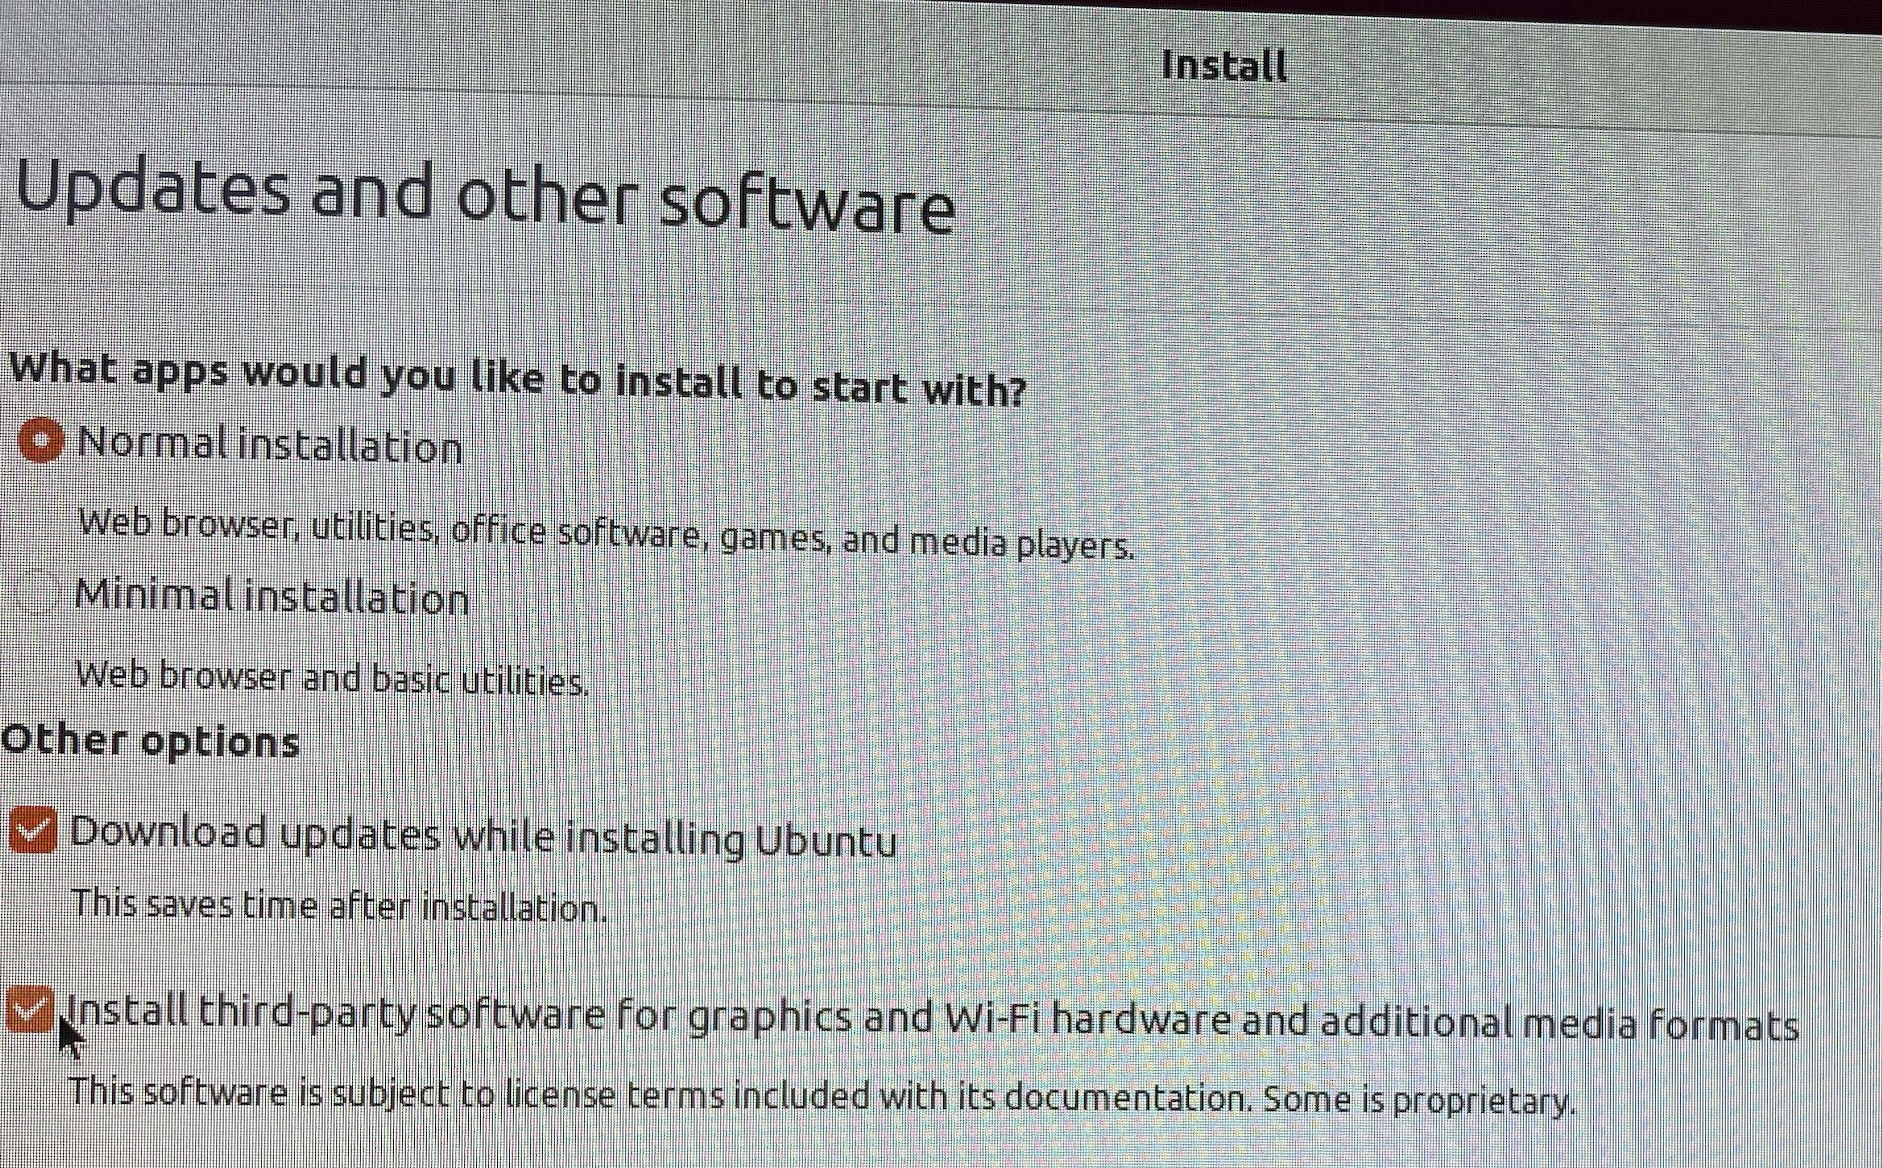
Allow third party software.
-
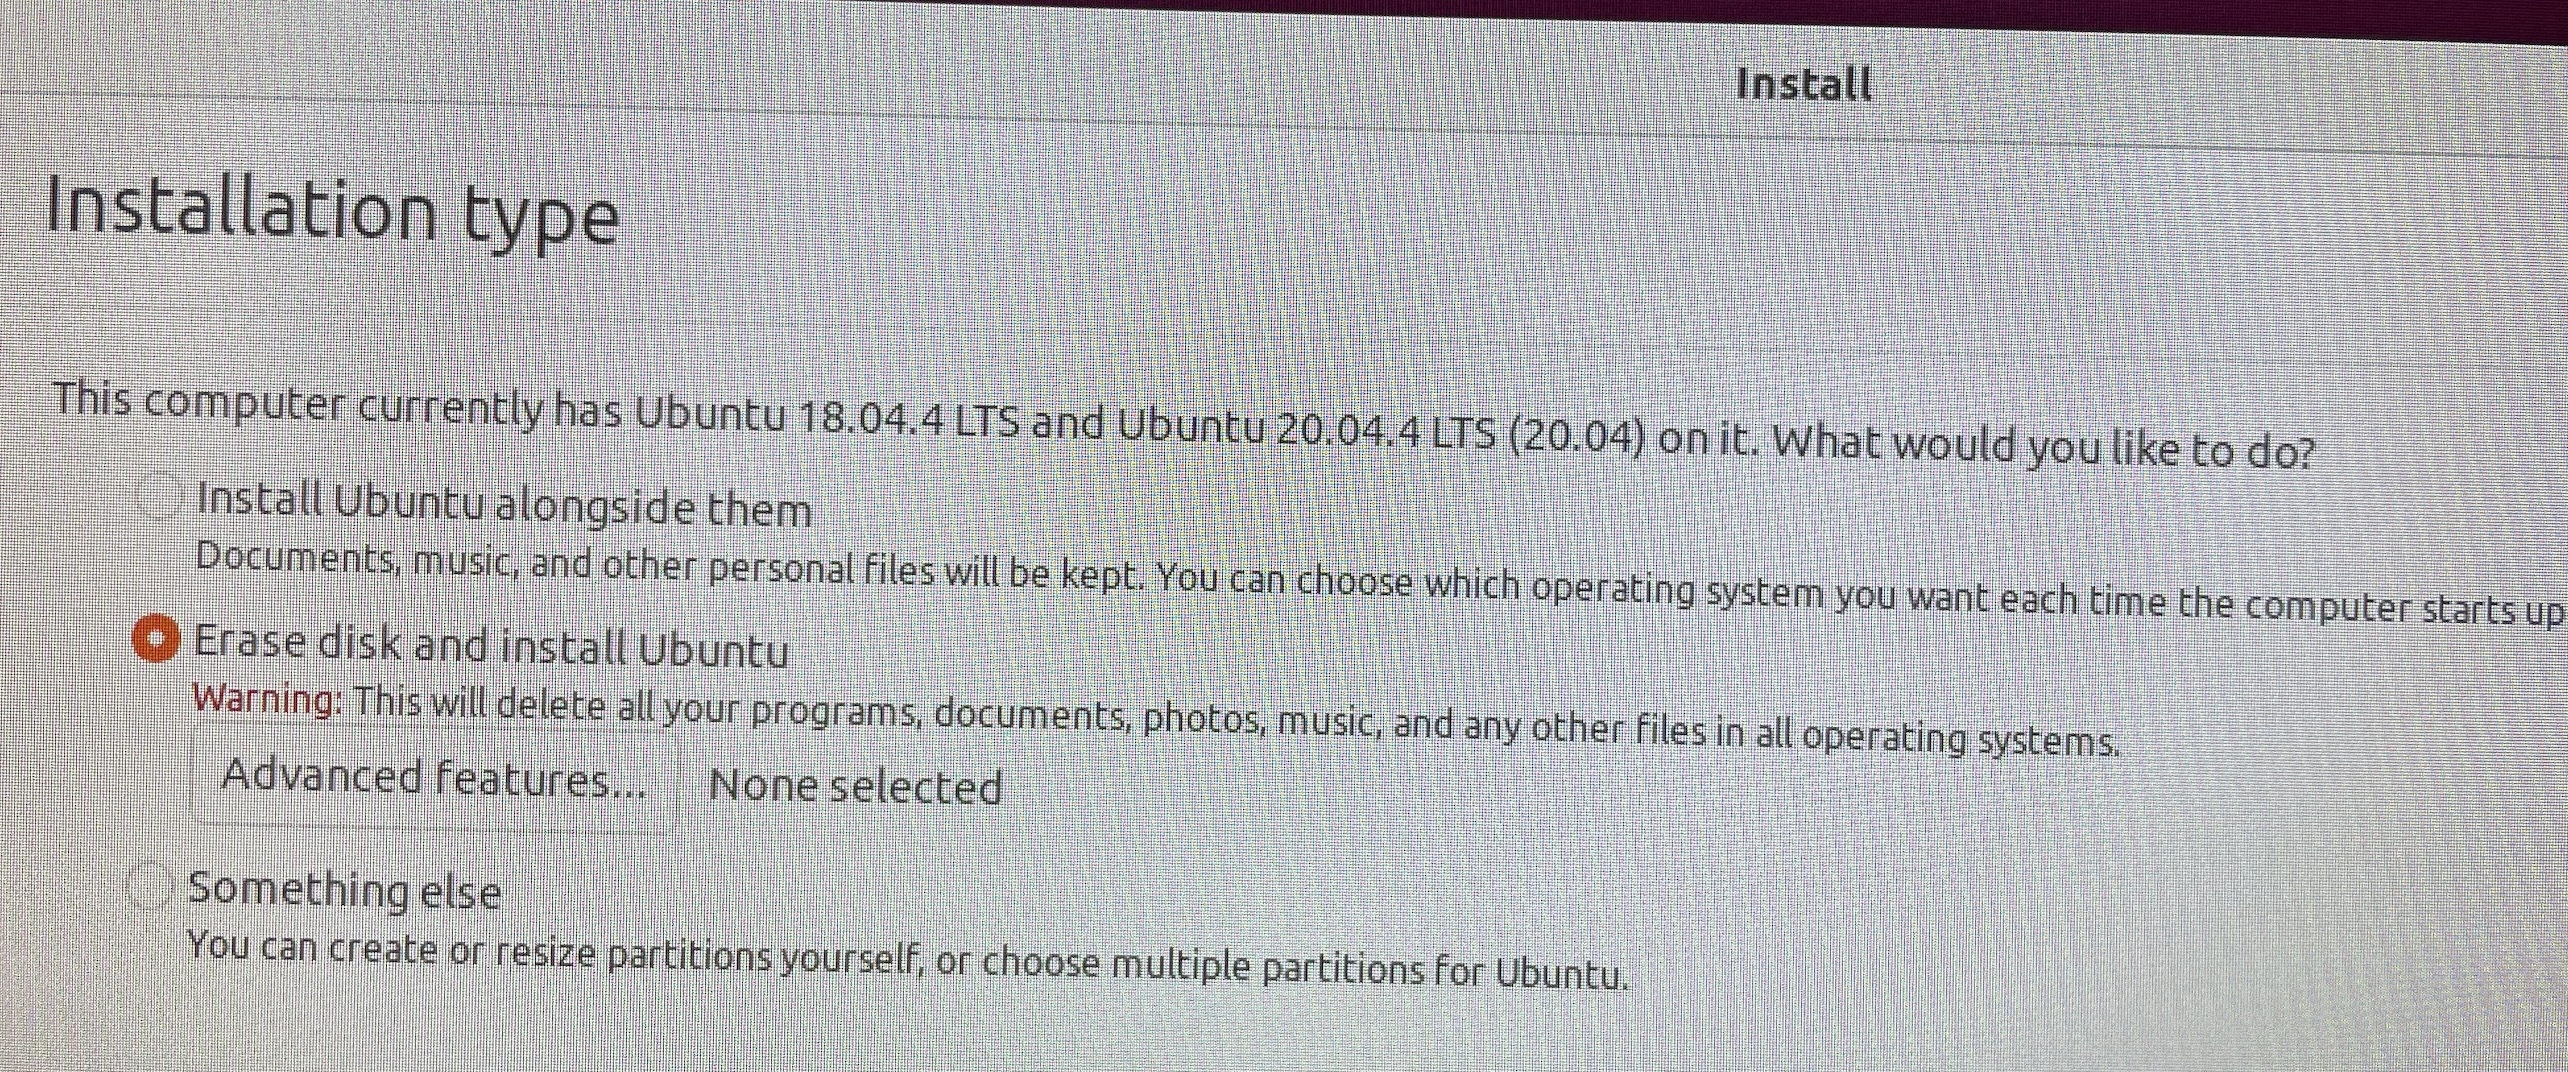
Erase install.
-
User name and password.
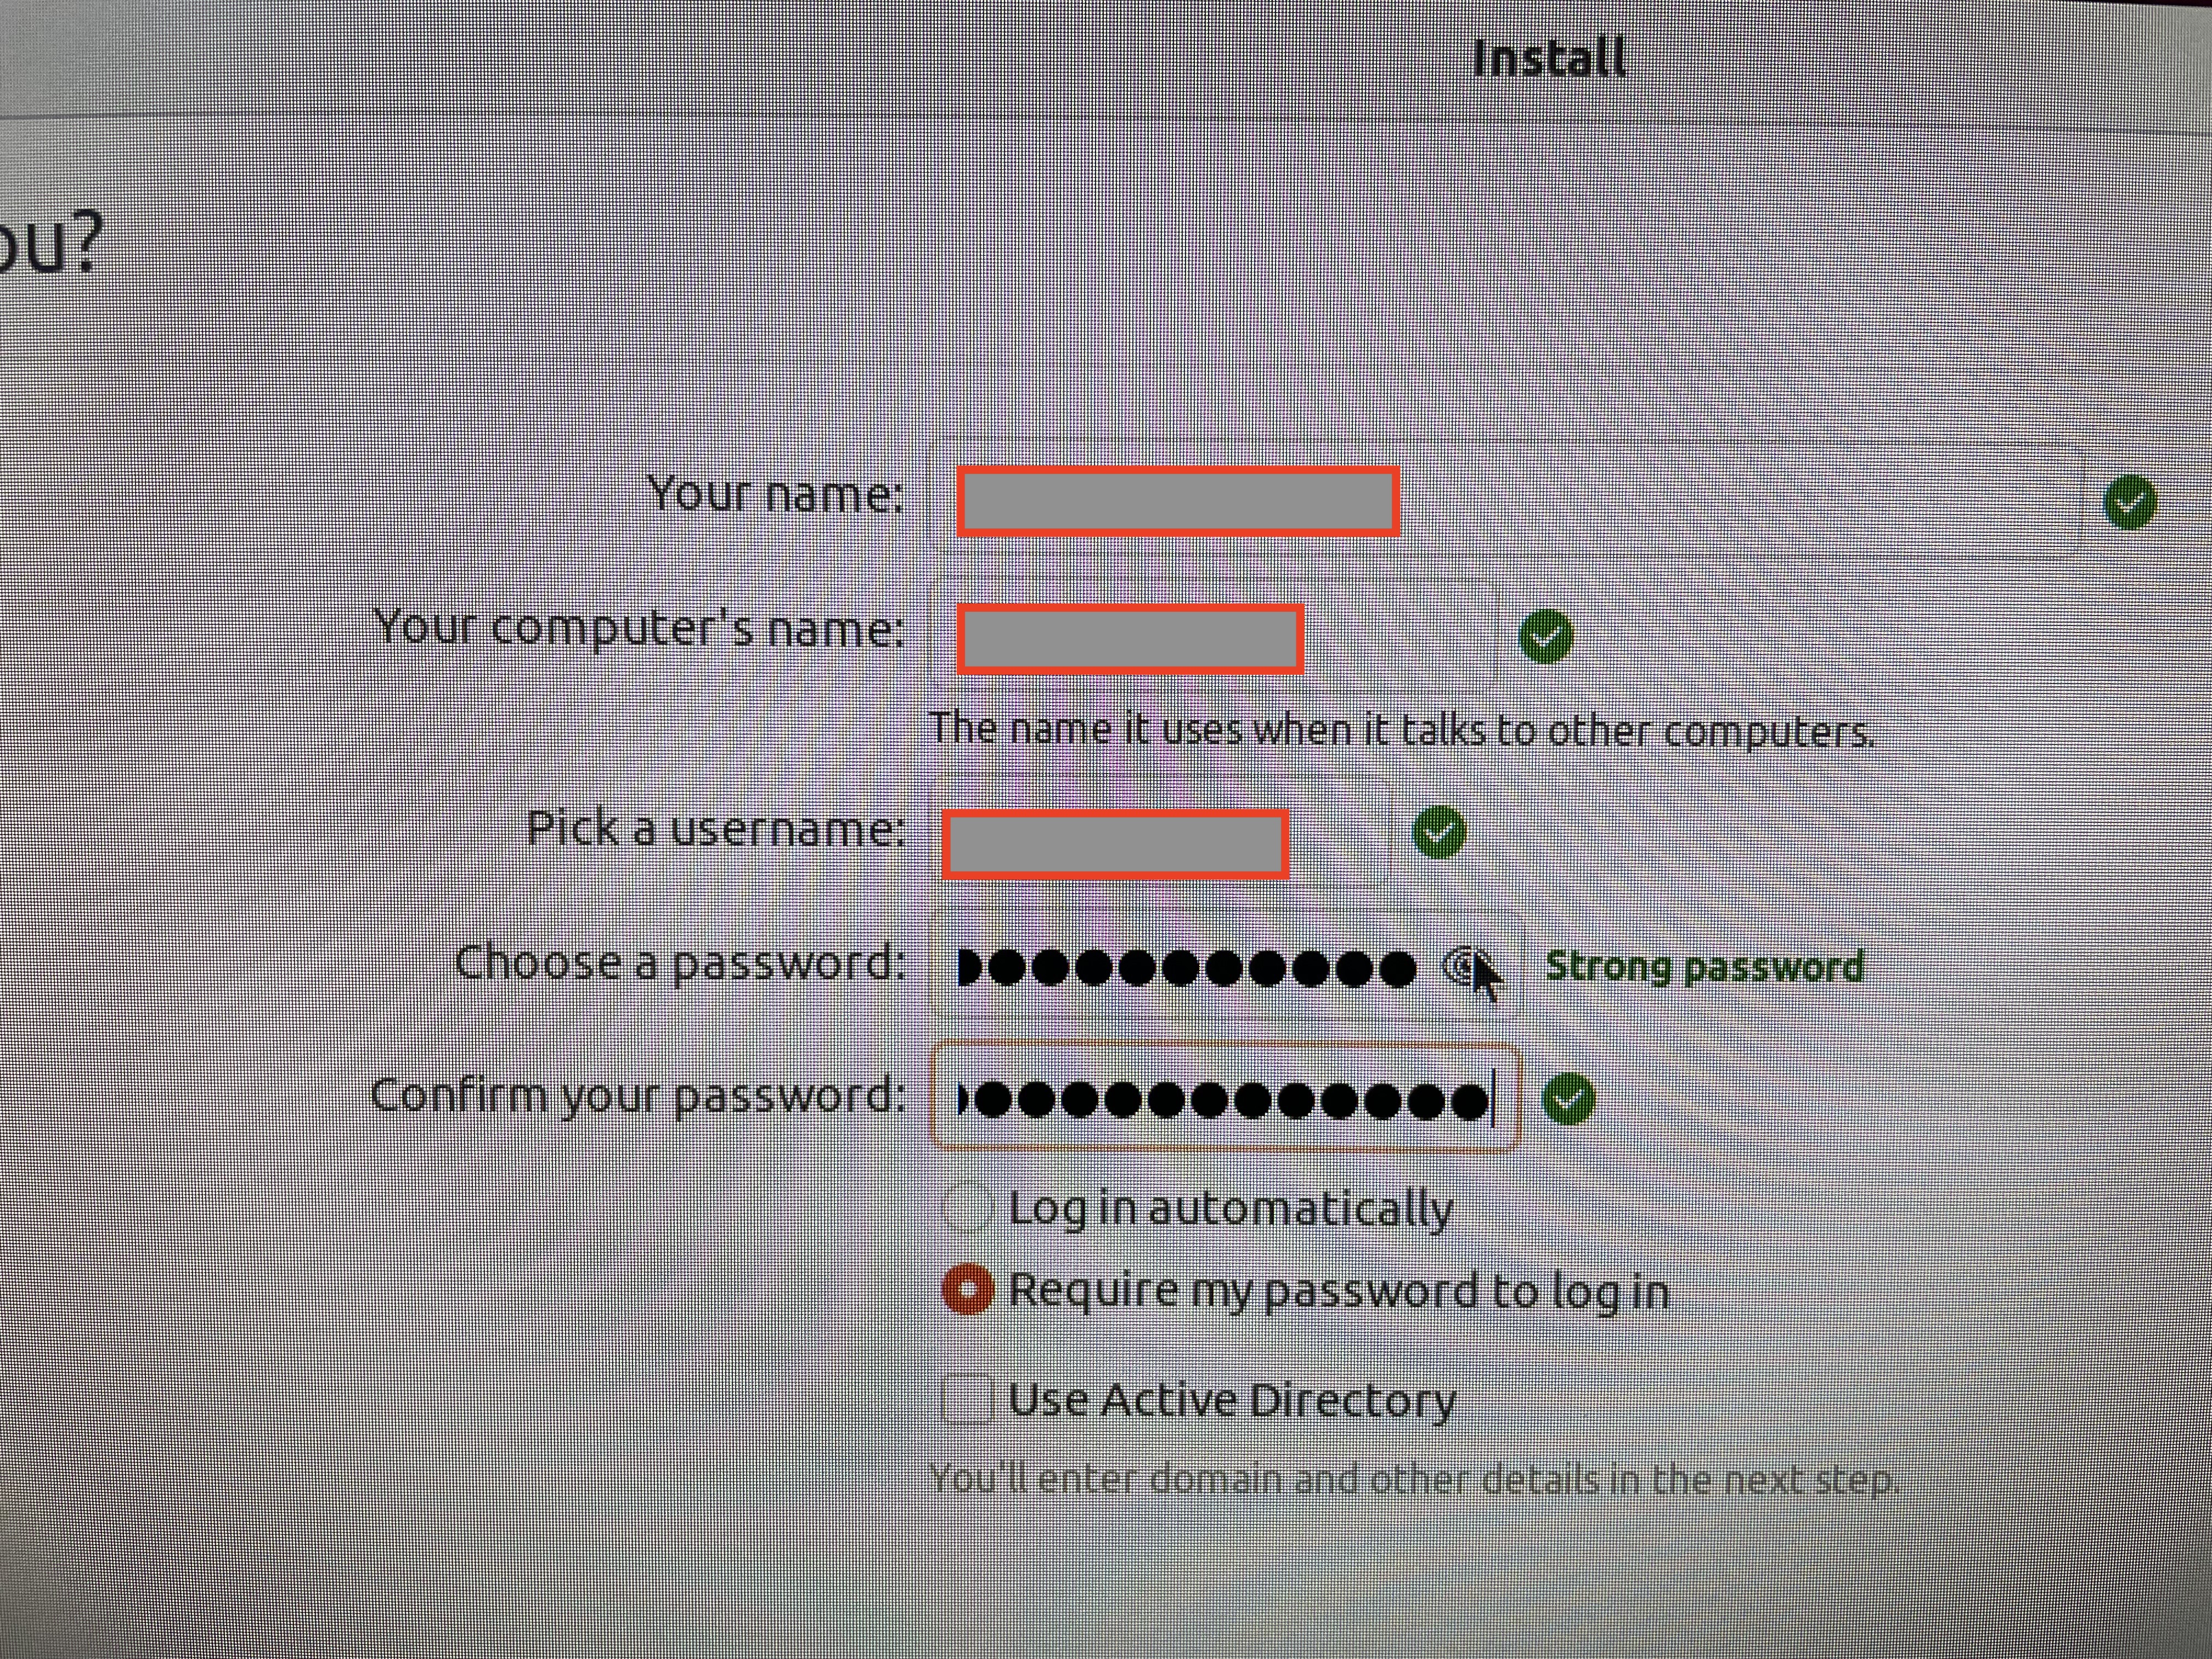
Then continue to the end of the install.
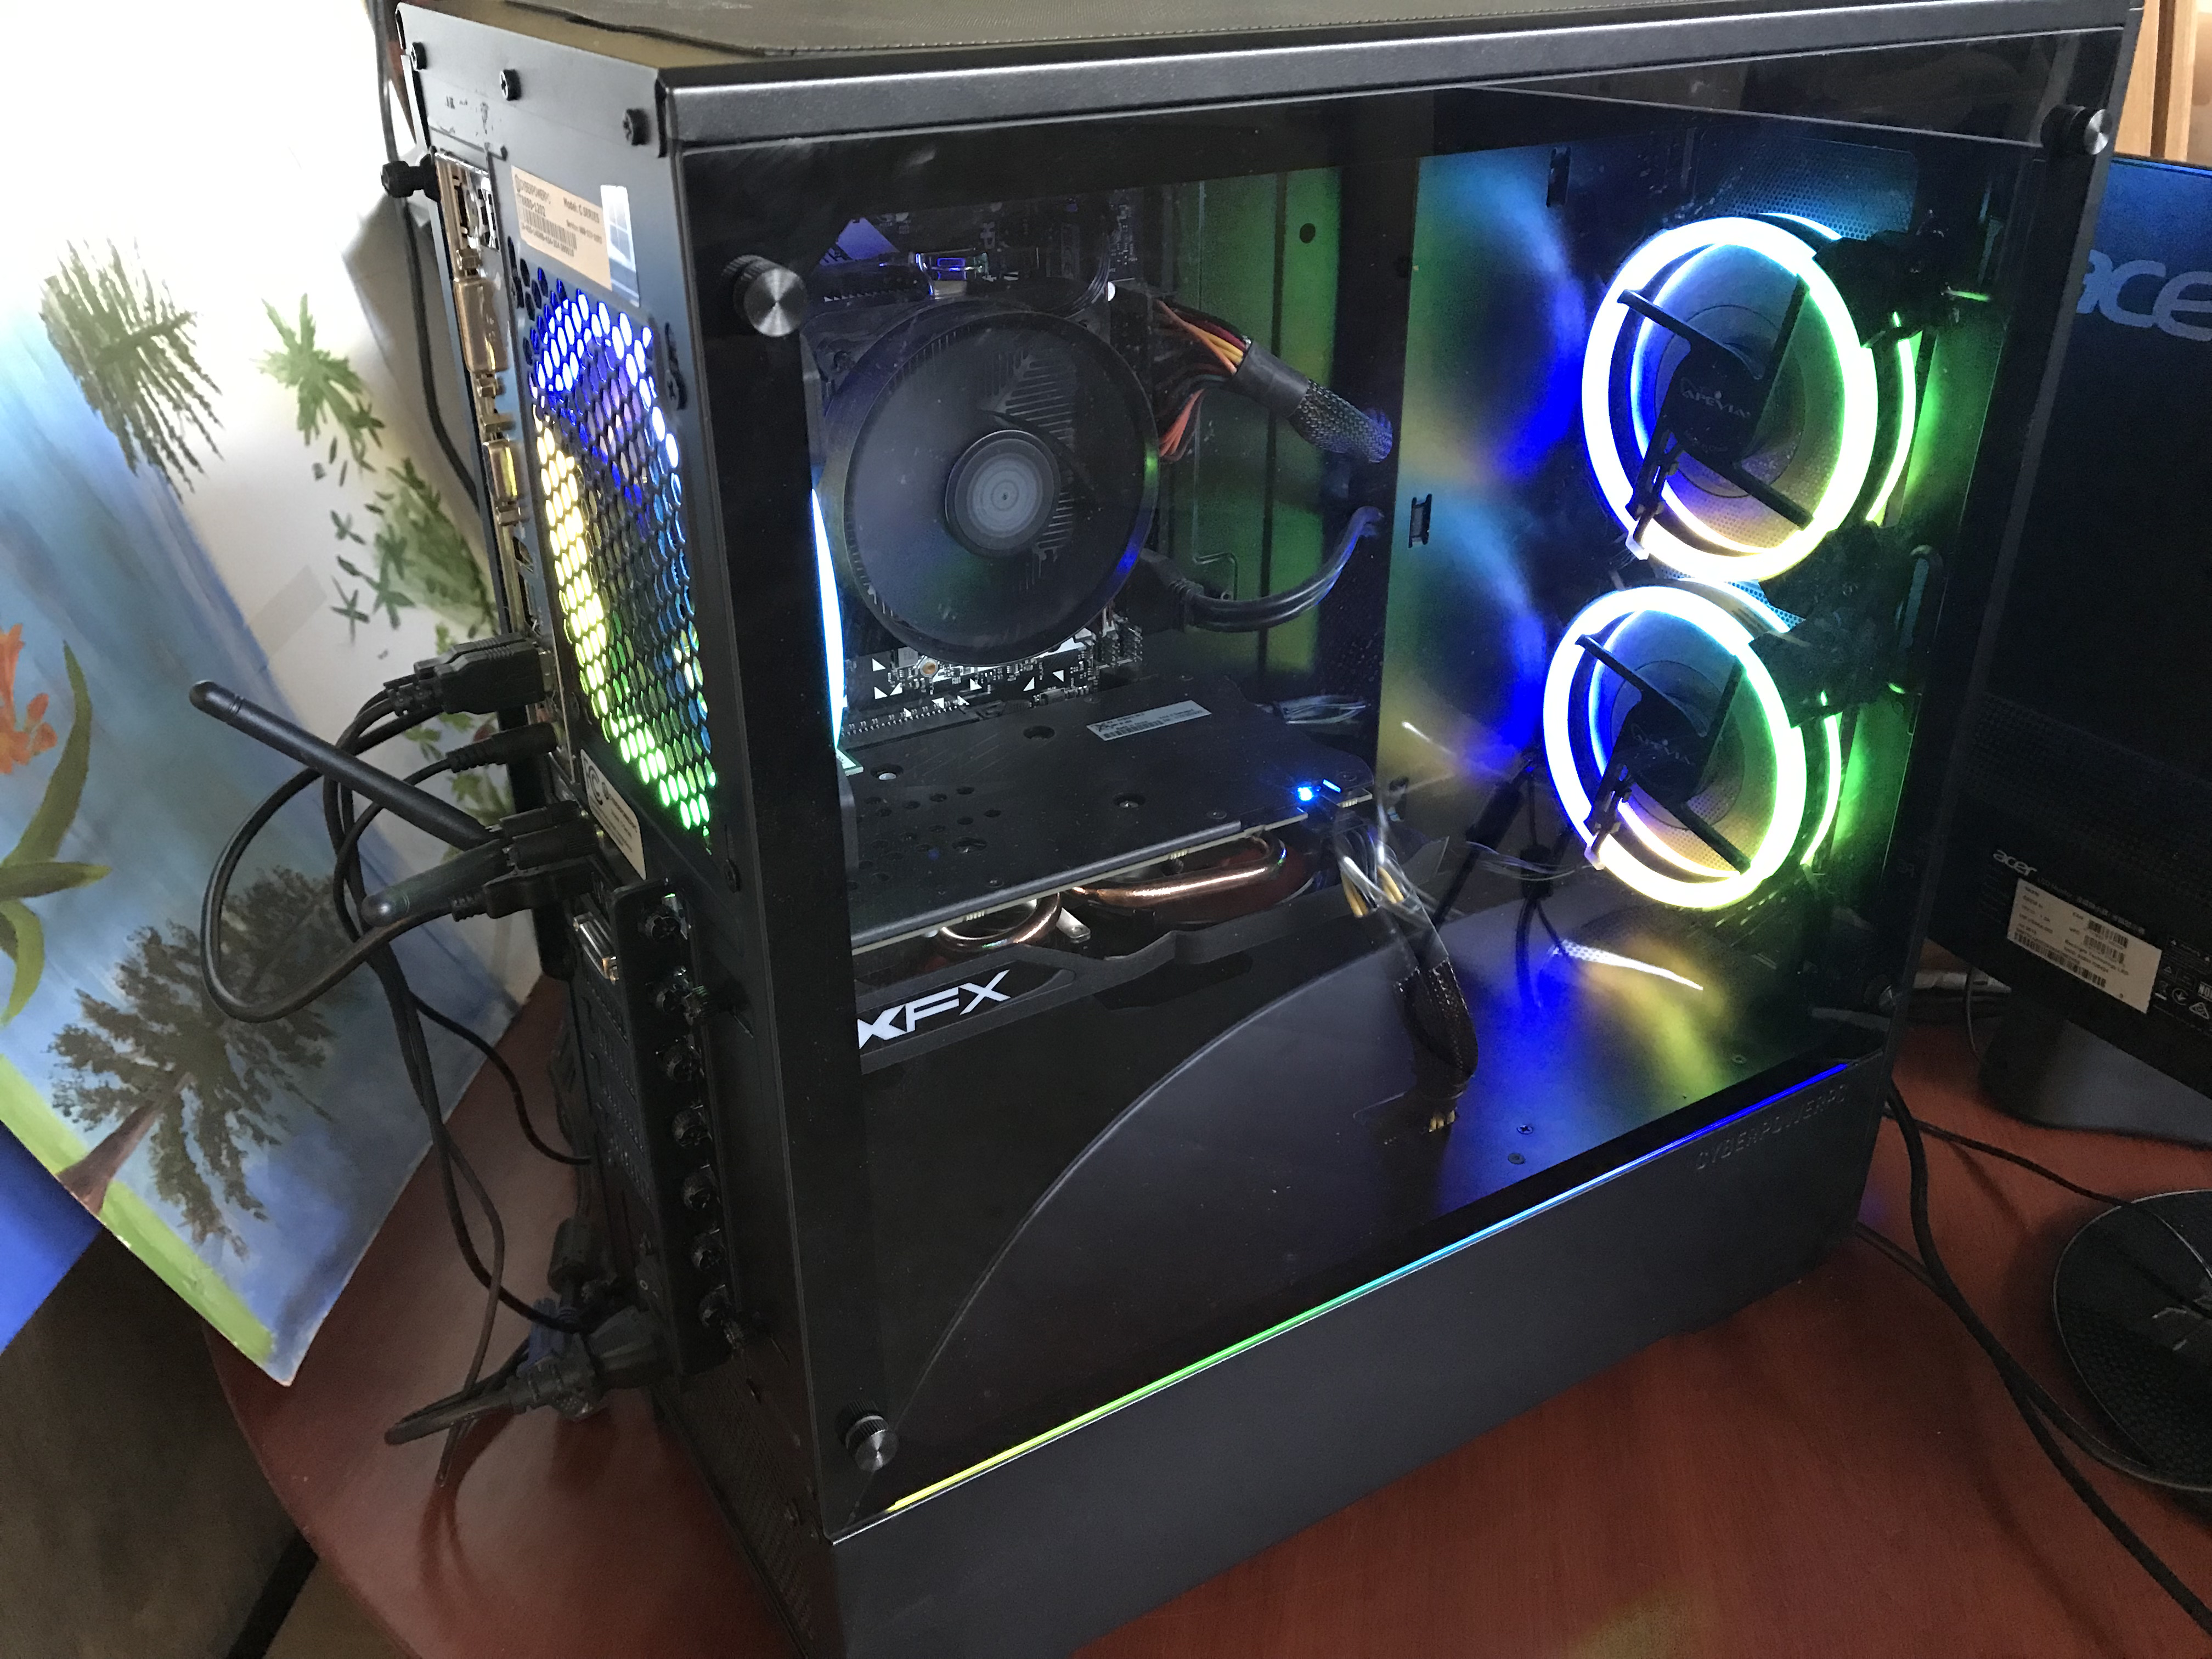
Installing Drivers for the GPU
My machine has a GPU card, an AMD XFX Radeon RX570 4GB OC+ 1386 MHz DDR5 3xDP HDMI DVI board. It was painful to get working drivers installed. Go to AMD Support, and download the drivers SW for this version of Linux. The steps in my case were:
Install this stuff too:
Ubuntu 22.04 LTS has Wayland which replaces X11.
Ubuntu Linux Tweaks
We'll make Ubuntu more useful. First read the Ubuntu Desktop Guide.
Clean up Problems with Your Upgrade
If your upgrade didn't go smoothly, you can install and run aptitude.
Run aptitude to diagnose, clean and reinstall your packages.
Displaying HEIC Images
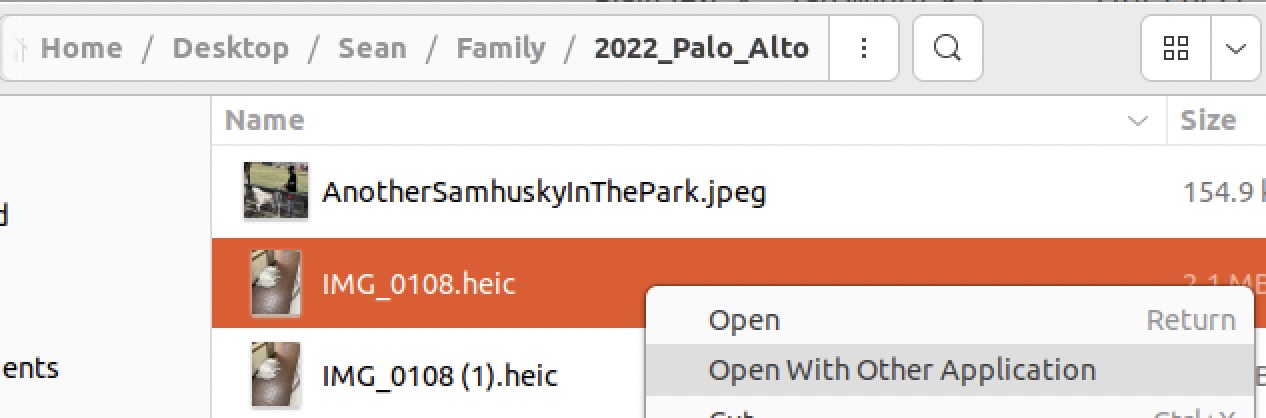
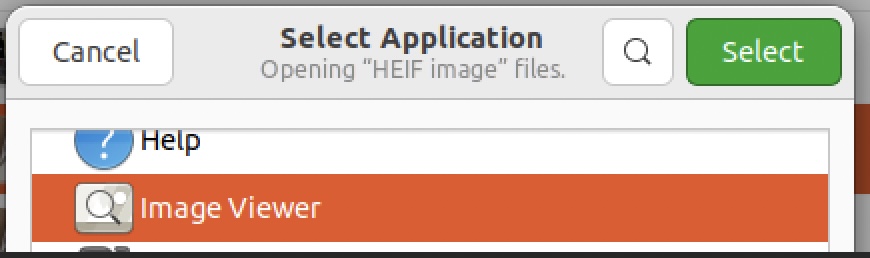
To show Apple's HEIC formatted images from iPhones as thumbnails in folders and to view them, follow viewing HEIC photos and do this
Then right click on one of the HEIC images in file folder and select ImageViewer for this file type:
Screen Shots
Use the Space + PrintSysRq buttons to do screen shotsChanging the Terminal Type
I want to execute the bash startup files the same way macOS does. So you need tell Ubuntu to run the terminal window as a login shell: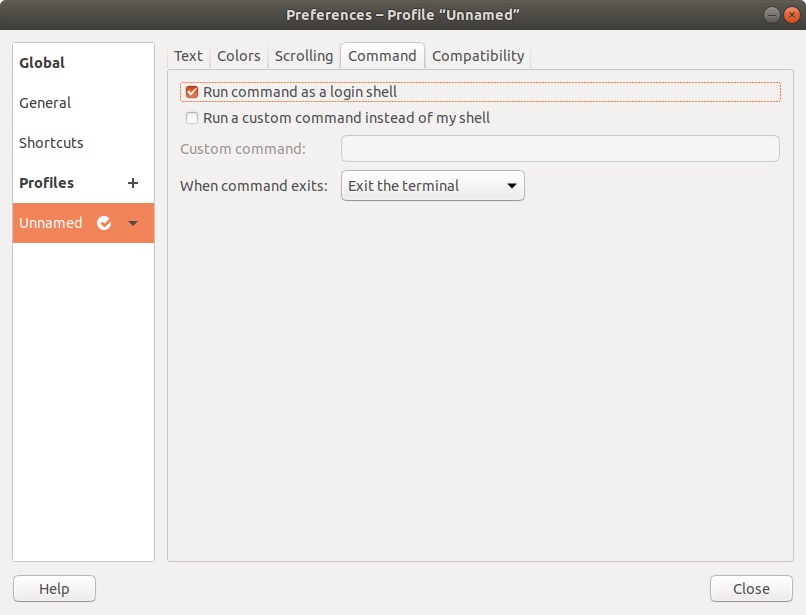
File Sharing Between Mac and Ubuntu Computers
Install Vim first so you can edit files. Here's how to change the hostname of your system.
To install file sharing across computers, find out your username
then install Samba, and give a sharing password,
Let's share the Desktop directory under $HOME. First copy the system config file to your local directory,
Edit the smb.conf file by adding these lines to the end,
Start the Samba client,
To speed up SMB sharing, (it still takes a minute or two on my Mac), add the IP addresses and hostnames of all your local computers to the /etc/hosts file.
Install ifconfig so you can see the IP addresses.
Get the hostname on my Ubuntu Linux computer and its IP address
Now go to the macOS computer and get the hostname and IP address,
Back in Ubuntu, edit the hosts file by doing sudo vim /etc/hosts. Add these two host names and their IP addresses.
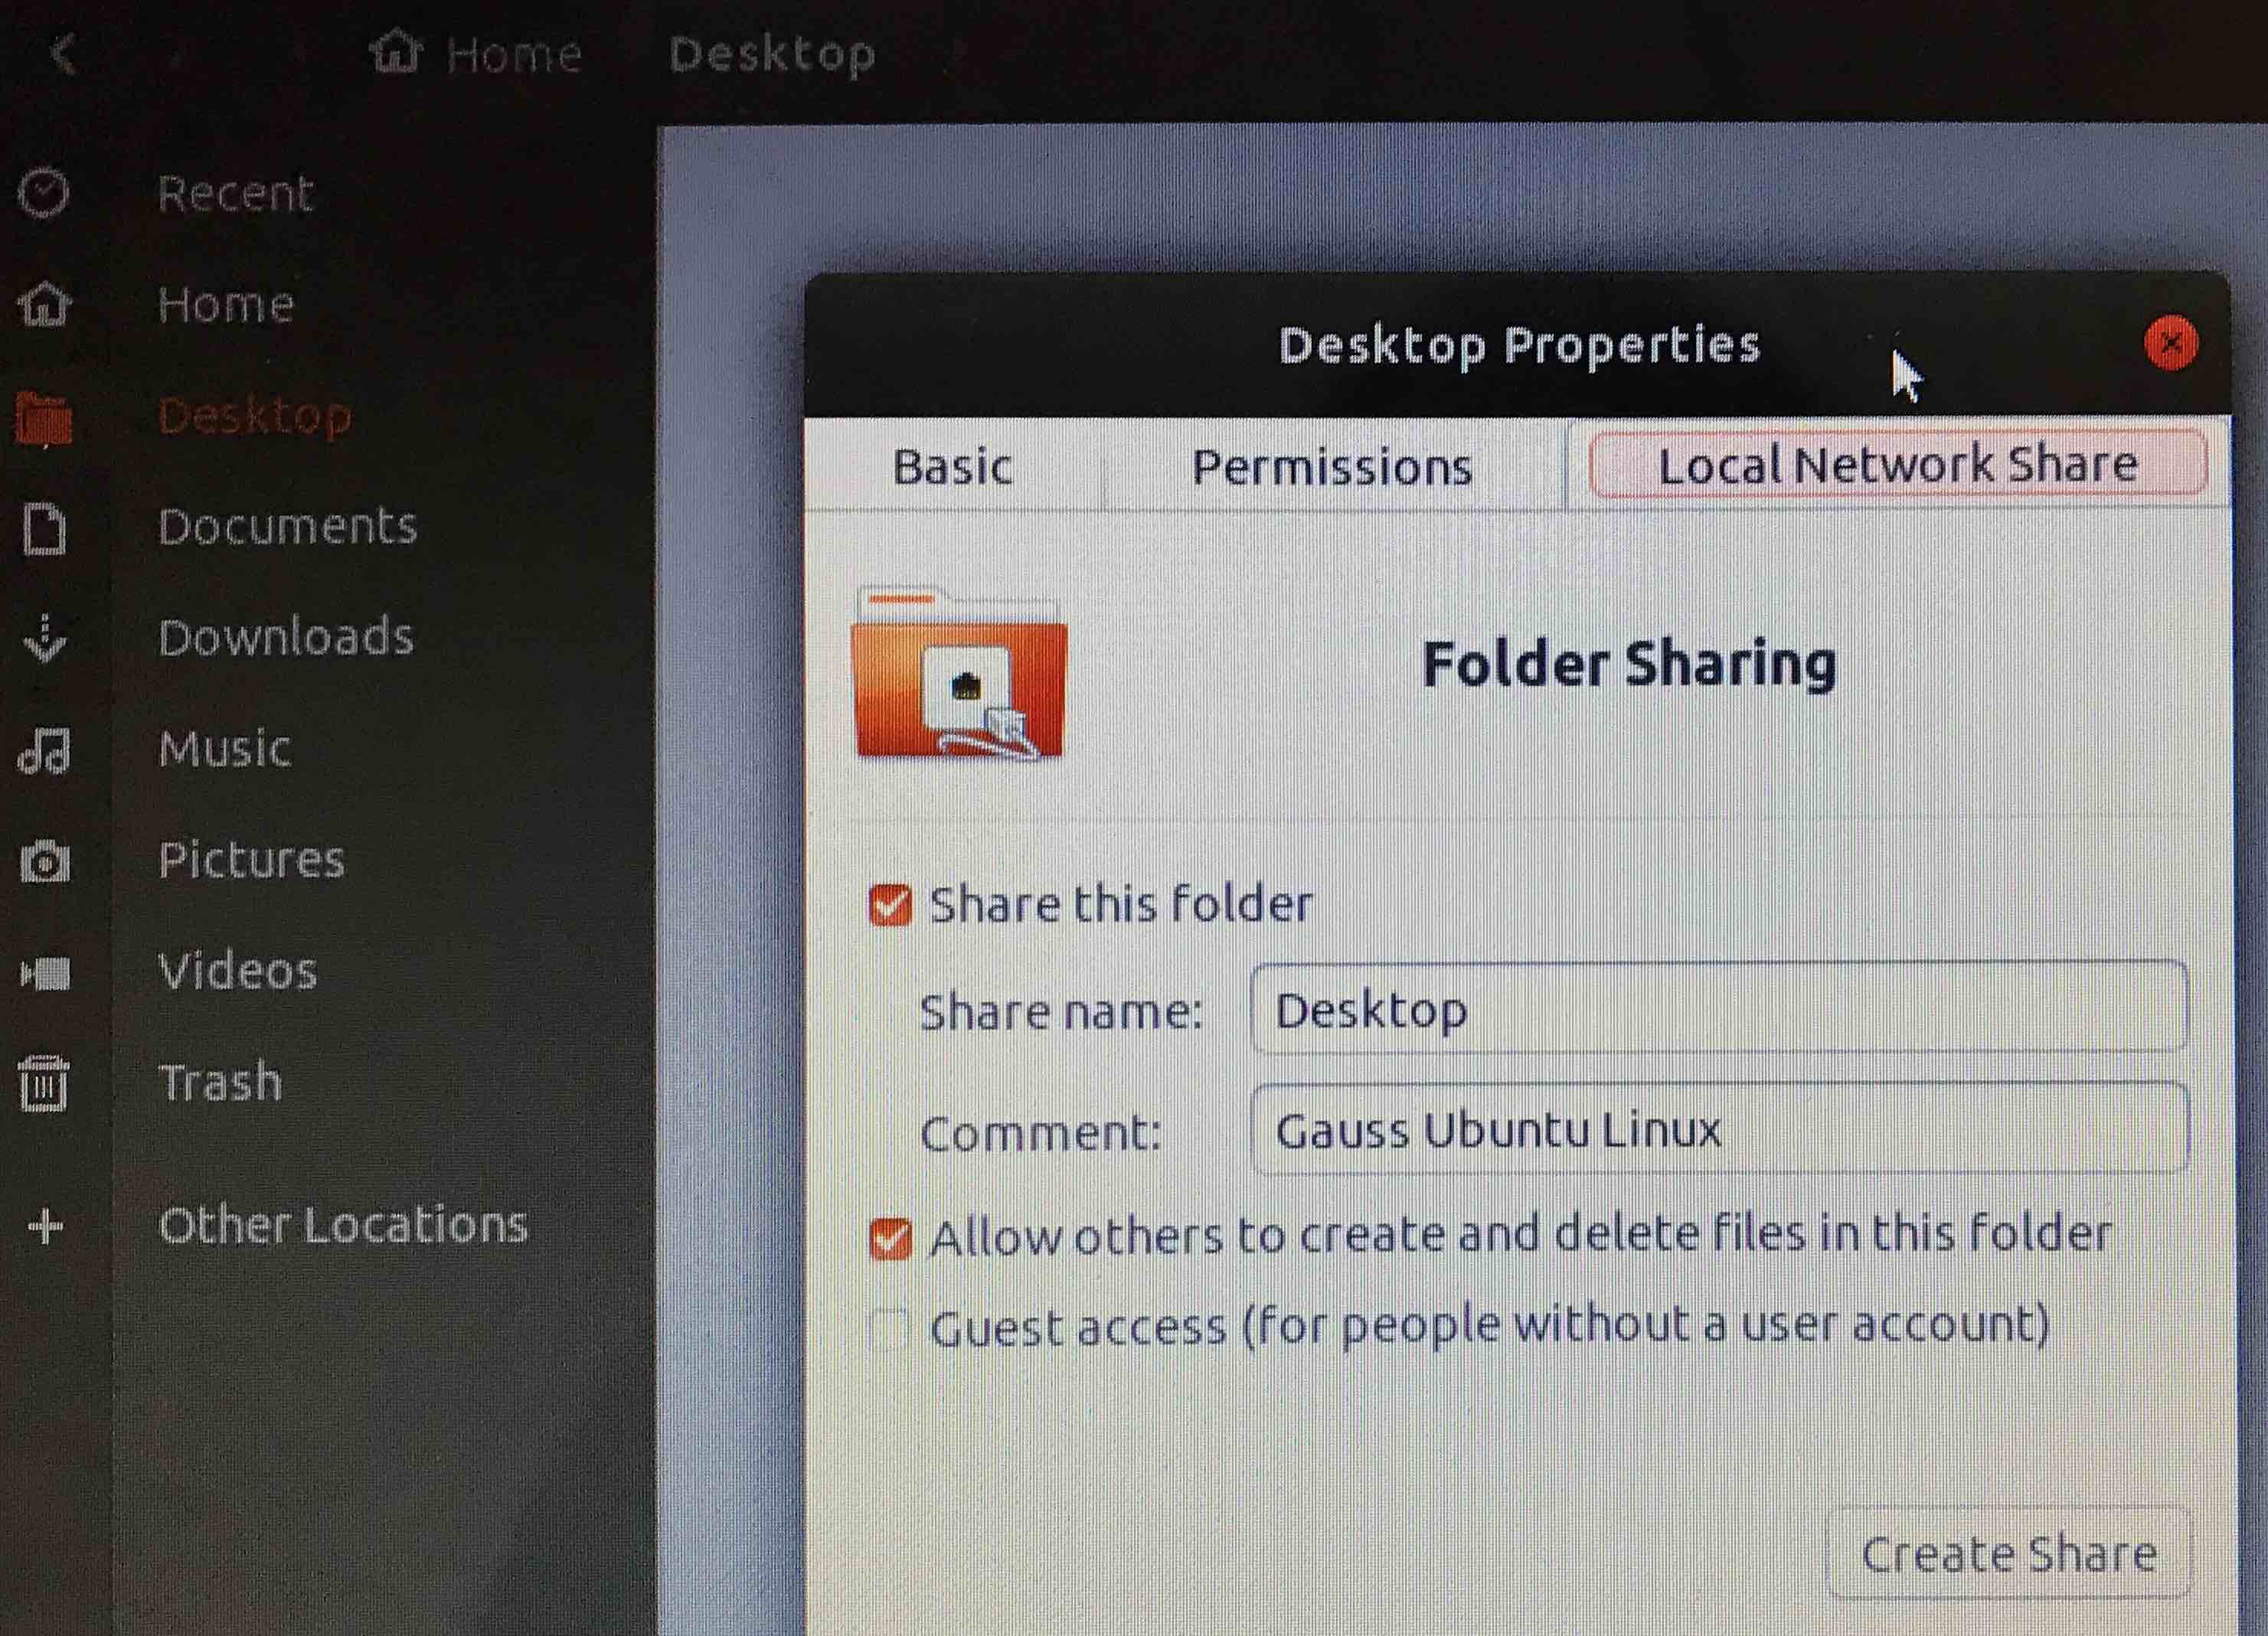
Launch the File Manager application. In your Home directory, right click on the Desktop directory to get Properties. Turn on sharing in Local Network Share and allow others to create and delete files.
Finally you must open the firewall for Samba,
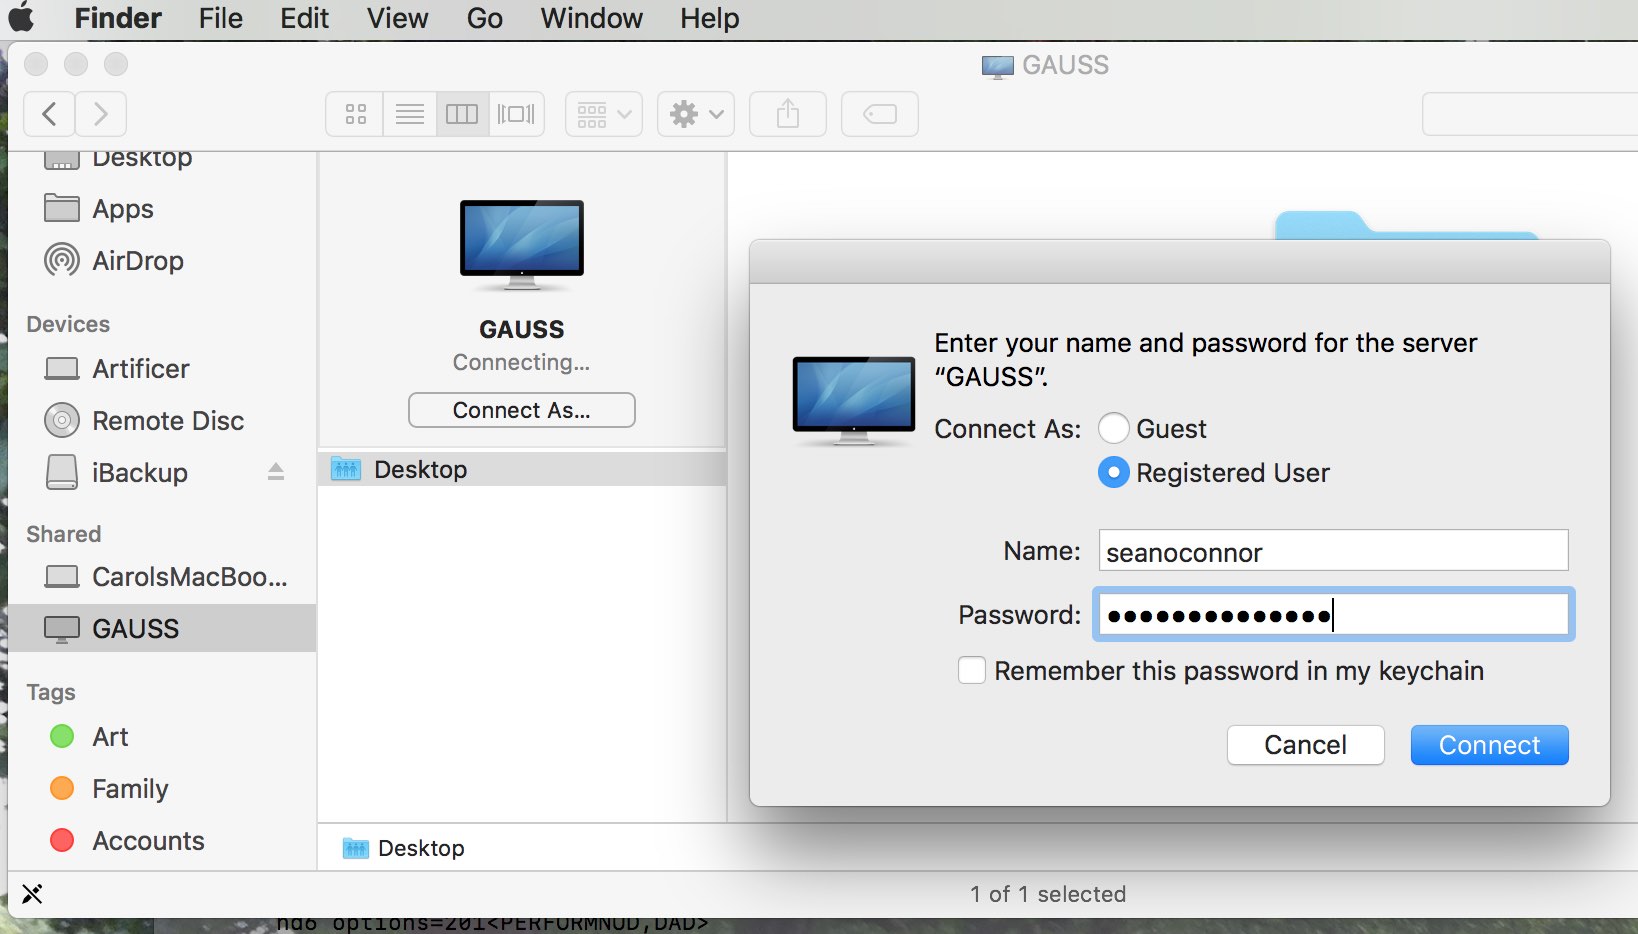
Back on macOS, mount the shared remote directory, which will prompt you for the Samba password you just set,
You'll see the shared directory on the Ubuntu machine, so go ahead and Connect
Backing Up Your System
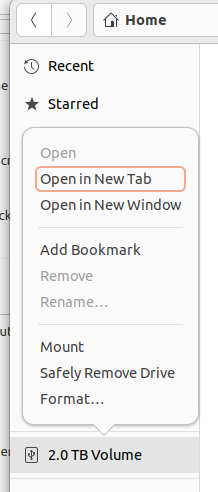
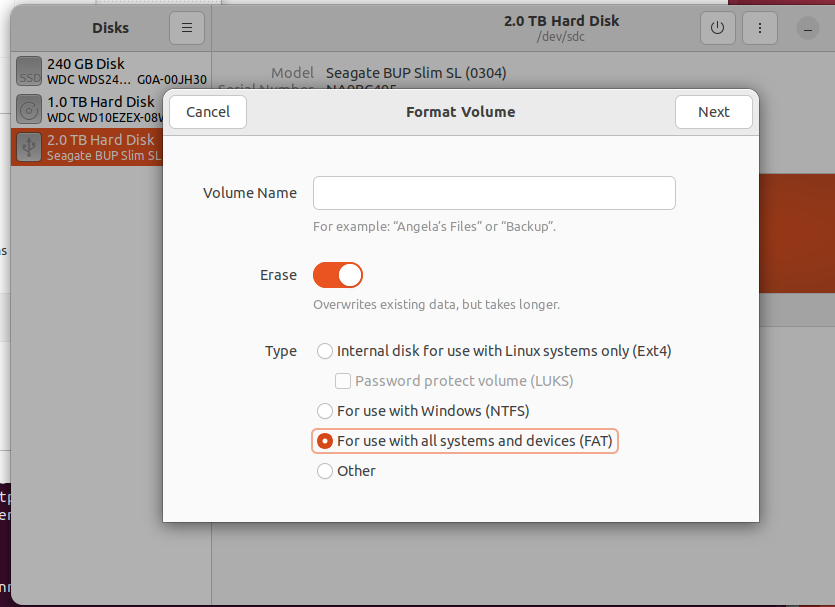
Format a 2TB USB drive as ExFAT and give it a name.
Then back up your system with rsync. As the article explains the command is
The -aAX options transfers files in archive mode. This ensures symbolic links, devices, permissions, ownerships, modification times, ACLs, and extended attributes are preserved, assuming that the target file system supports the feature. The option -H preserves hard links, but uses more memory. The --exclude option causes files that match the given patterns to be excluded. The directories /dev, /proc, /sys, /tmp, and /run are included in the above command, but the contents of those directories are excluded. This is because they are populated on boot, but the directories themselves are not created. The command above depends on brace expansion available in both the bash and zsh shells. Quoting the exclude patterns will avoid expansion by the shell, which is necessary, for example, when backing up over SSH. Ending the excluded paths with * ensures that the directories themselves are created if they do not already exist.
Secure Shell Login
I've followed instructions from the article How to Enable SSH on Ubuntu 18.04 to ssh from my Mac to my Ubuntu on my local net. I haven't tried it yet from outside my router but look at Ubuntu's instructions SSH Server Configuration and Servers Behind NAT
Install the ssh server,
Check the status
Open the firewall
Back on the Mac, ssh into the Ubuntu machine using the IP address. You'll be asked to register an RSA encryption key the first time.
Screen Sharing from Mac to Ubuntu
Follow the Ubuntu instructions to enable screen sharing
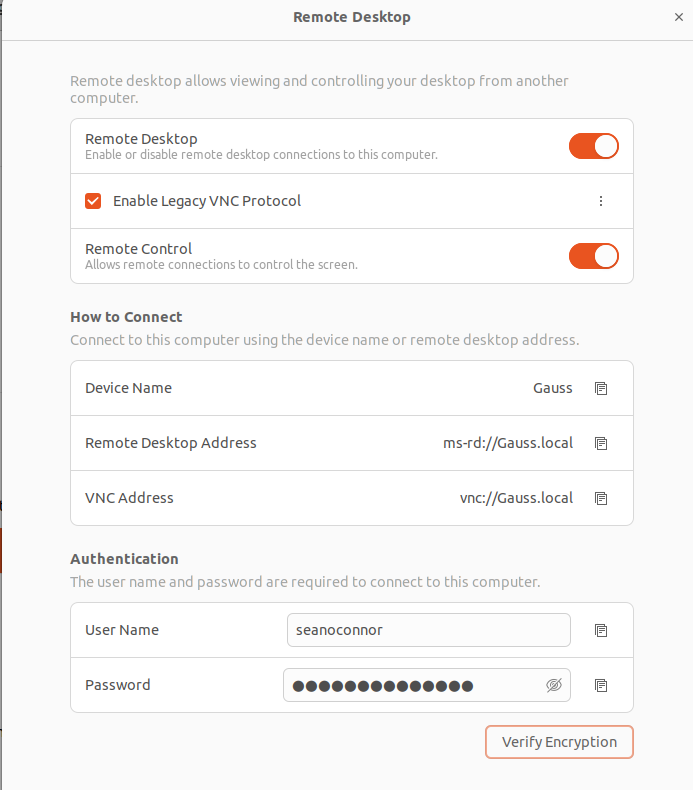
I allow only local connections. Check the VNC server status:
In Terminal you'll see the screen sharing server listening on port 5900
If you don't have Vino already, you will need to install the Vino tool and verify it and set the encryption to false so macOS Screen Sharing can see it.
Open the firewall for the screen sharing port.
View the firewall settings, which show the VNC screen sharing port 5900, the ssh port 22 and Samba which we allowed earlier.
Or use the firewall GUI:
If that doesn't work you can try installing the TightVNC server according to How to Install and Configure VNC on Ubuntu 22.04
Launch the VNC server using
Configure the VNC server by stopping it first.
Edit the VNC configuration file.
Save the original default file which is
Make the file executable and restart the VNC server
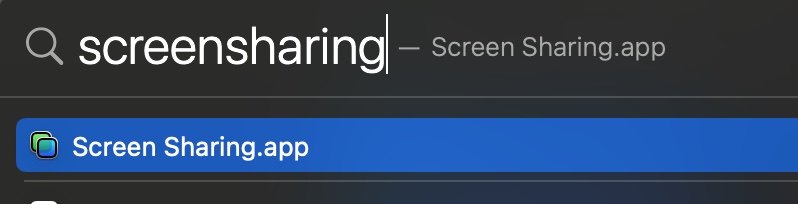
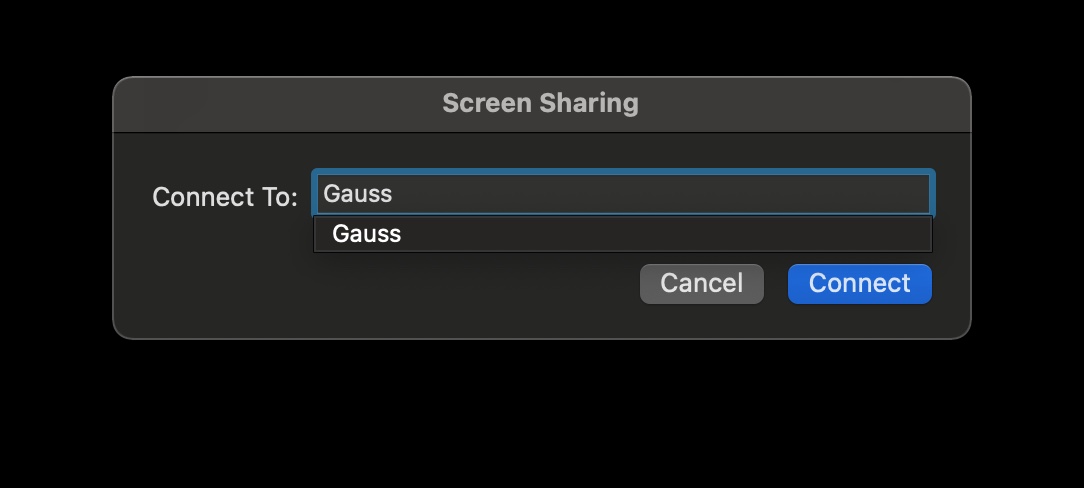
On the Mac Command Shift to bring up Spotlight Search and search for Screen Share.
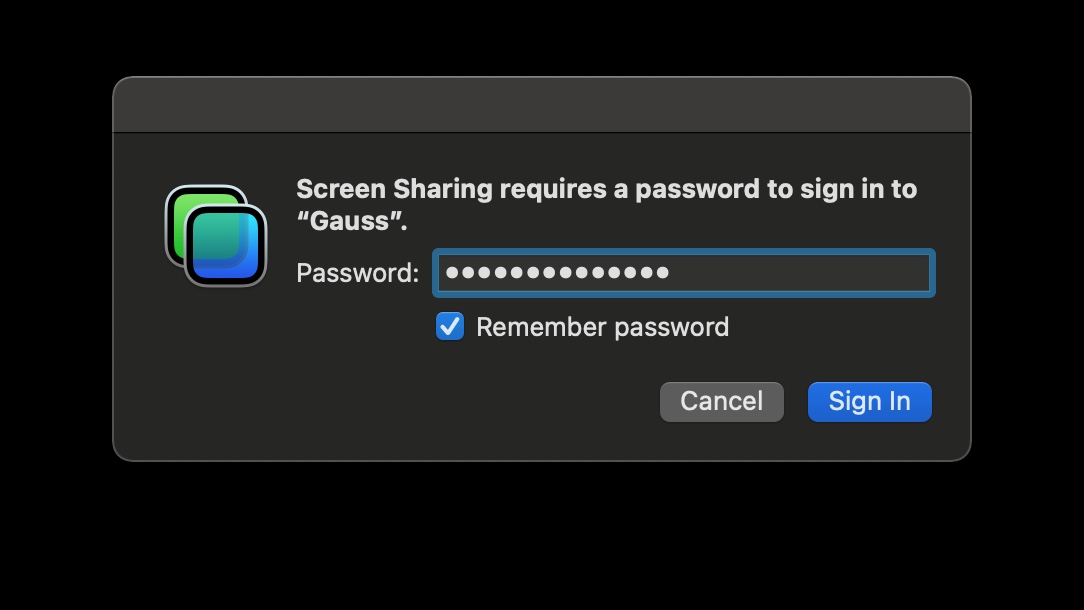
Click Share Screen and enter the user name and password.
Alternatively you can do Control K on the Mac desktop background and screen share this way:
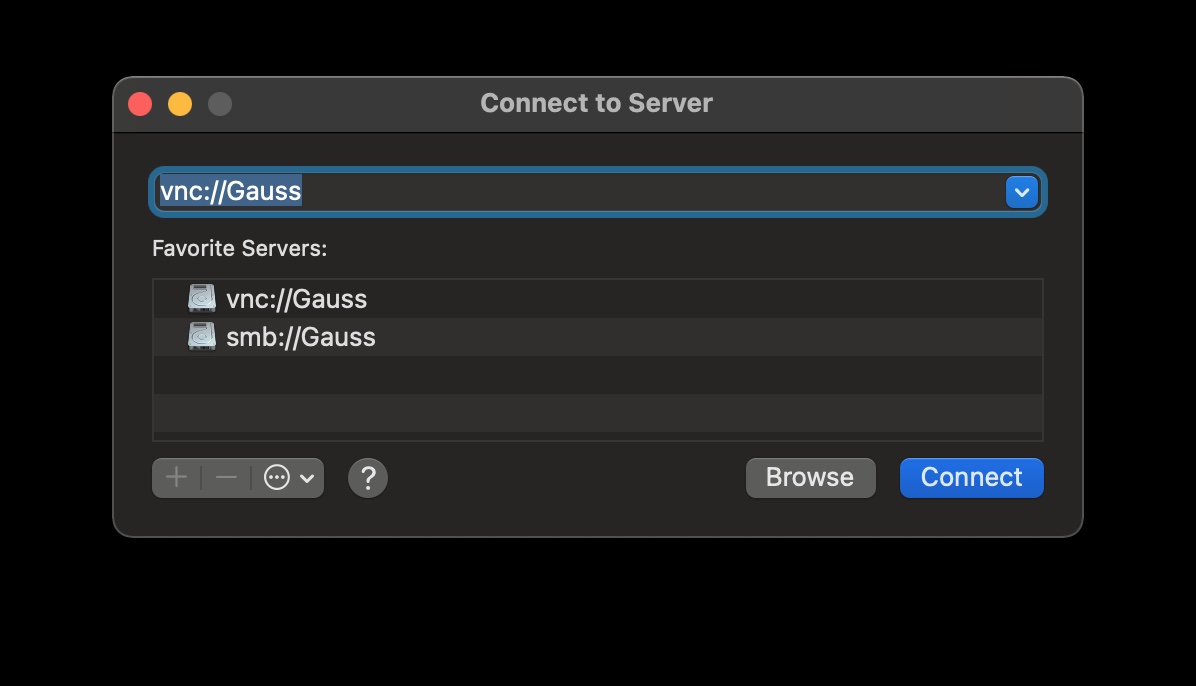
Here's the Ubuntu Linux screen share on the Mac,

Ubuntu Apps
Ubuntu comes with Thunderbird email among other applications. You can open Ubuntu Software in the Applications folder and search for more.
Install Gnome-Tweaks using the Ubuntu software app (shopping bag icon).
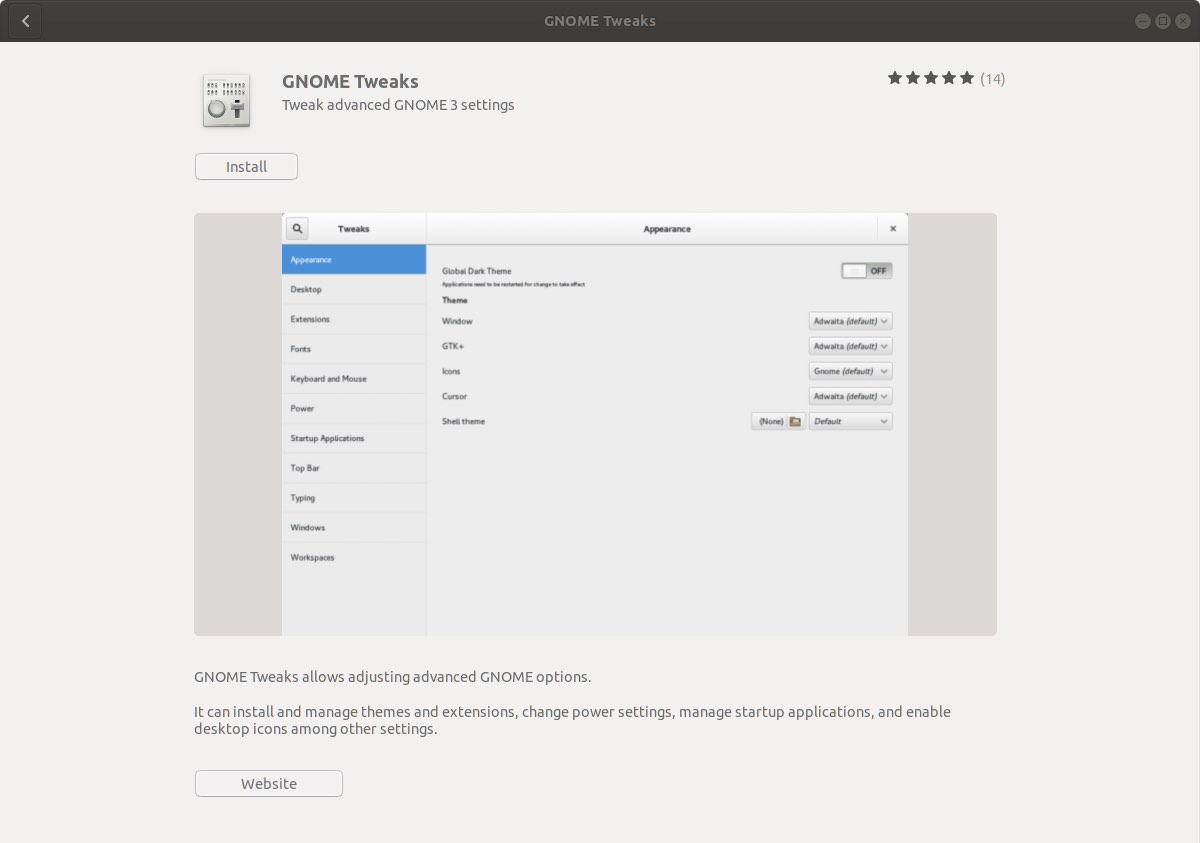
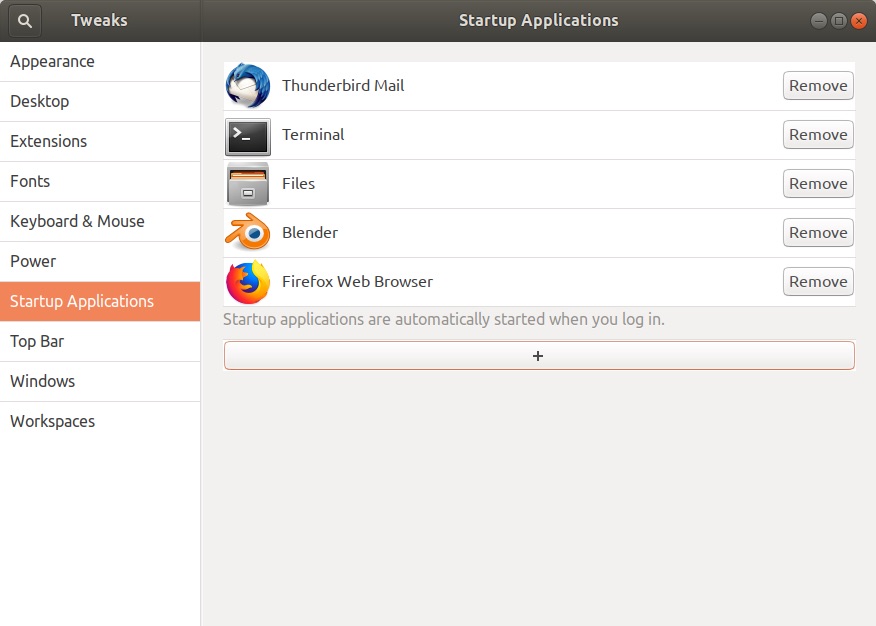
In the Settings you can launch apps upon startup,
Putting Apps on the Dock
Usually you can run an app from the terminal command line, and when it appears on the dock, you can right click its icon, select add to favorites and that will add it permanently to the dock.
But you might have to do this manually for some apps. For example, I downloaded the latest Blender version 3.3.0 for Linux, unpacked the download to create the Blender directory,
Then edit the blender.desktop in the Blender directory to point to the executable in the section Exec and the Blender icon in section Icon.
Copy the file to where Gnome can find it.
Launch Blender from the command line,
After Blender comes up, right click on its icon in the dock and select Add to Favorites (you may not have to do this). Now you should see the Blender icon permanently in the dock.
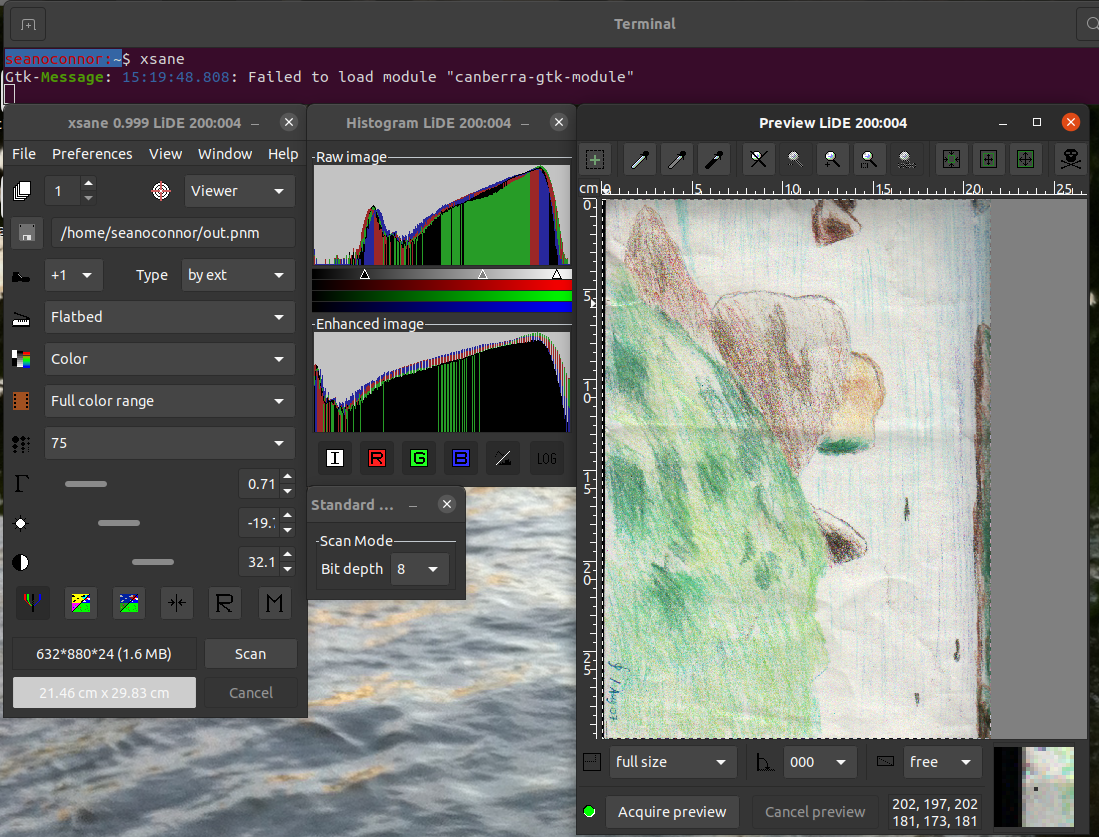
Running CanoScan LiDE 200 Flatbed Scanner
The CanoScan LiDE 200 flatbed scanner is no longer supported on macOS Monterey. But we can install and run it on Ubuntu using advice from Install Canon LiDE 300 / 400 on Ubuntu 18.4
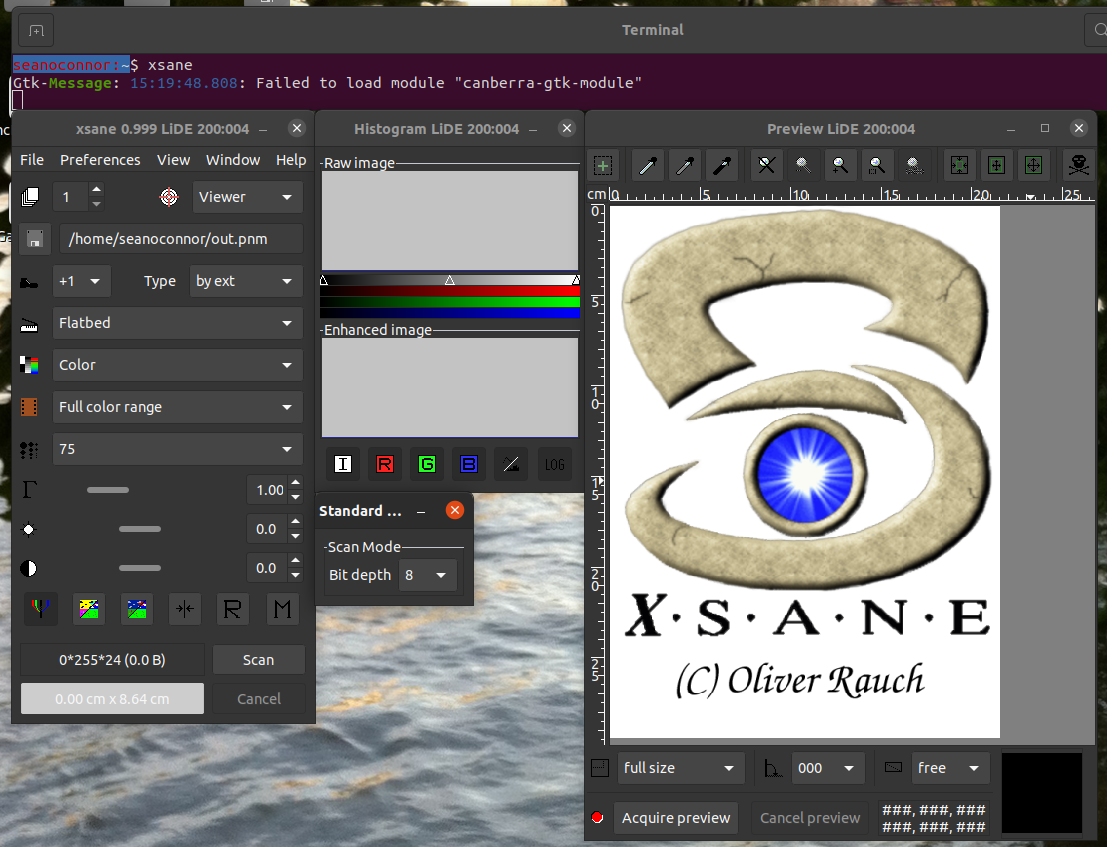
First install the xsane software if you don't already have it:
Connect the scanner to a spare USB port on your PC. Run these tests to see if the scanner is connected and if you can scan at all:
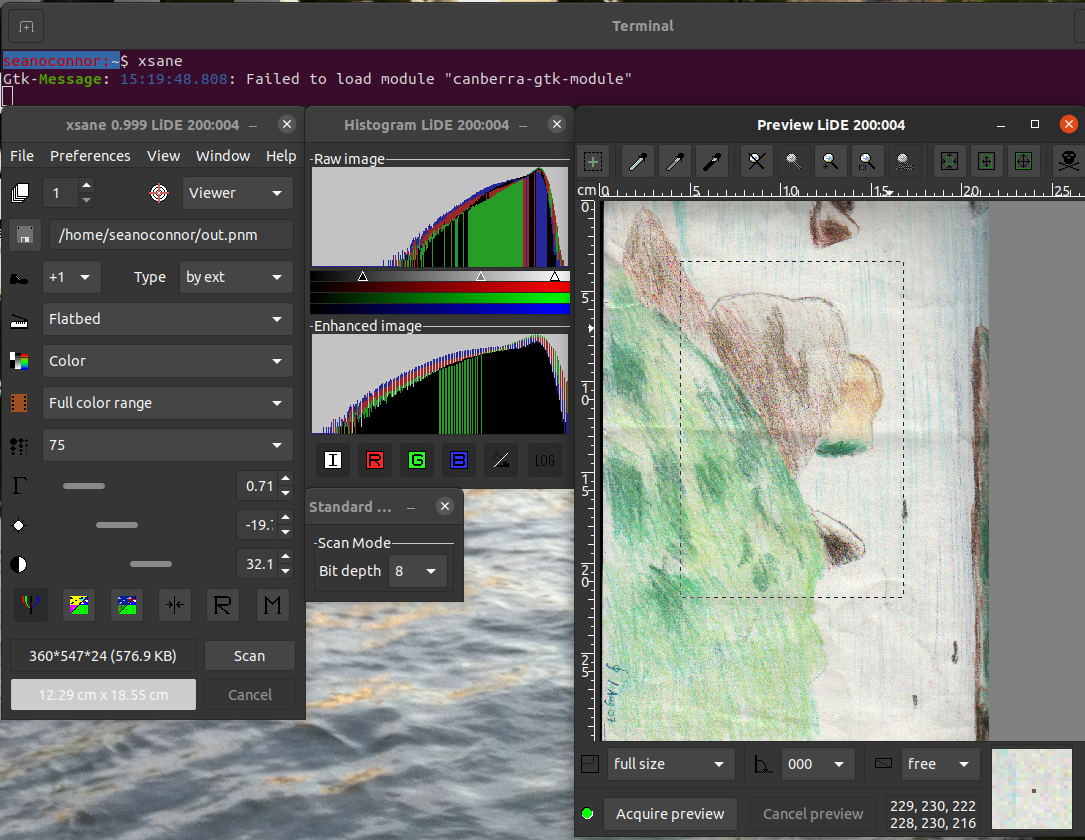
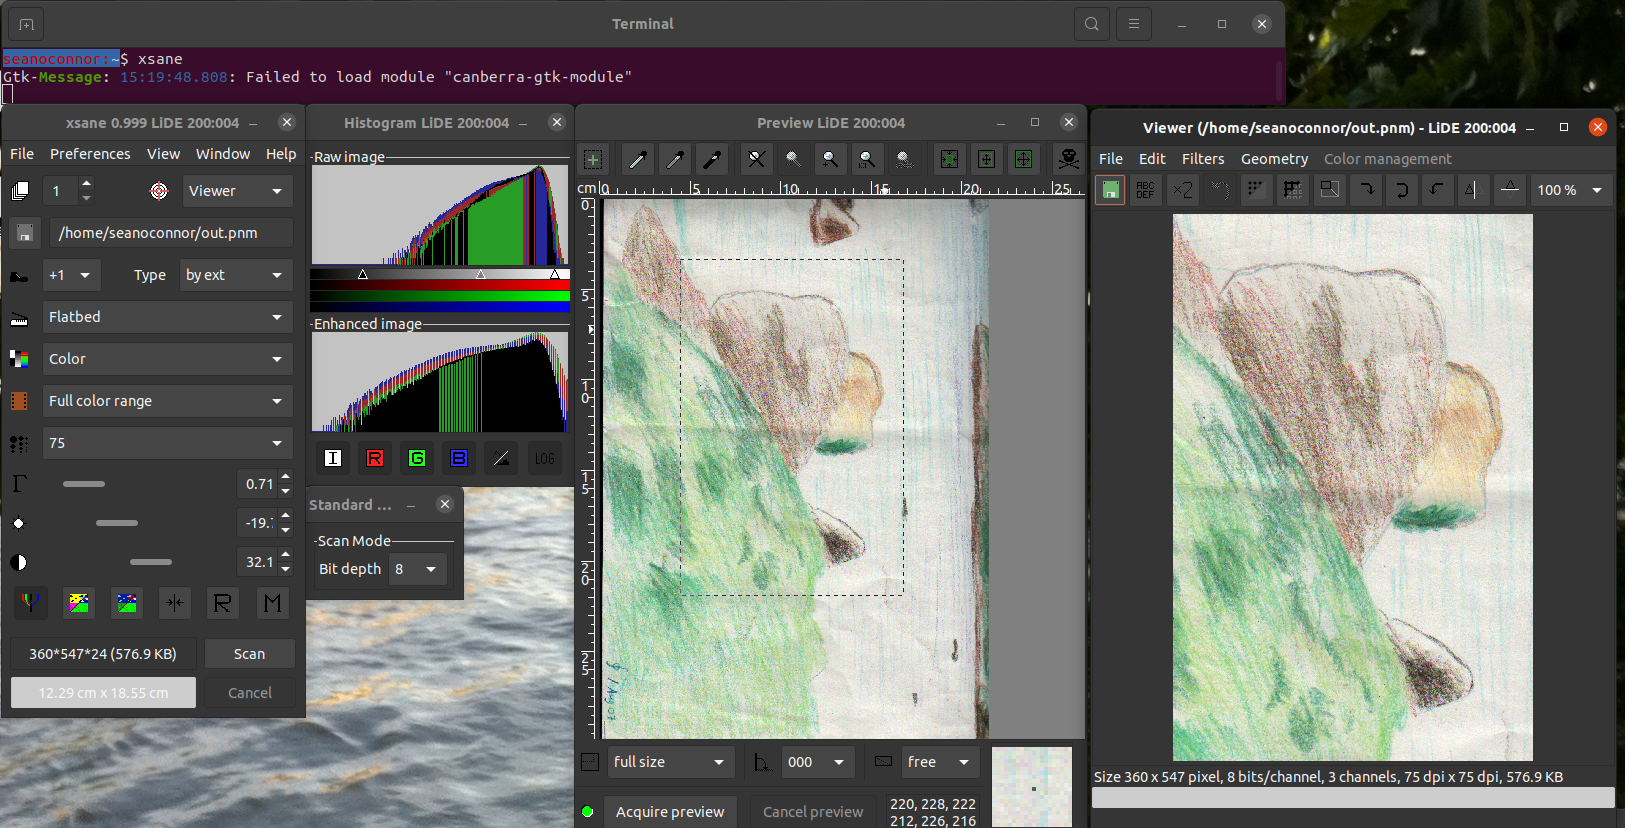
Now run the nifty xsane scanning program which has a GUI. You can set the scanner resolution and color, preview scan, select the area to scan, do a hi-res scan and view the image.

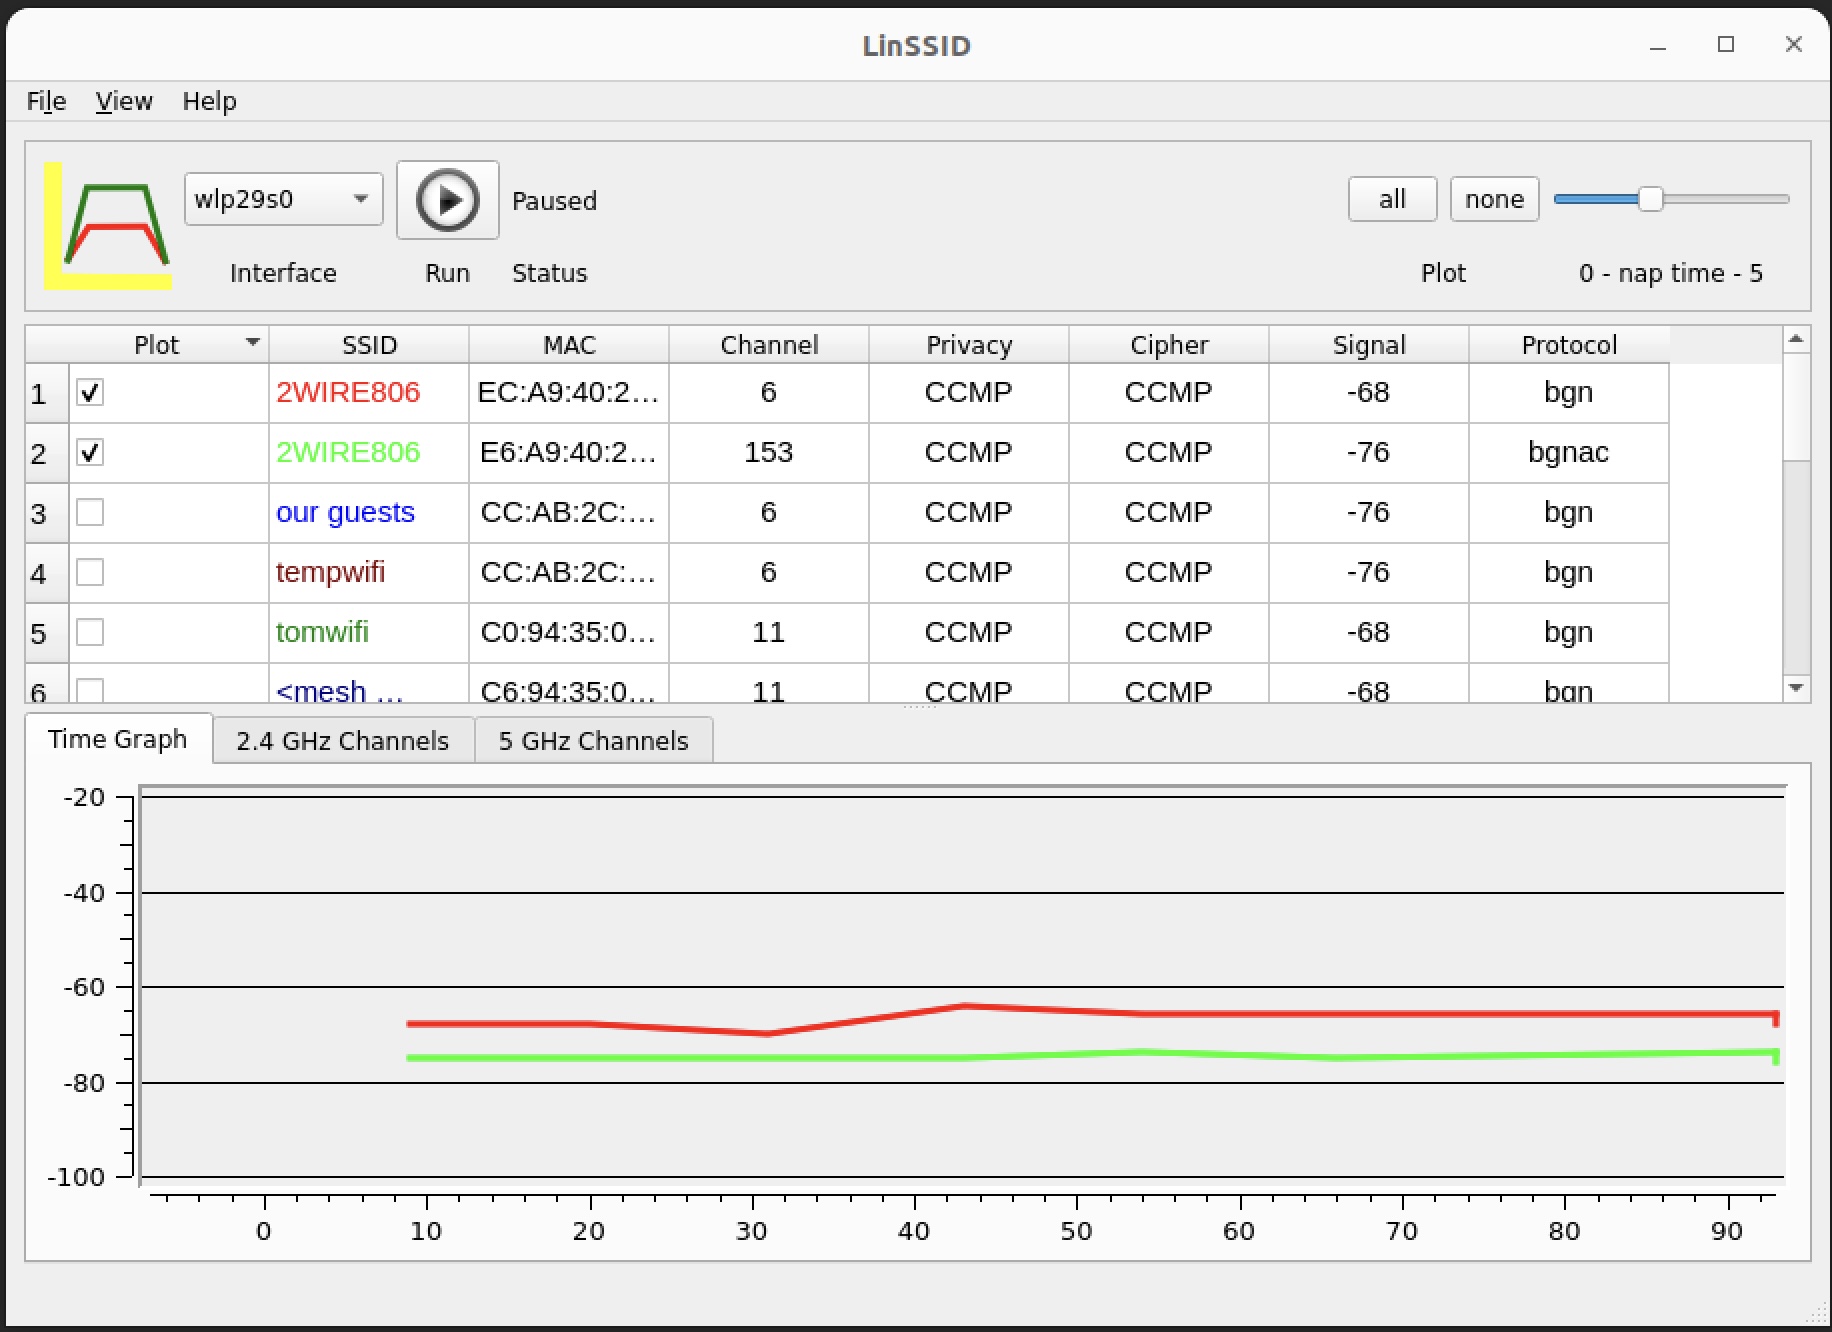
Wifi Diagnostics
You can see what's happening with your WiFi communications with these two utilities. The first one is linssid
Ubuntu Linux on a MacBook Air
This platform is a 2010 original MacBook Air. Follow the excellent Ubuntu Desktop Installation instructions.
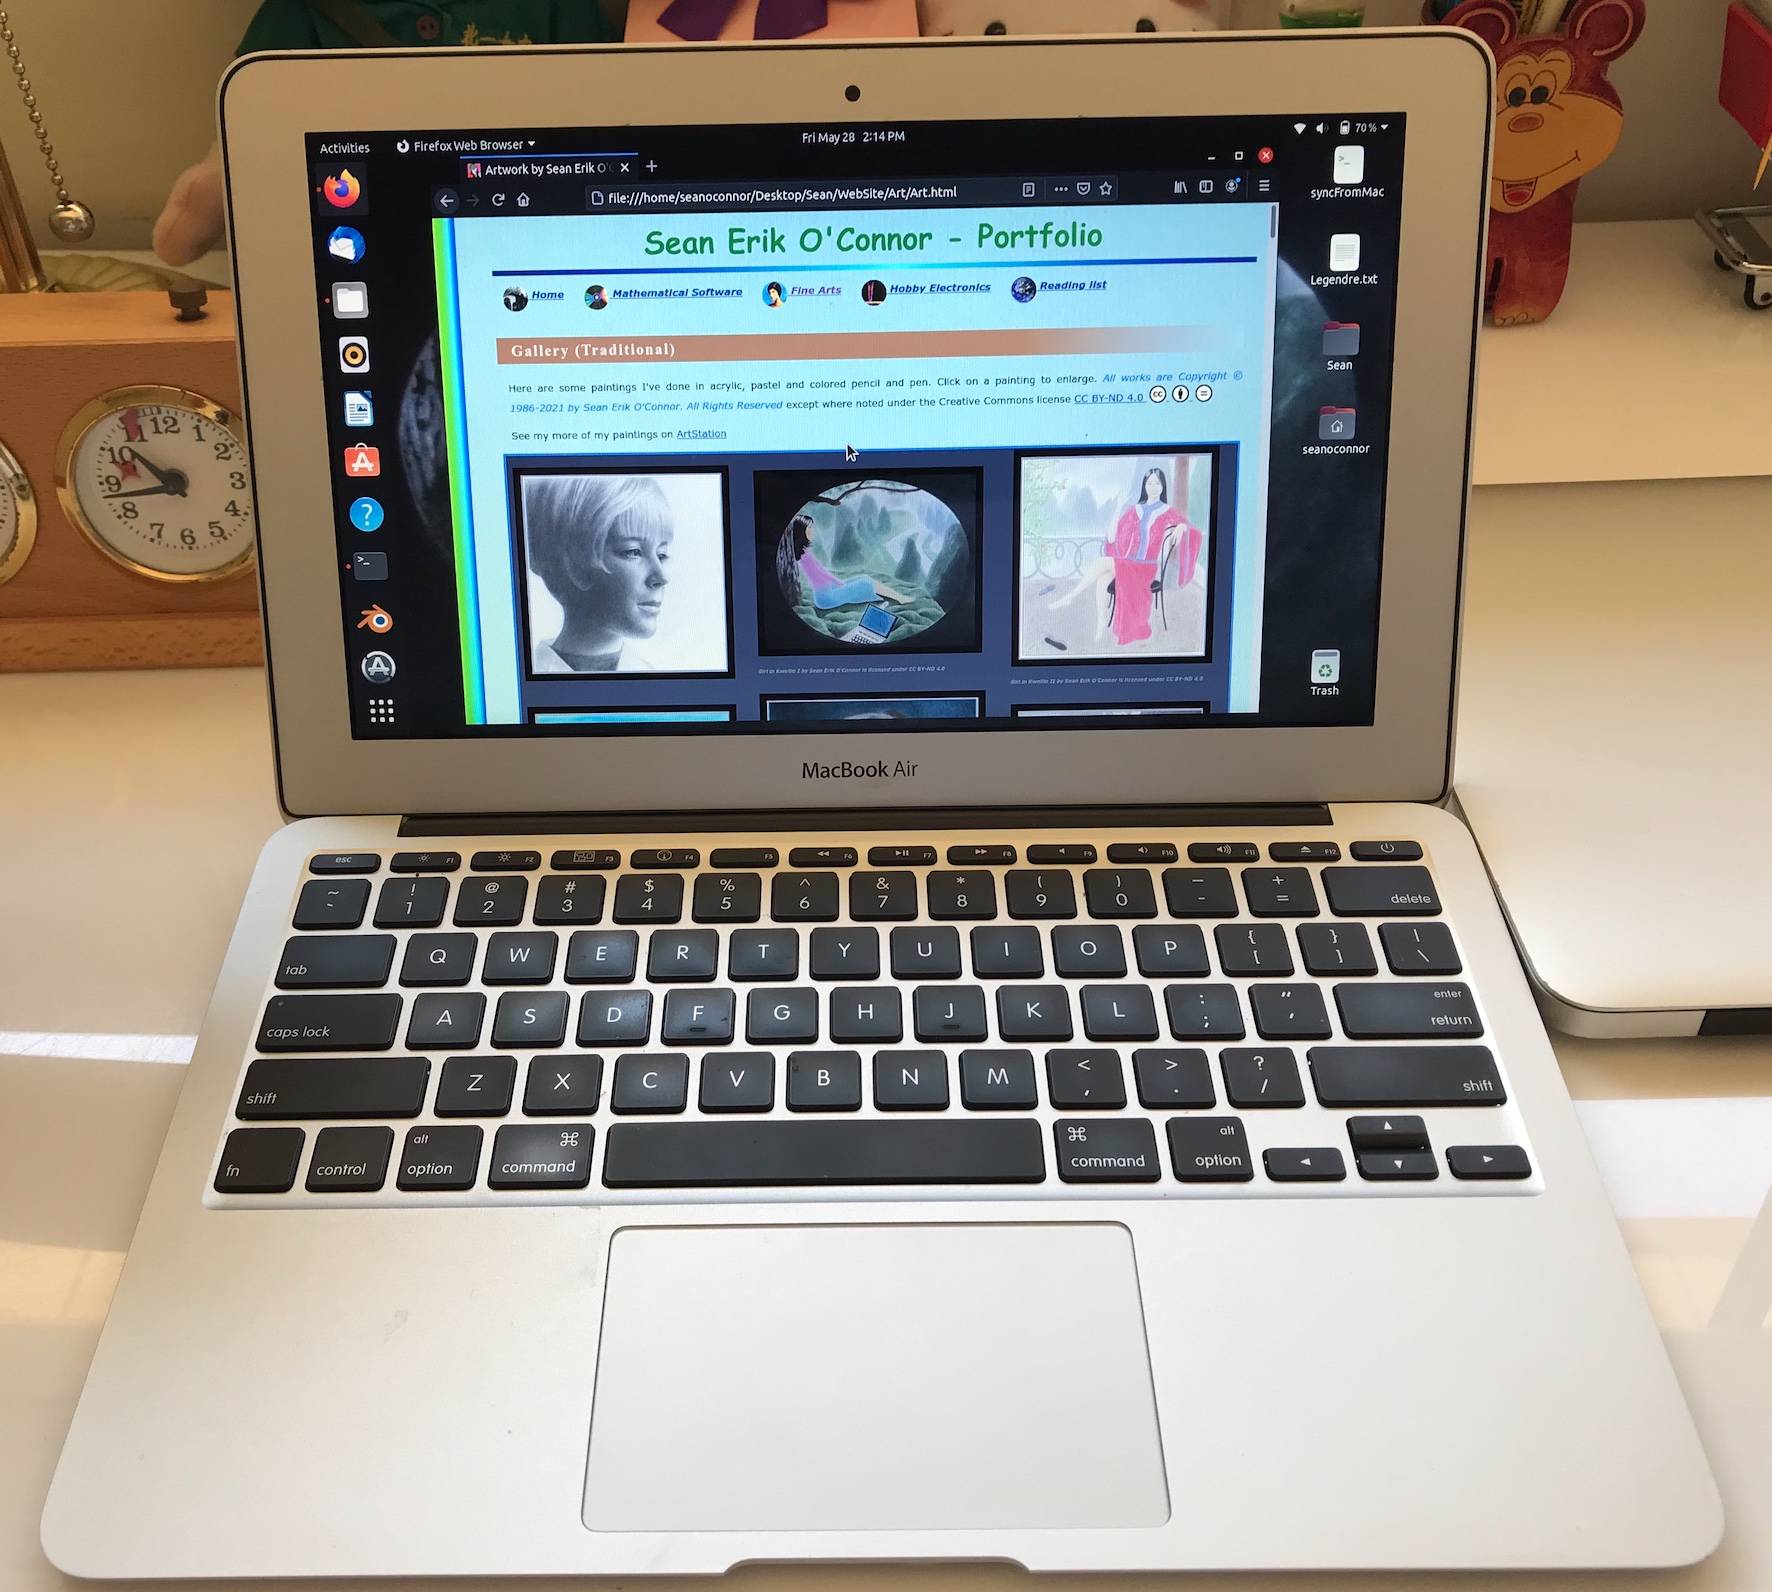
I downloaded the Ubuntu .iso file and created a USB flash drive. I powered up my MacBook with the USB drive inserted, and paused the boot sequence to select the USB drive as the boot drive. Then I installed Ubuntu according to the instructions. During Ubuntu install I select the option to erase the disk.
macOS
Well, macOS is Unix, so you get most of what you want out of the box. Note that macOS only supports 64-bit applications. There are also security features which you'll need to work around when running third party apps.
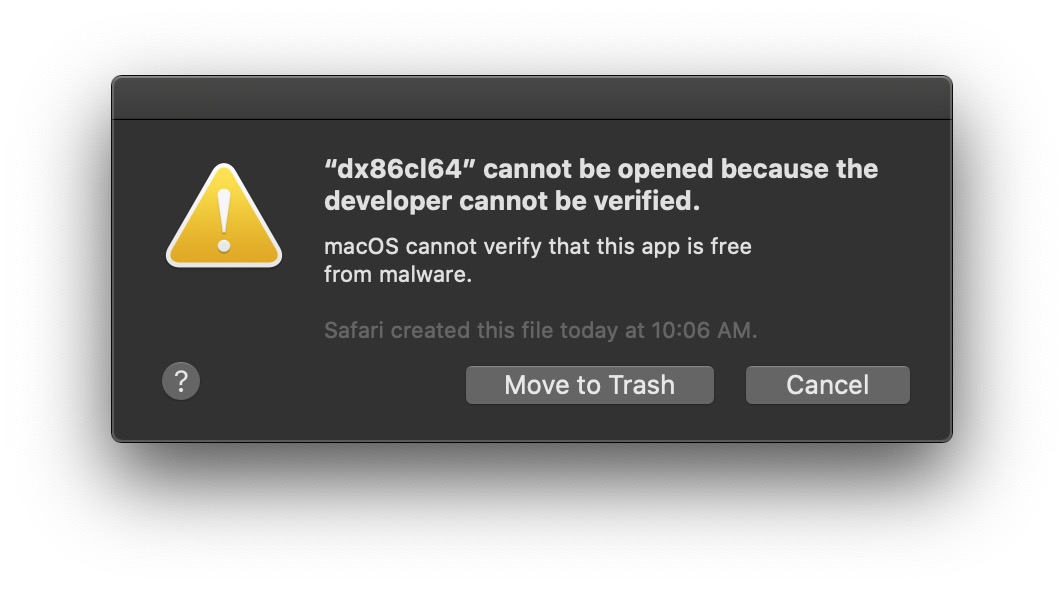
Working Around macOS Security
When you try to run a third party executable, e.g. ClozureCommonLisp, the OS will block it as follows in macOS:
Go to the Settings->Security and Privacy and allow the exe to run:
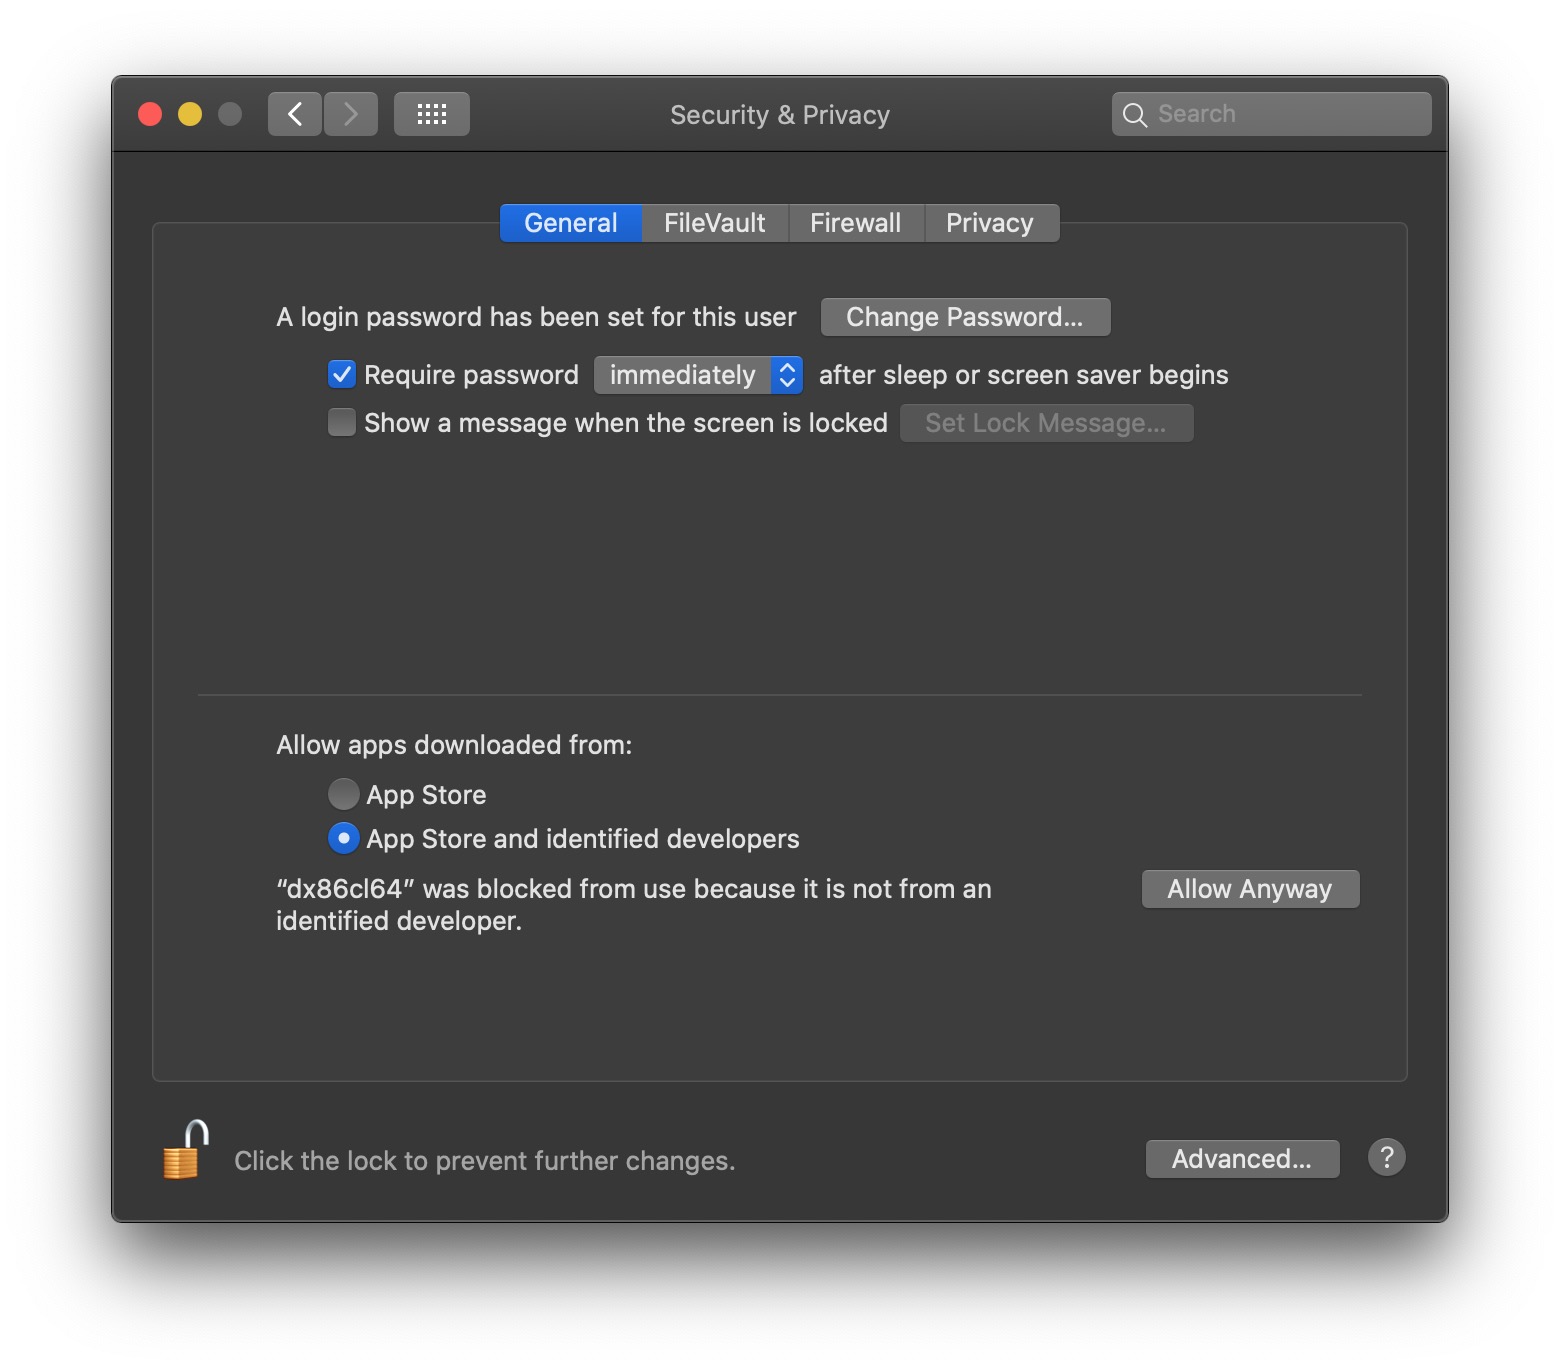
You can then open the exe:

PROGRAMMING TOOLS
Developer Tools Mac
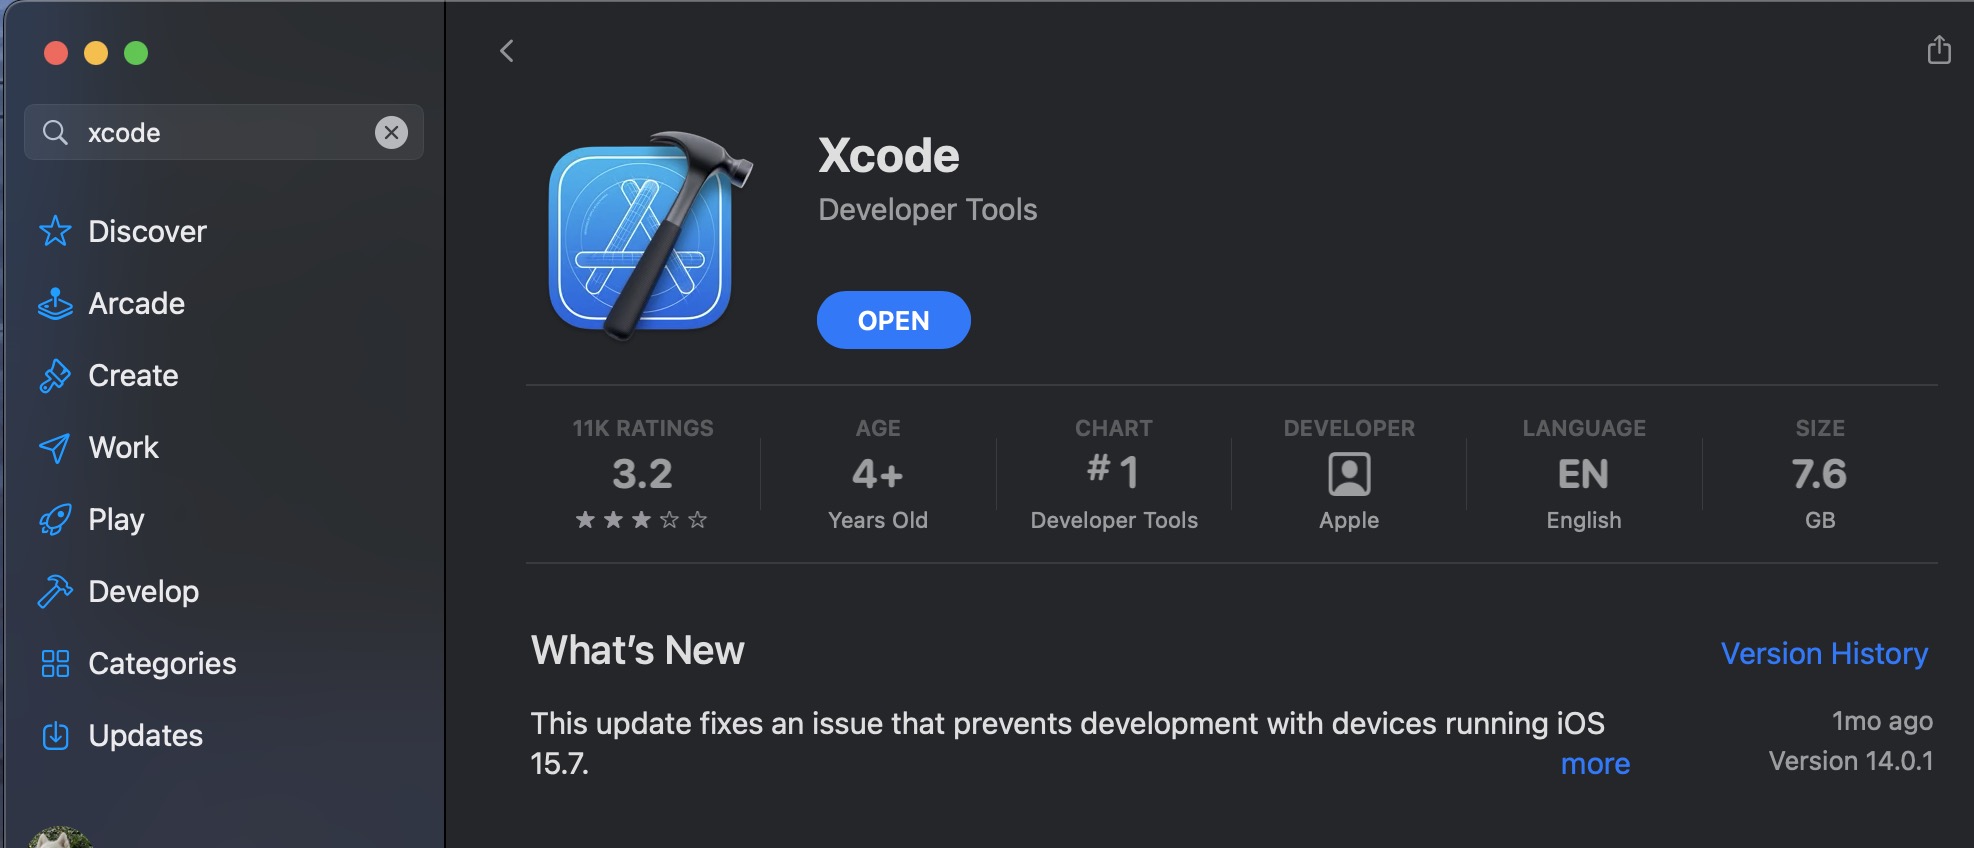
Xcode
macOS X comes with most of the the Unix utilities make, diff, gcc, g++ (the clang equivalent), lldb, etc. already installed. You can install the free Xcode IDE from the Apple App Store
Install the command line tools also:
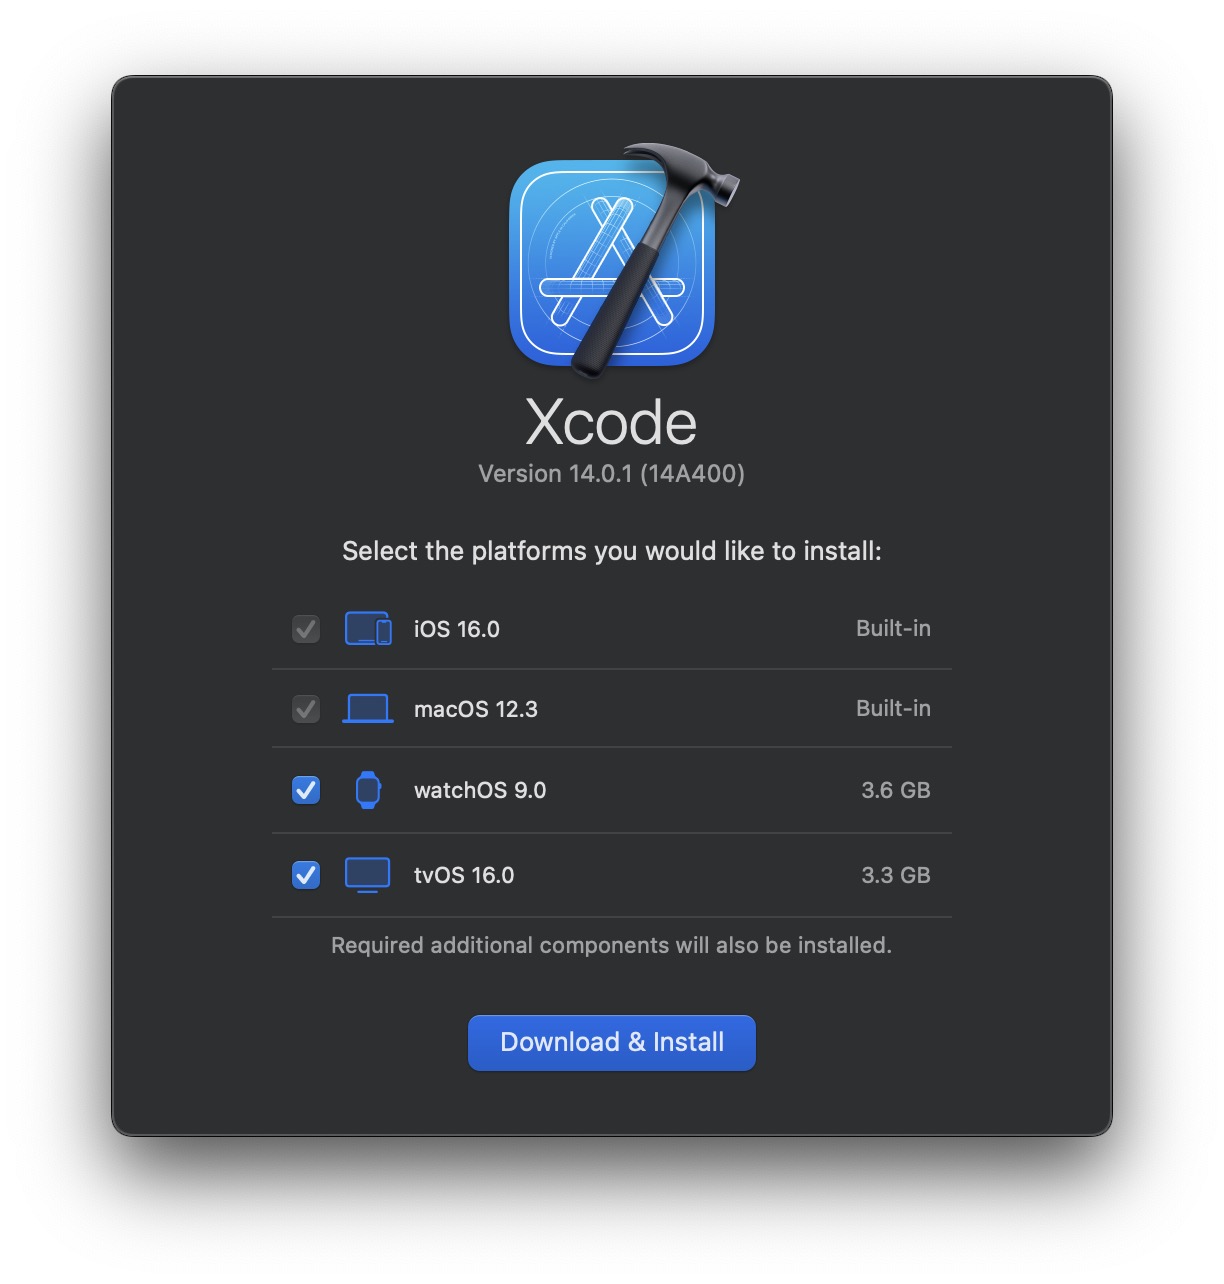
When you launch Xcode, it may ask you about which additional SDK's you wish to install
XCode Settings for a Command Line App in C++
I'll use my Primpoly app as an example. Create a new XCode project as a command line app in the C++ language.
Drag and drop all source code files into the project.
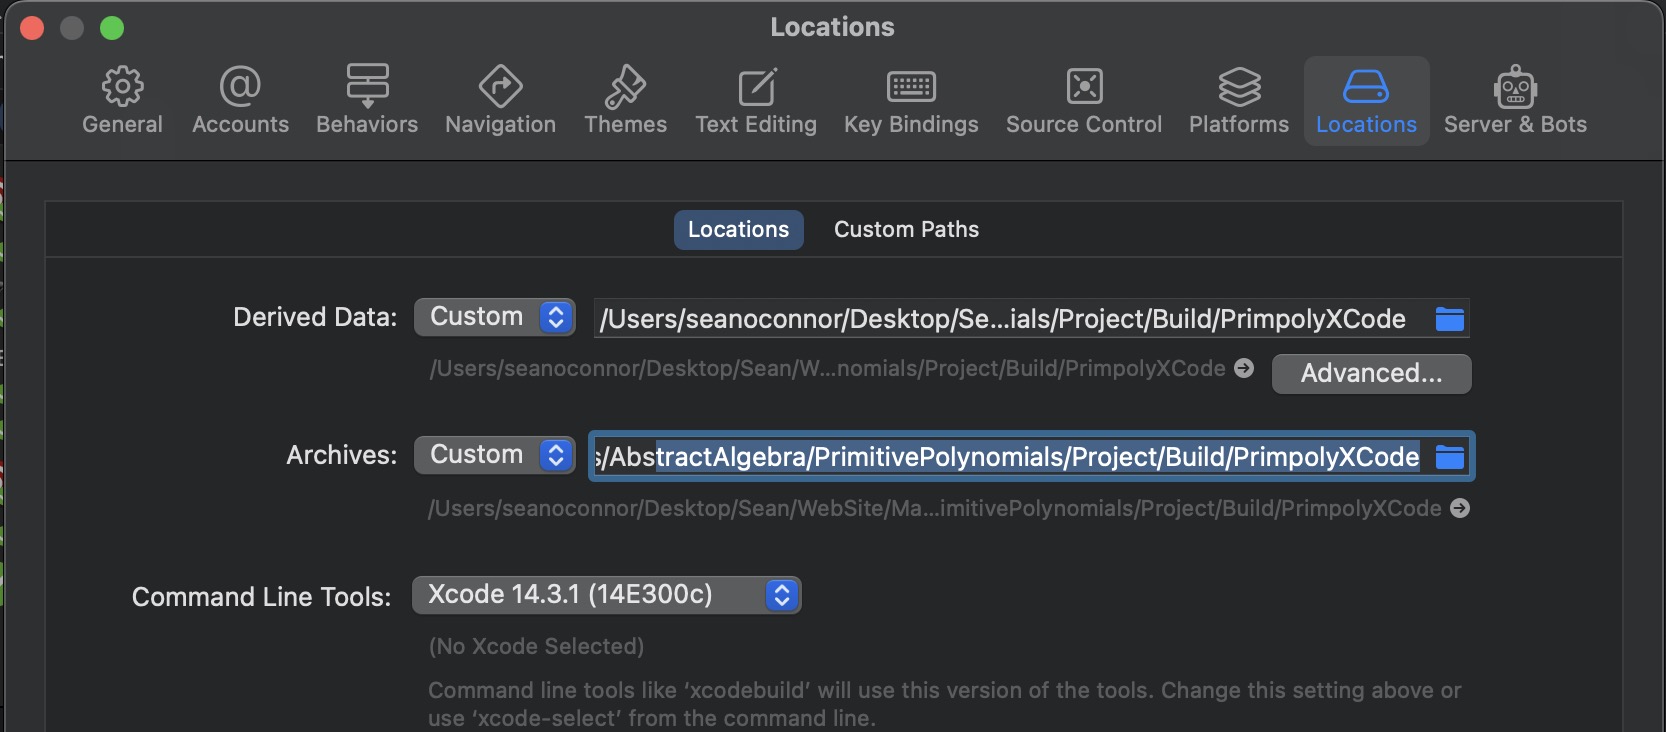
Then go to settings and change the locations for the products.
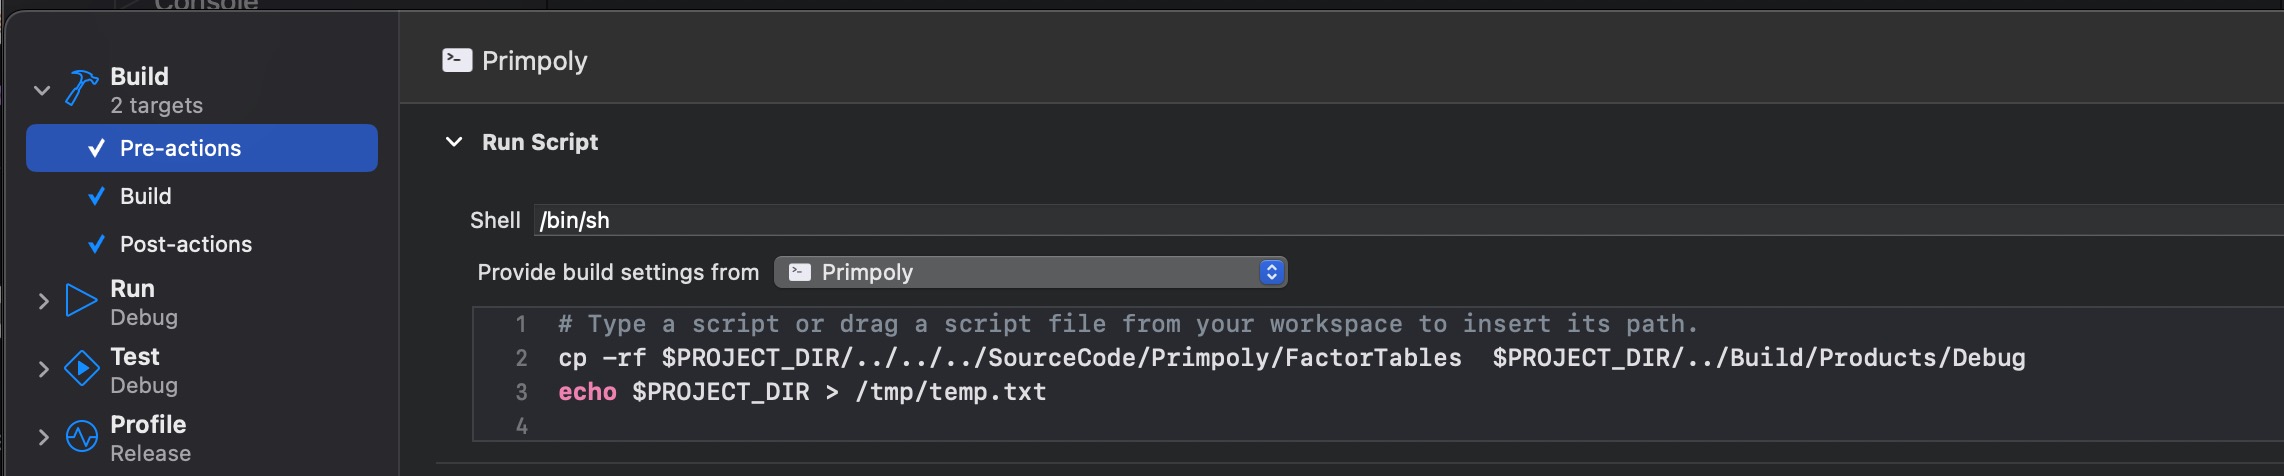
Add a new pre-build copy command to put some lookup tables in the same place as the executable by
editing the Scheme
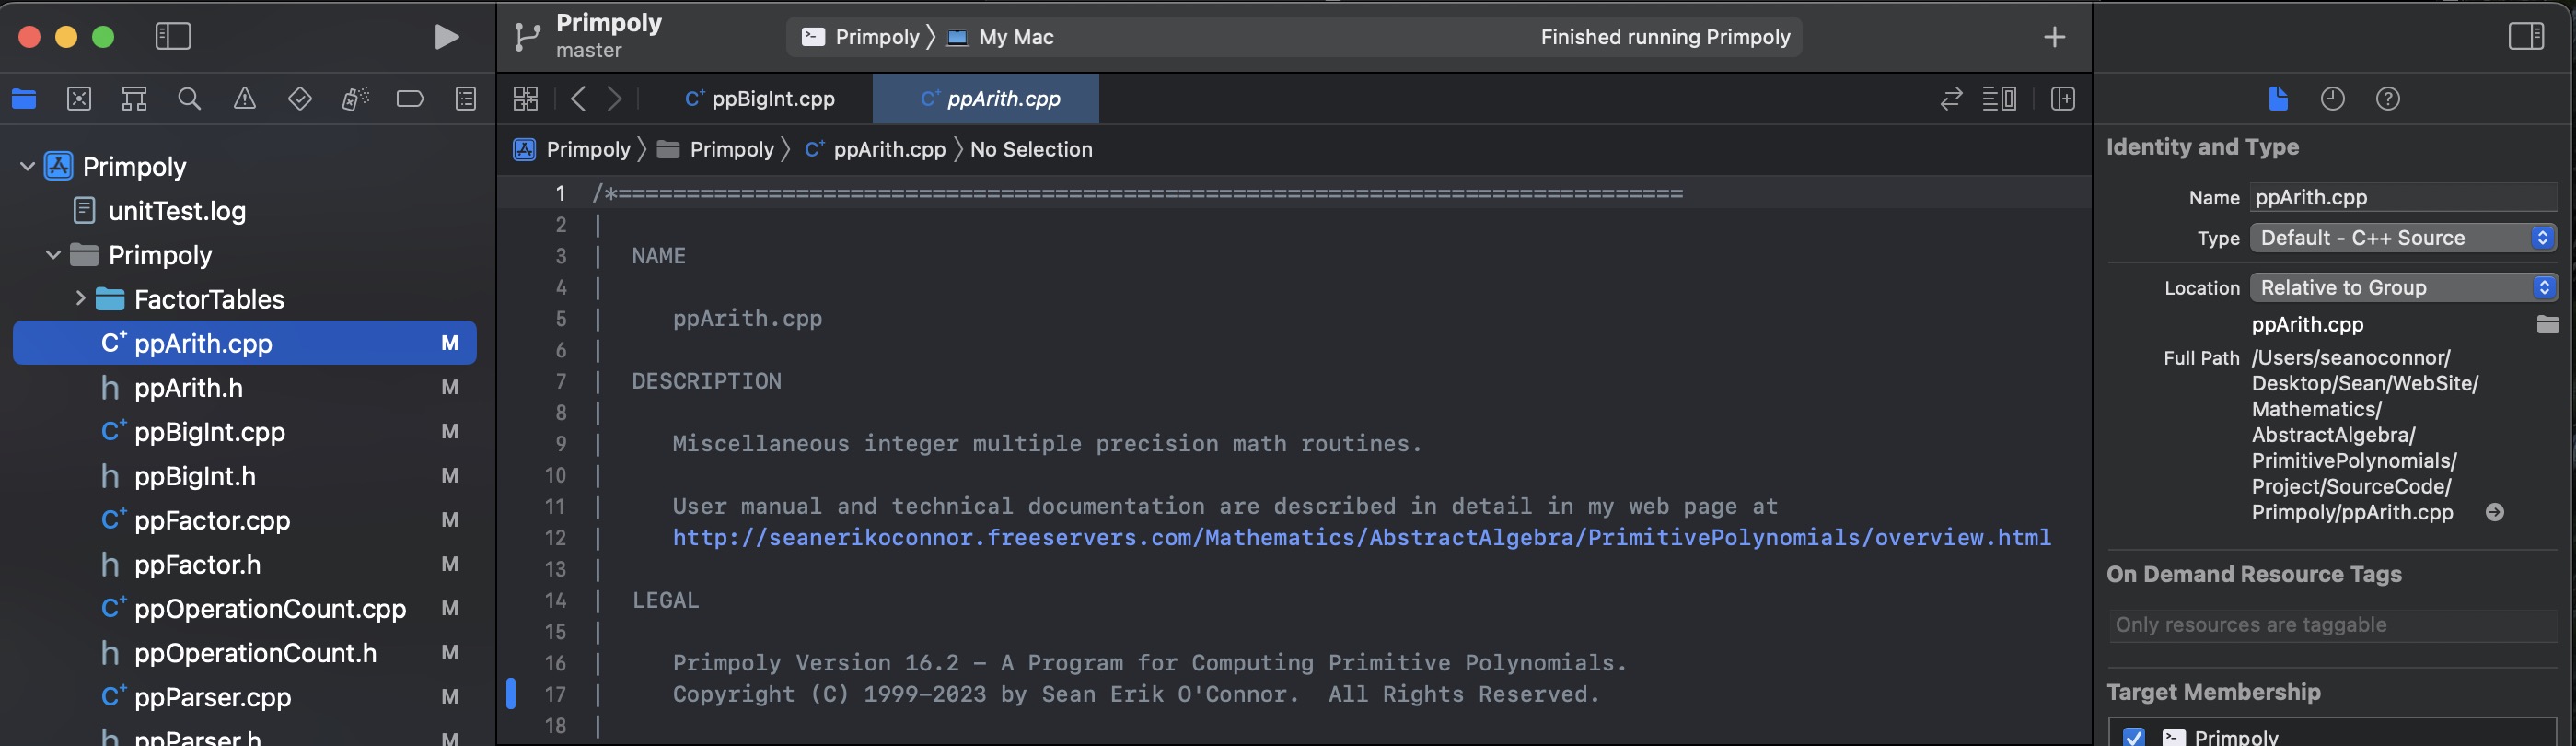
Make sure your source code and other files is in the correct location (not grayed out)
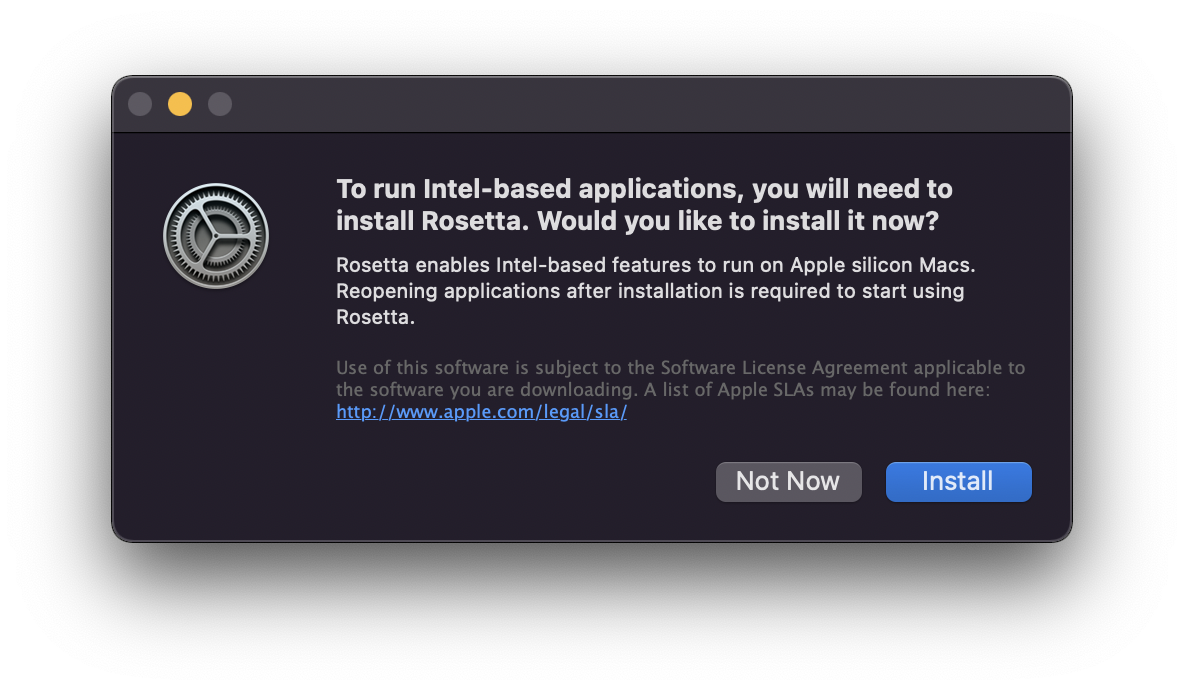
The new MacBook Pro is based on a 64-bit ARM CPU design and has a GPU on the same bus. Apple will automatically ask you to install Rosetta, which emulates the Intel CPU instruction set if you open an Intel App. Make sure you compile all source code to native ARM CPU code *.exe binaries, or you'll get a speed hit of 2X as your Intel binary is emulated on the ARM. You can look at info for any App to see if it is Universal (runs on Intel or Apple Silicon), Intel or Apple silicon).

Bash
The new macOS now uses zsh instead of bash (Apple Support: Use zsh as the default shell on your Mac) but you can install the latest version of bash and use it as your shell.
Download the Bash source code from Bash from GNU Web Site
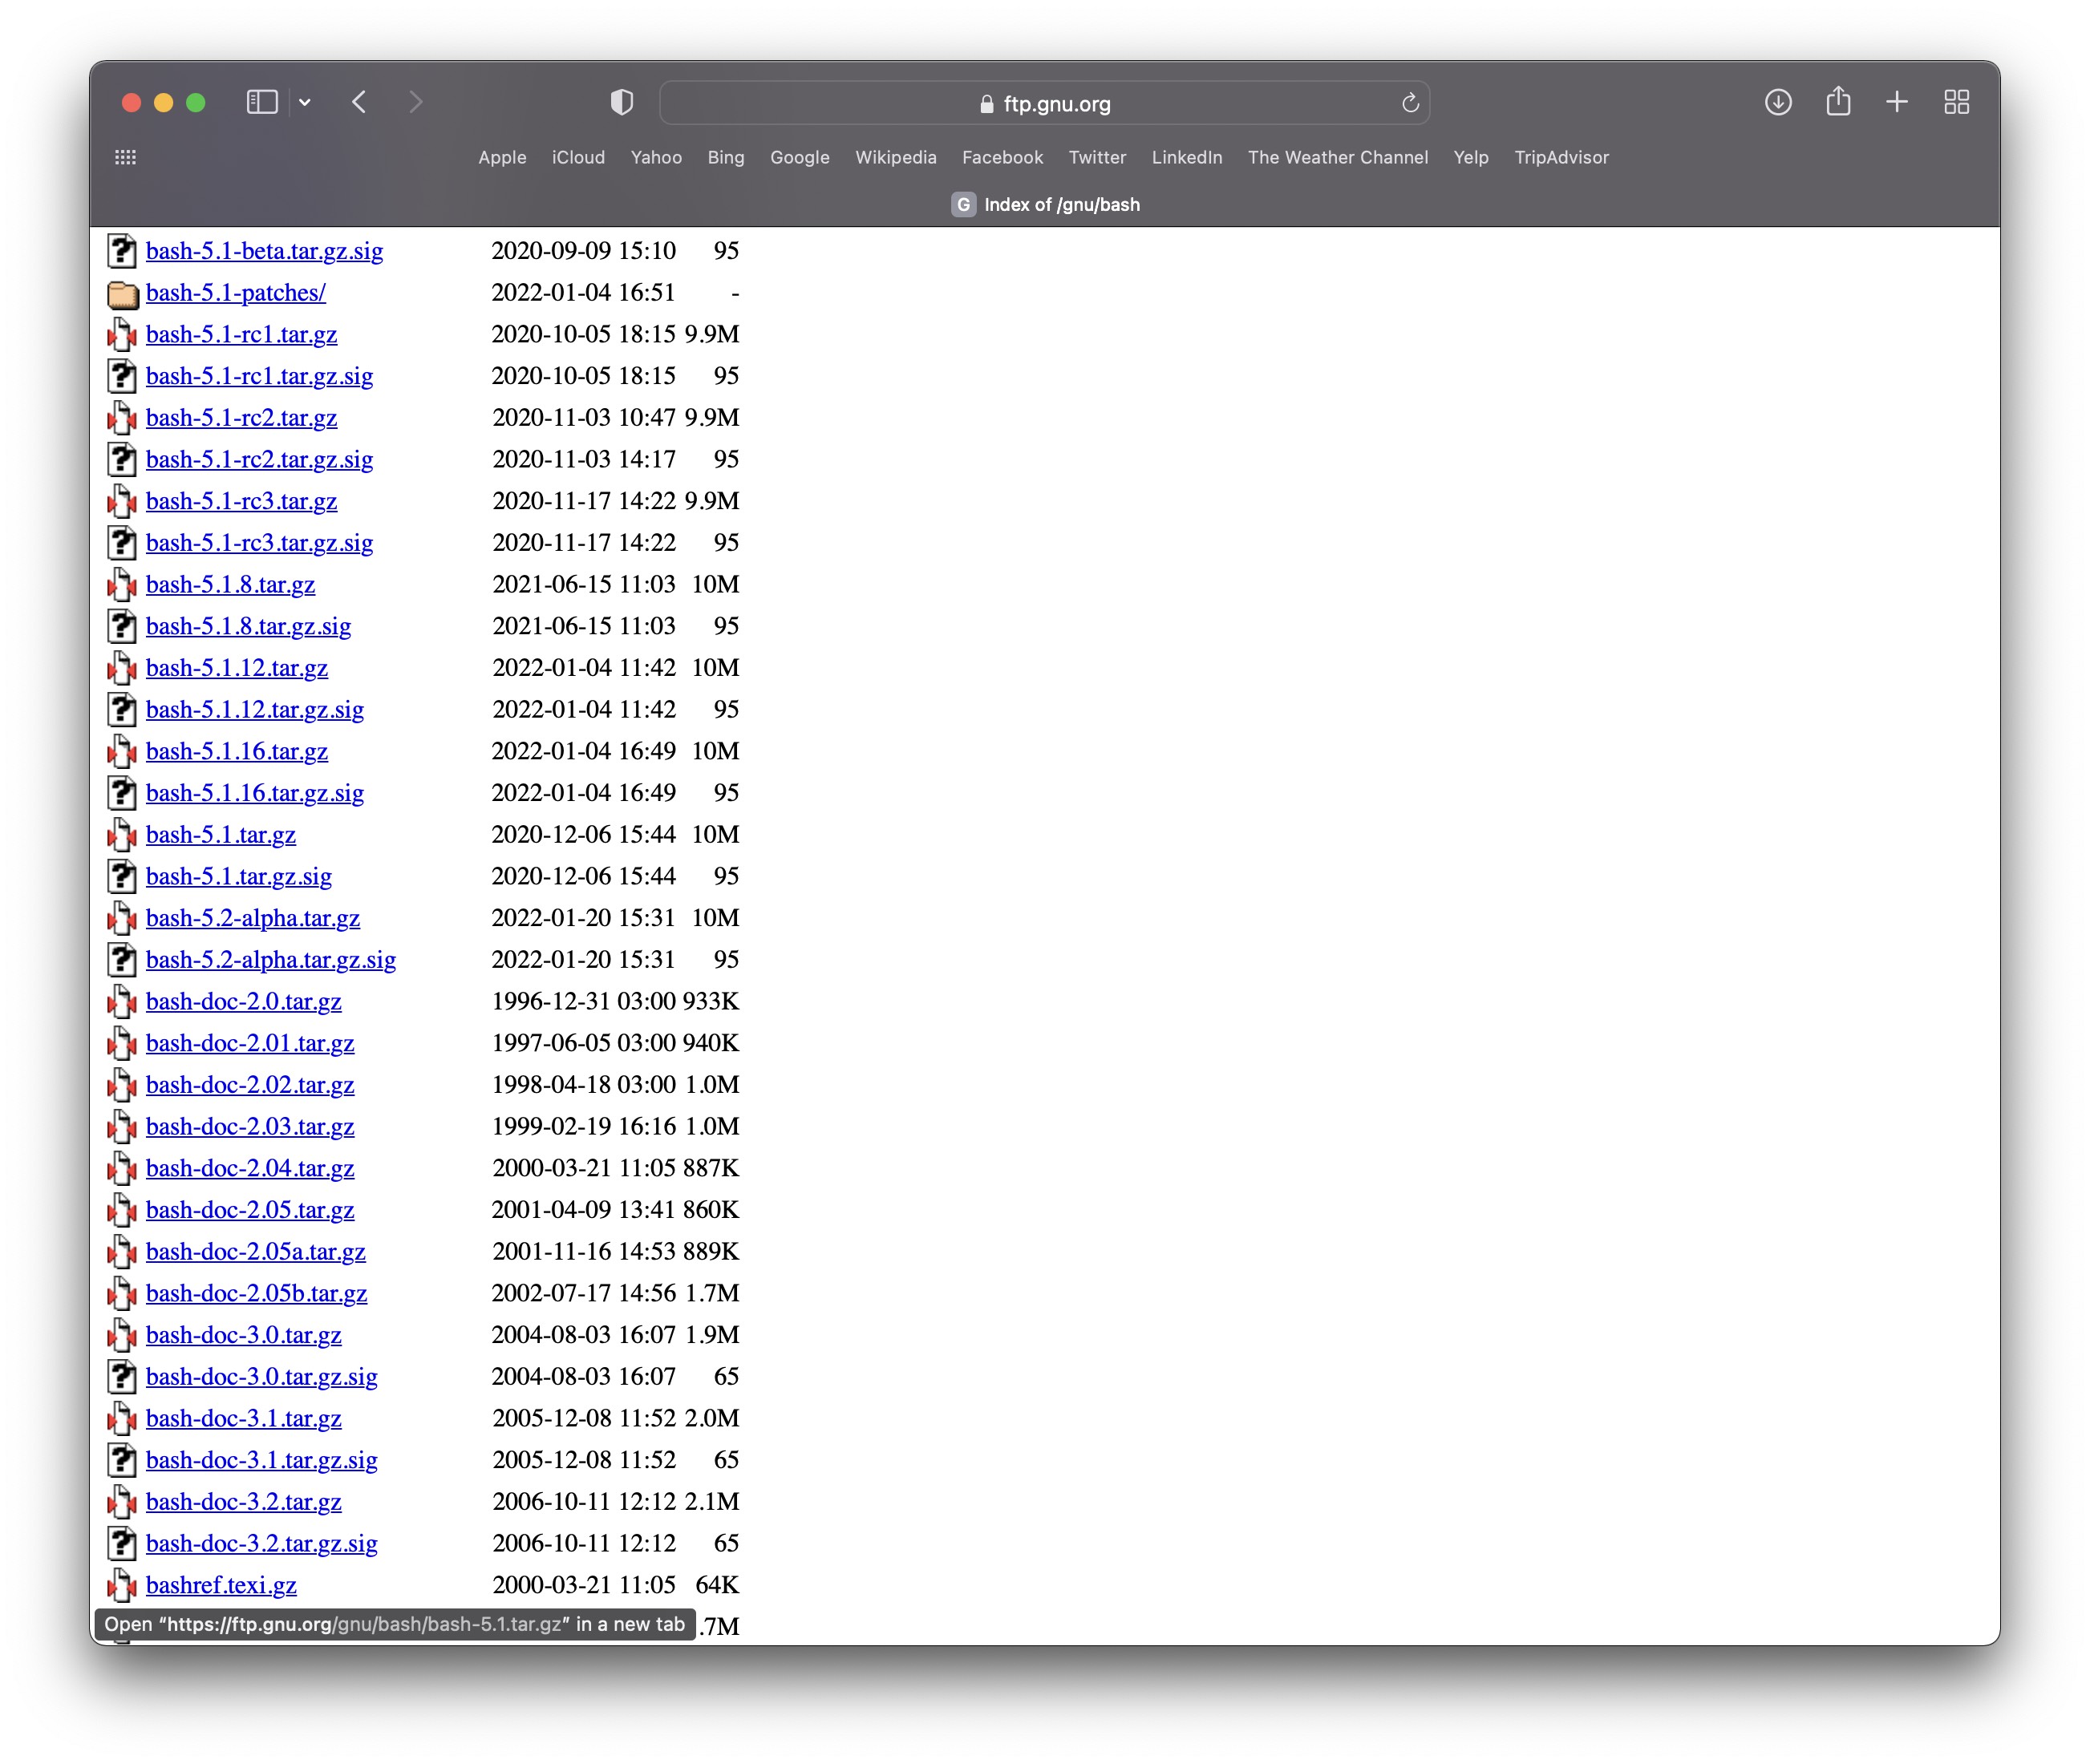
Unpack the bash-5.1.tar file, move it to a convenient directory, cd into that directory, then run these commands,
This installs bash into both /usr/local/bin and /usr/local/bin:
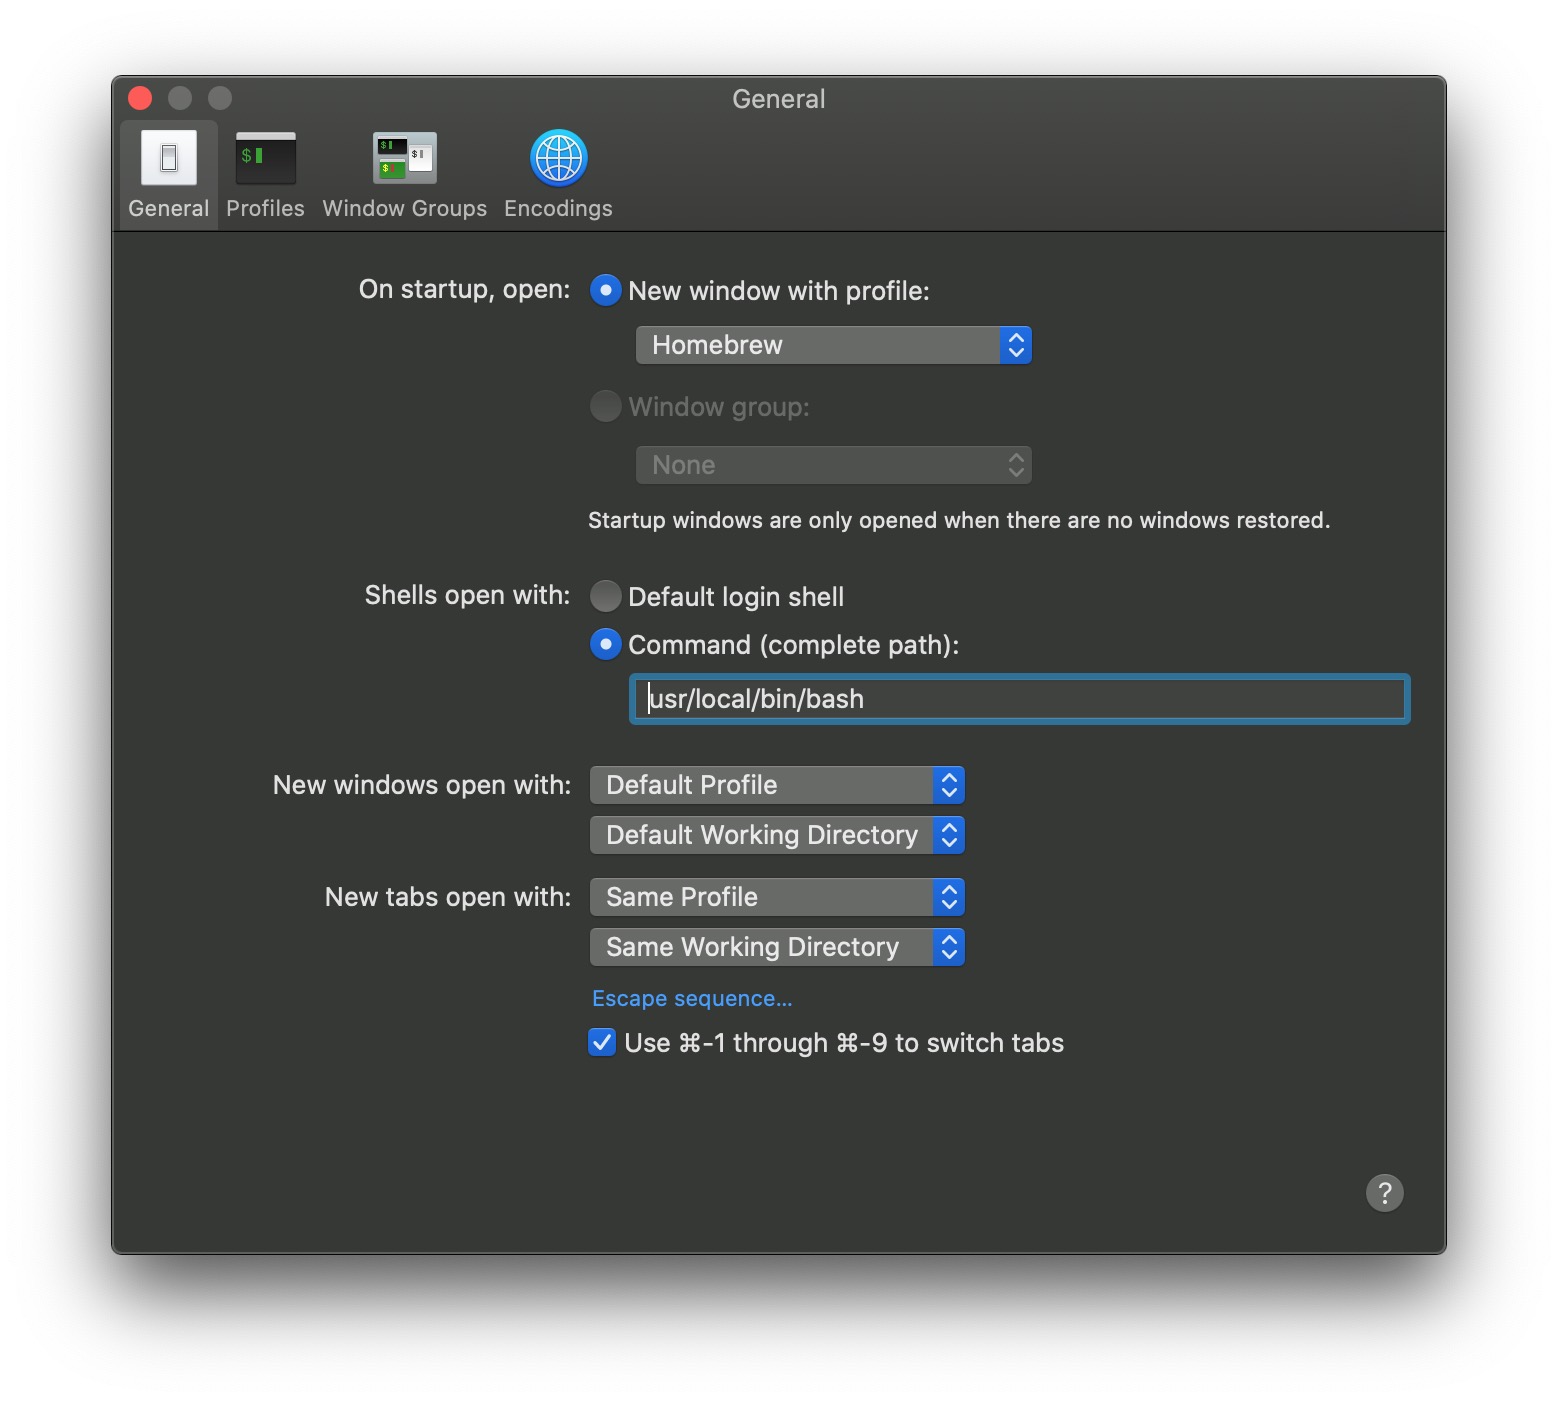
Make the new version of bash your default shell for all terminals. First edit this file and add the new bash path at the top:
Then change the default shell on the command line and in the Terminal Preferences
Close all terminal windows, open a terminal window up again, and check the version
Brew
Brew installs other open source software on the Mac. (it's the macOS version of apt-get for Ubuntu Linux).
Brew will add this last line to your .bash_profile.
Remove this line. Instead, integrate brew's path into your Bash Settings
rsync
Install rsync with brew.
Ctags
Universal Ctags is a successor to Exuberant Ctags. First install Brew. Then install ctags,
If you have problems, uninstall,
Then reinstall as above.
Developer Tools Ubuntu Linux
Naturally, you've got all the unix tools or can easily install them using sudo apt-get from the terminal.
Ctags
To install Universal Ctags on Ubuntu Linux, download several SW tools first, download the source code, build and install
Bash Settings
I'm using the bash shell in preference to the macOS default zsh. Read the Beginner's Guide, Tutorial, and Reference then go to your home directory, and place the bash startup files .bash_login, .bash_logout and .bashrc there.
I have lots of utilties and shortcuts in these scripts. I automatically detect whether I'm on a macOS or Linux system.
Git
I use Git for source code control. It's out of the box in macOS
But better you should install a recent build
Also install the large file version
Install in Ubuntu Linux using
It's described in the Git Pro 2 Book. Here's an example of how I set up my Git repository for my Primpoly project using local repositories.
Git Configuration
In your home directory ${HOME}, create the global git configuration file .gitconfig
Local Protocol for the Git Repository
Create a local directory to serve as the Git repository. This is the simplest possible remote protocol, and can be used if you are on a single computer or everyone remotely shares your directory.
In your .bashrc file in home directory, add the location of the local git repository,
Let's add a new project Primpoly to the remote directory. The --bare flag says there are no files in this directory; it is only used as a central repository to push and pull from local working directories.
Set up a Local Git Snapshot
Let's place a collection of C++ source files under source code control. This will create a new .git subdirectory.
Add the files to source code control.
Your files are staged now. When ready, do a commit,
You can see your new branch and the history,
Set up the Remote Repository
Now we let the local directory Primpoly know about the remote repository.
Then we push up to the remote repository for the first time.
Verify the git repository is set up correctly by doing a test clone from the remote repository, and verify there are no differences between it and your local repository,
You can use macOS X mergetool/opendiff to resolve conflicts.
You can rsync the git repository and local files between macOS and Ubuntu Linux If you copy from macOS to Linux, the local git configuration file will point to the macOS home dir instead of the Linux home dir.
You can use a symbolic link to fix that by pointing Linux to the macOS type home directory.
You may also see the local files say they are changed. Just git restore them and pull again.
Make
Get a new version of make which you can download. To install, do the usual GNU procedure,
rsync
Download a new version of rsync. Unpack rsync-3.2.3.tar.gz file.
See the rsync INSTALL file for hints on how to install the missing libraries and/or how to generate (or fetch) man pages.
Then configure, build and install rsync and check the version.
ack
ack does regular expression searches of files within directories recursively. Think of it as fast replacement for combining find and grep with more powerful (Perl style REs) and lots of ways to customize searches.
For example, here are the old and new ways:
I downloaded the single Perl file version of ack then made it available to where my PATH could find and run it,
PROGRAMMING LANGUAGES
C++ Language and Compilers
Start by reading the textbooks A Tour of C++ by Bjarne Stroustrup and The C++ Programming Language, 4th Edition then read the latest updates in the C++ Super-FAQ and the C FAQ
Mac OS X development tools contain the clang C++ and C compilers. They come with Xcode.
Ubuntu Linux To get C++ and C working in Ubuntu Linux, you can use g++ which is installed already. Or you can install clang, but you have to explicity install its libraries,
Then you can compile thus:
If that doesn't work (but it should), change your makefiles by replacing the default library -stdlib=libc++, with the older GNU library -stdlib=libstdc++
C++ GUIs
I haven't tried them yet but the C++ GUIs FoxTookit and WxWidgets sound interesting. WxWidgets looks a lot like Windows API with classes. Here is a tutorial ending up with source code for a tetris game.
LLDB Debugger
I use the lldb debugger in the llvm toolchain which comes installed on macOS.
Python
Keep the tutorial and library reference handy. Or better yet, download the whole set.
If you program LISP already, Python is very similar.
Python on MacOS
On macOS don't use the shipping python. Go to the Python Web Site and download the latest version of Python.
 Install SSL root certificates during the install.
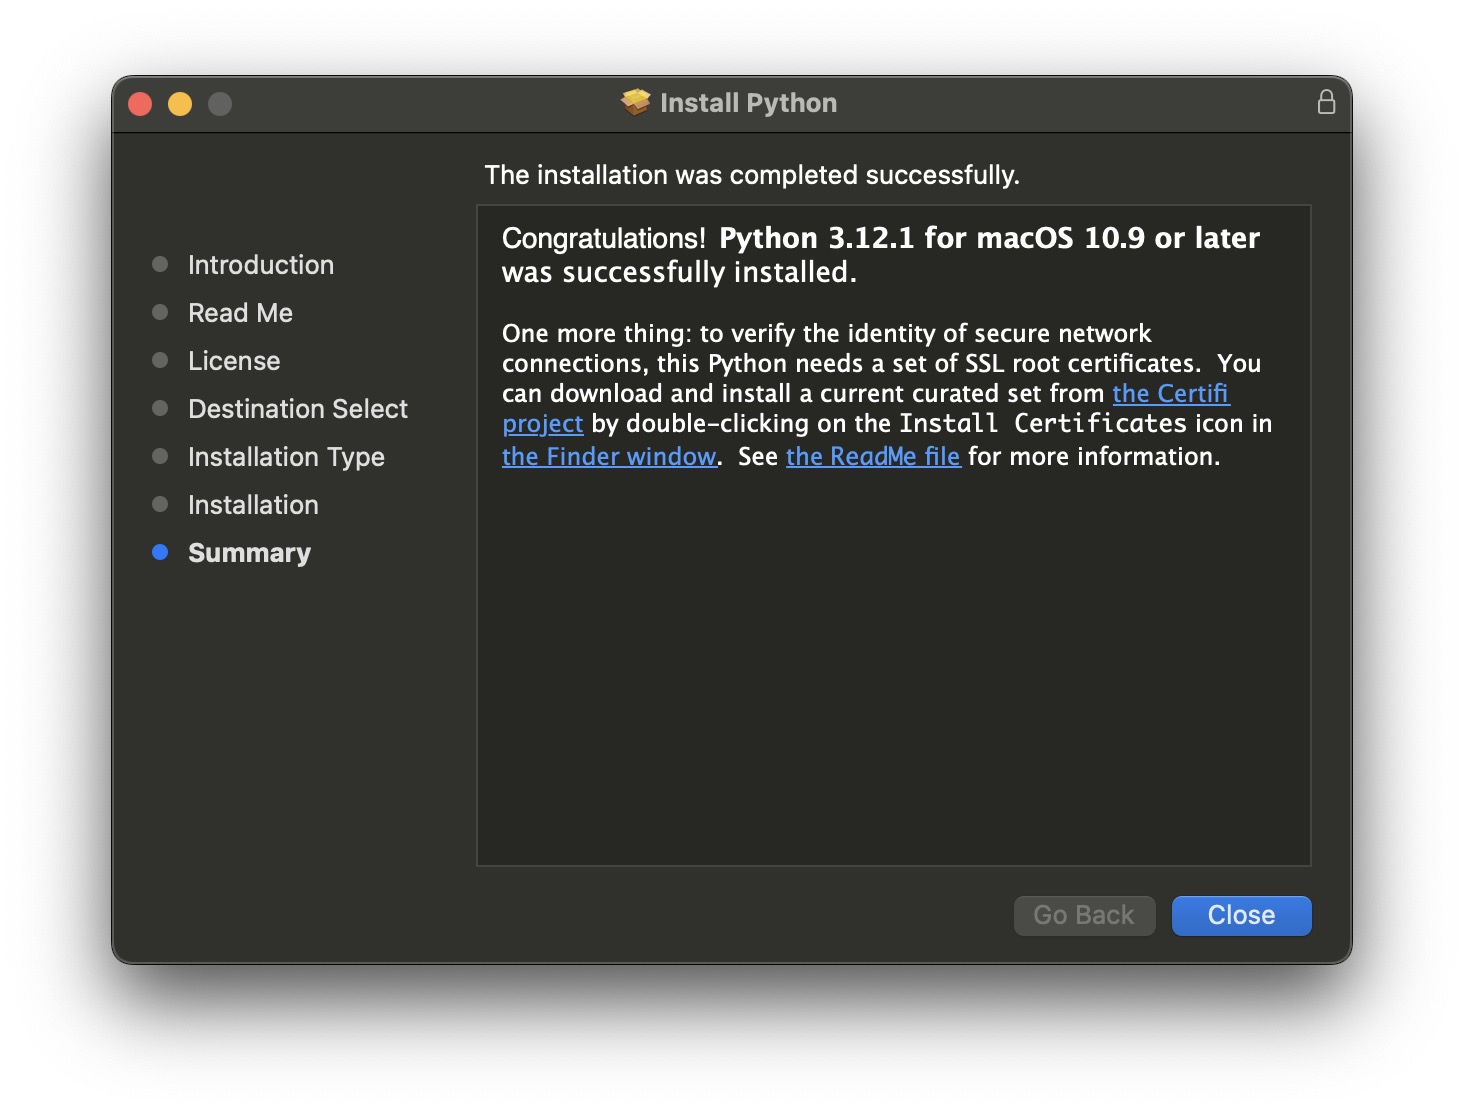
Python 3 installs into /Library/Frameworks/Python.framework/Versions/3.12 The installer will prefix the Python 3 path to your existing path in your .bash_profile
I don't like this so remove it and set up a custom .bash_profile to change the path in cleaner manner.
Check by running the command python3 -V that we call Python 3.12
Get the latest PIP and check the version.
Installing a virtual environment.
Create a virtual environment which uses Python 3.x in your home directory. Remove any old virtual environments first. This will create a hidden subdirectory .VENV.
Activate it. You’ll get a command line prompt showing you are in the virtual environment with the version of Python you chose.
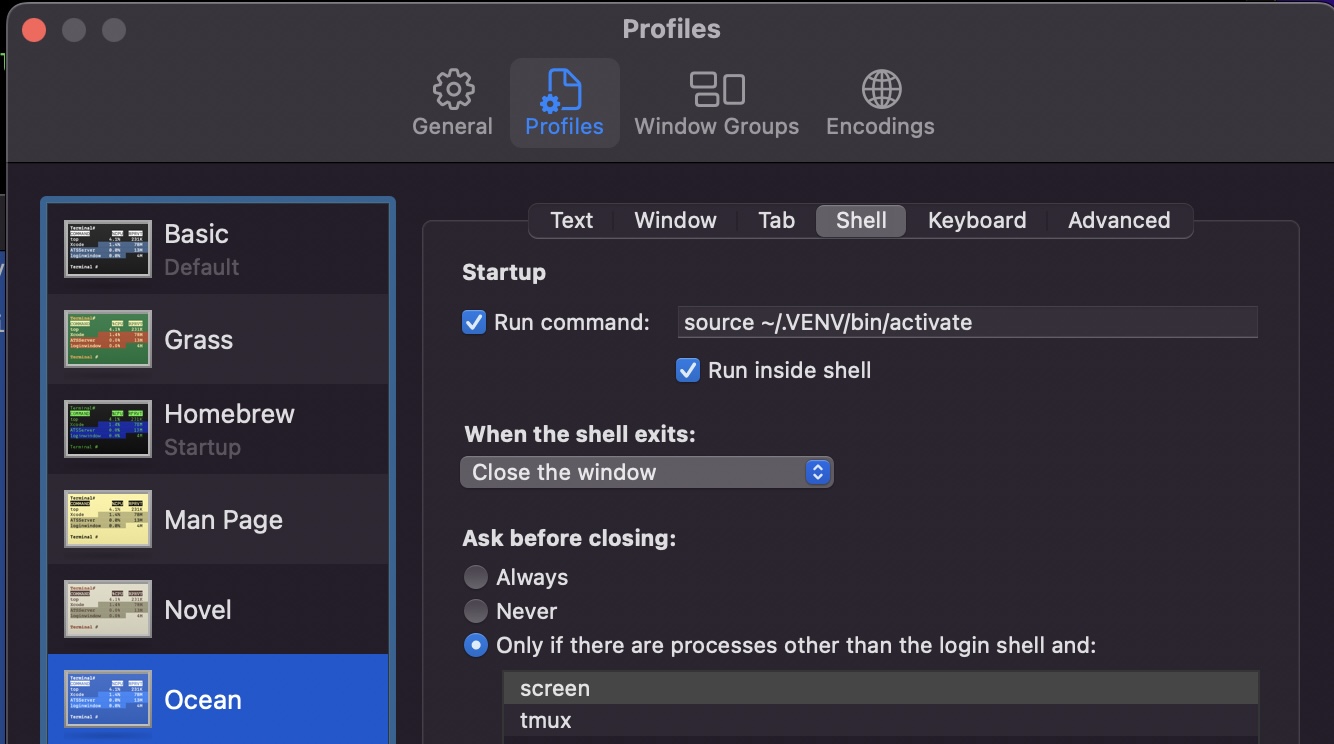
For convenience, go into macOS Terminal ➤ Preferences ➤ Profiles
to launch the virtual environment for the Ocean window profile.
To uninstall your Python virtual environment,
Python on Ubuntu Linux
On Ubuntu Linux install Python.
Install pip using
Install the virtual environment,
To enable the virtual environment in a terminal window, do this command,
Deactivate the virtual envionment using
For Python 3.x, install SSL root certificates, and install numpy, matplotlib, and other useful packages. See installing Python packages below for details.
Similarly to setting up .bash_profile for Python in macOS edit the code in your .bash_profile to set the path to Python 3.x On my Ubuntu Linux I've wired the bash profile script to automatically launch each new instance of terminal window in the Python virtual environment.
Installing Python Packages
You might as well upgrade pip then install every Python math library you need,
Keras and TensorFlow are optional.
You can verify which PIP modules you have installed:
If you are using a virtual environment, go into the VENV and do the pip upgrade and install all packages again, since you are in a separate sandbox, so to speak.
Here is a Python source code formatter. For example, I reformatted my web tool as follows:
PyCharm
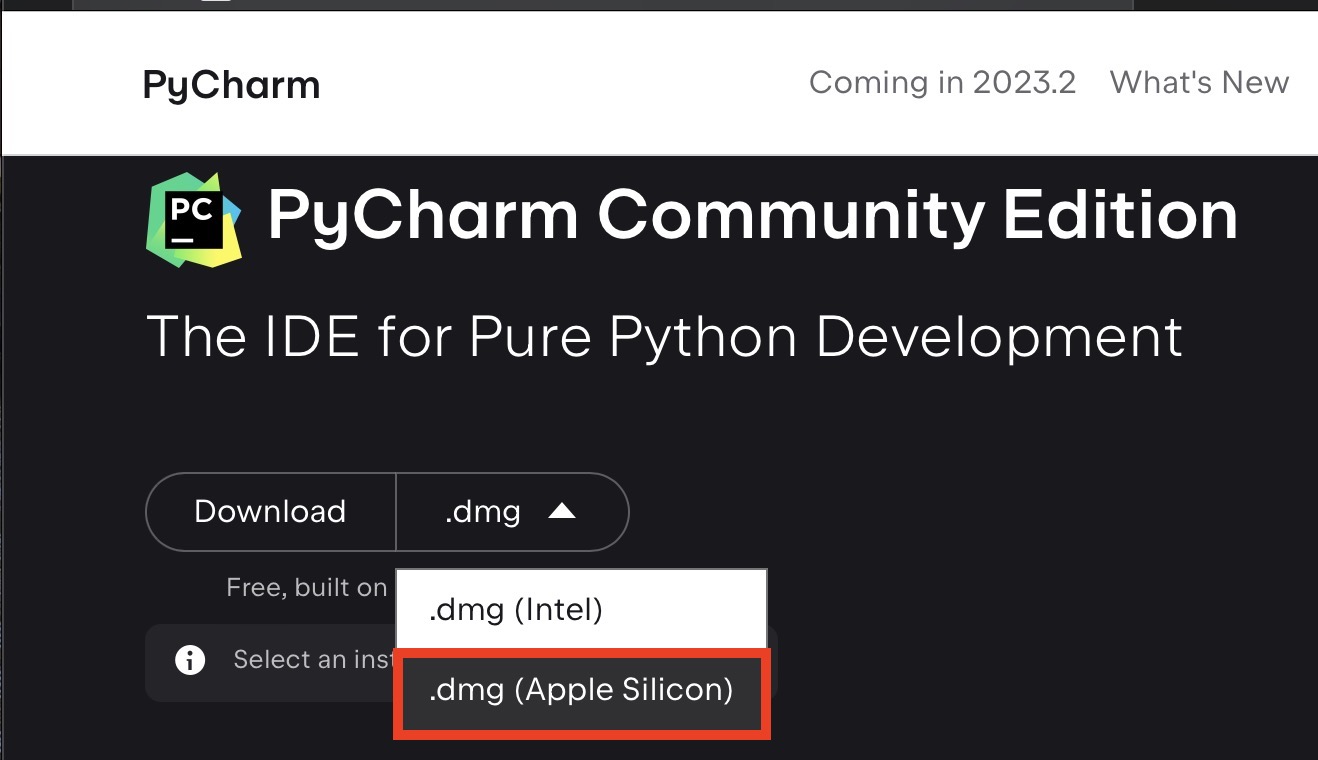
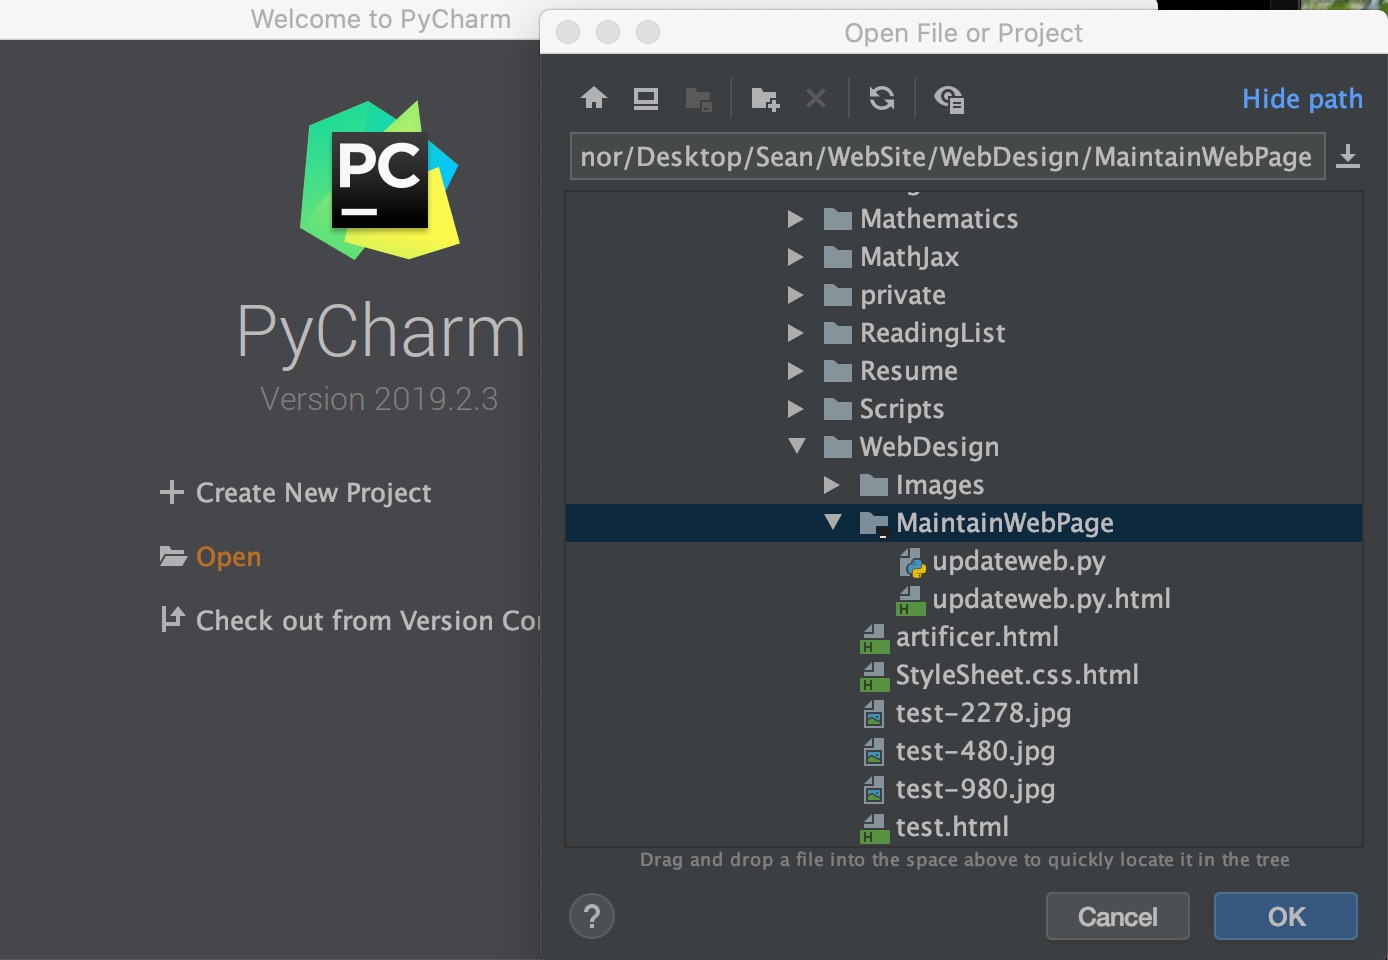
I use the free community edition of PyCharm IDE on my Apple Silicon M1 MacBook Pro.
To create a new project from an existing file do File->Open and select the file.
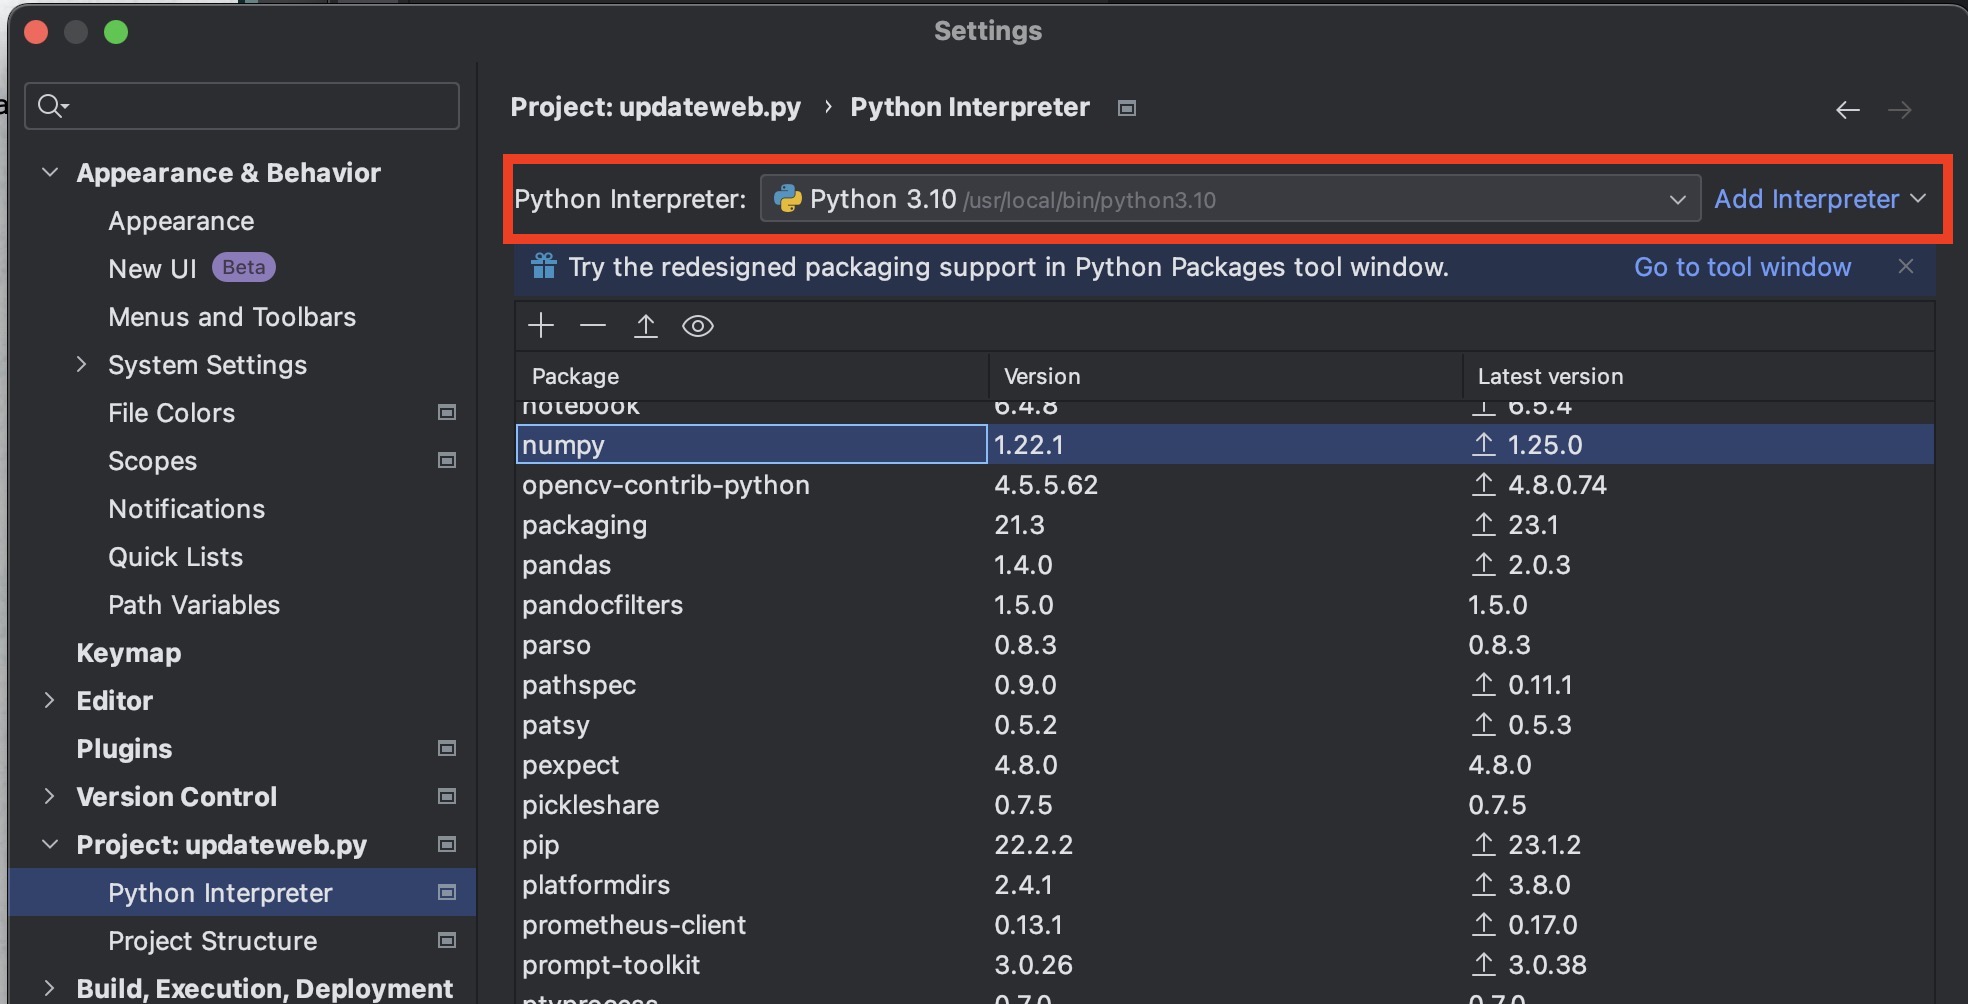
I'm assuming you've set up a Python virtual environment. PyCharm should show it in the Settings:
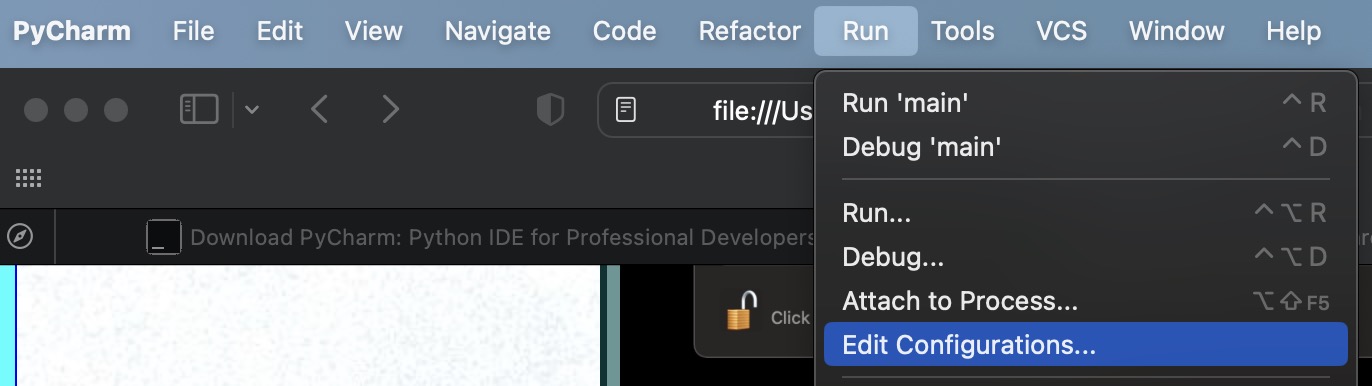
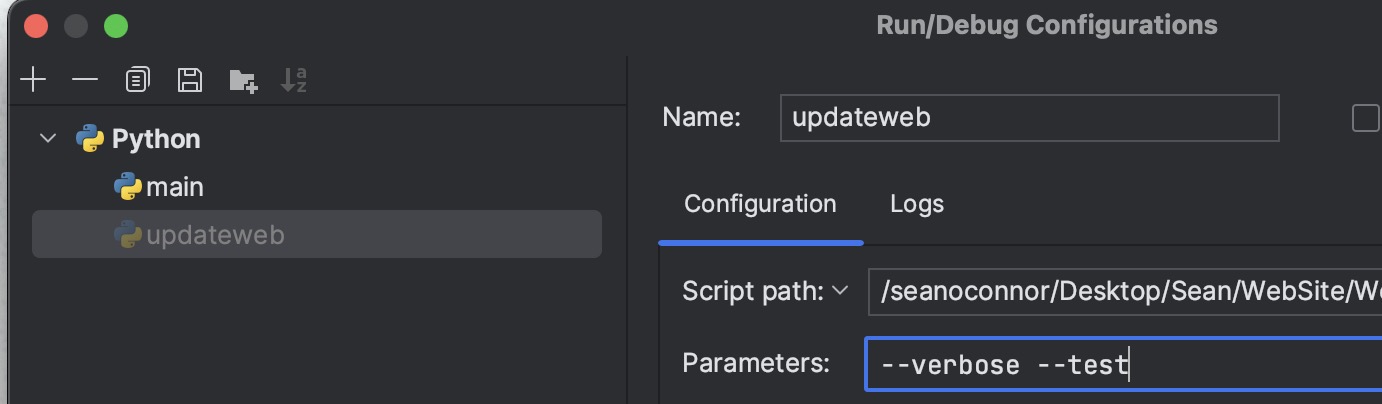
Edit the configuration to put in command line arguments for your script.
Remarks
- You need to define a main() function or PyCharm won't run.
- If you get the error saying the SDK cannot be written to, try deleting all the Python interpreters in the list except the one you are using.
- You can format the source code to the Python PEP standard!
You can do source level debugging in the IDE and code inspection and refactoring.

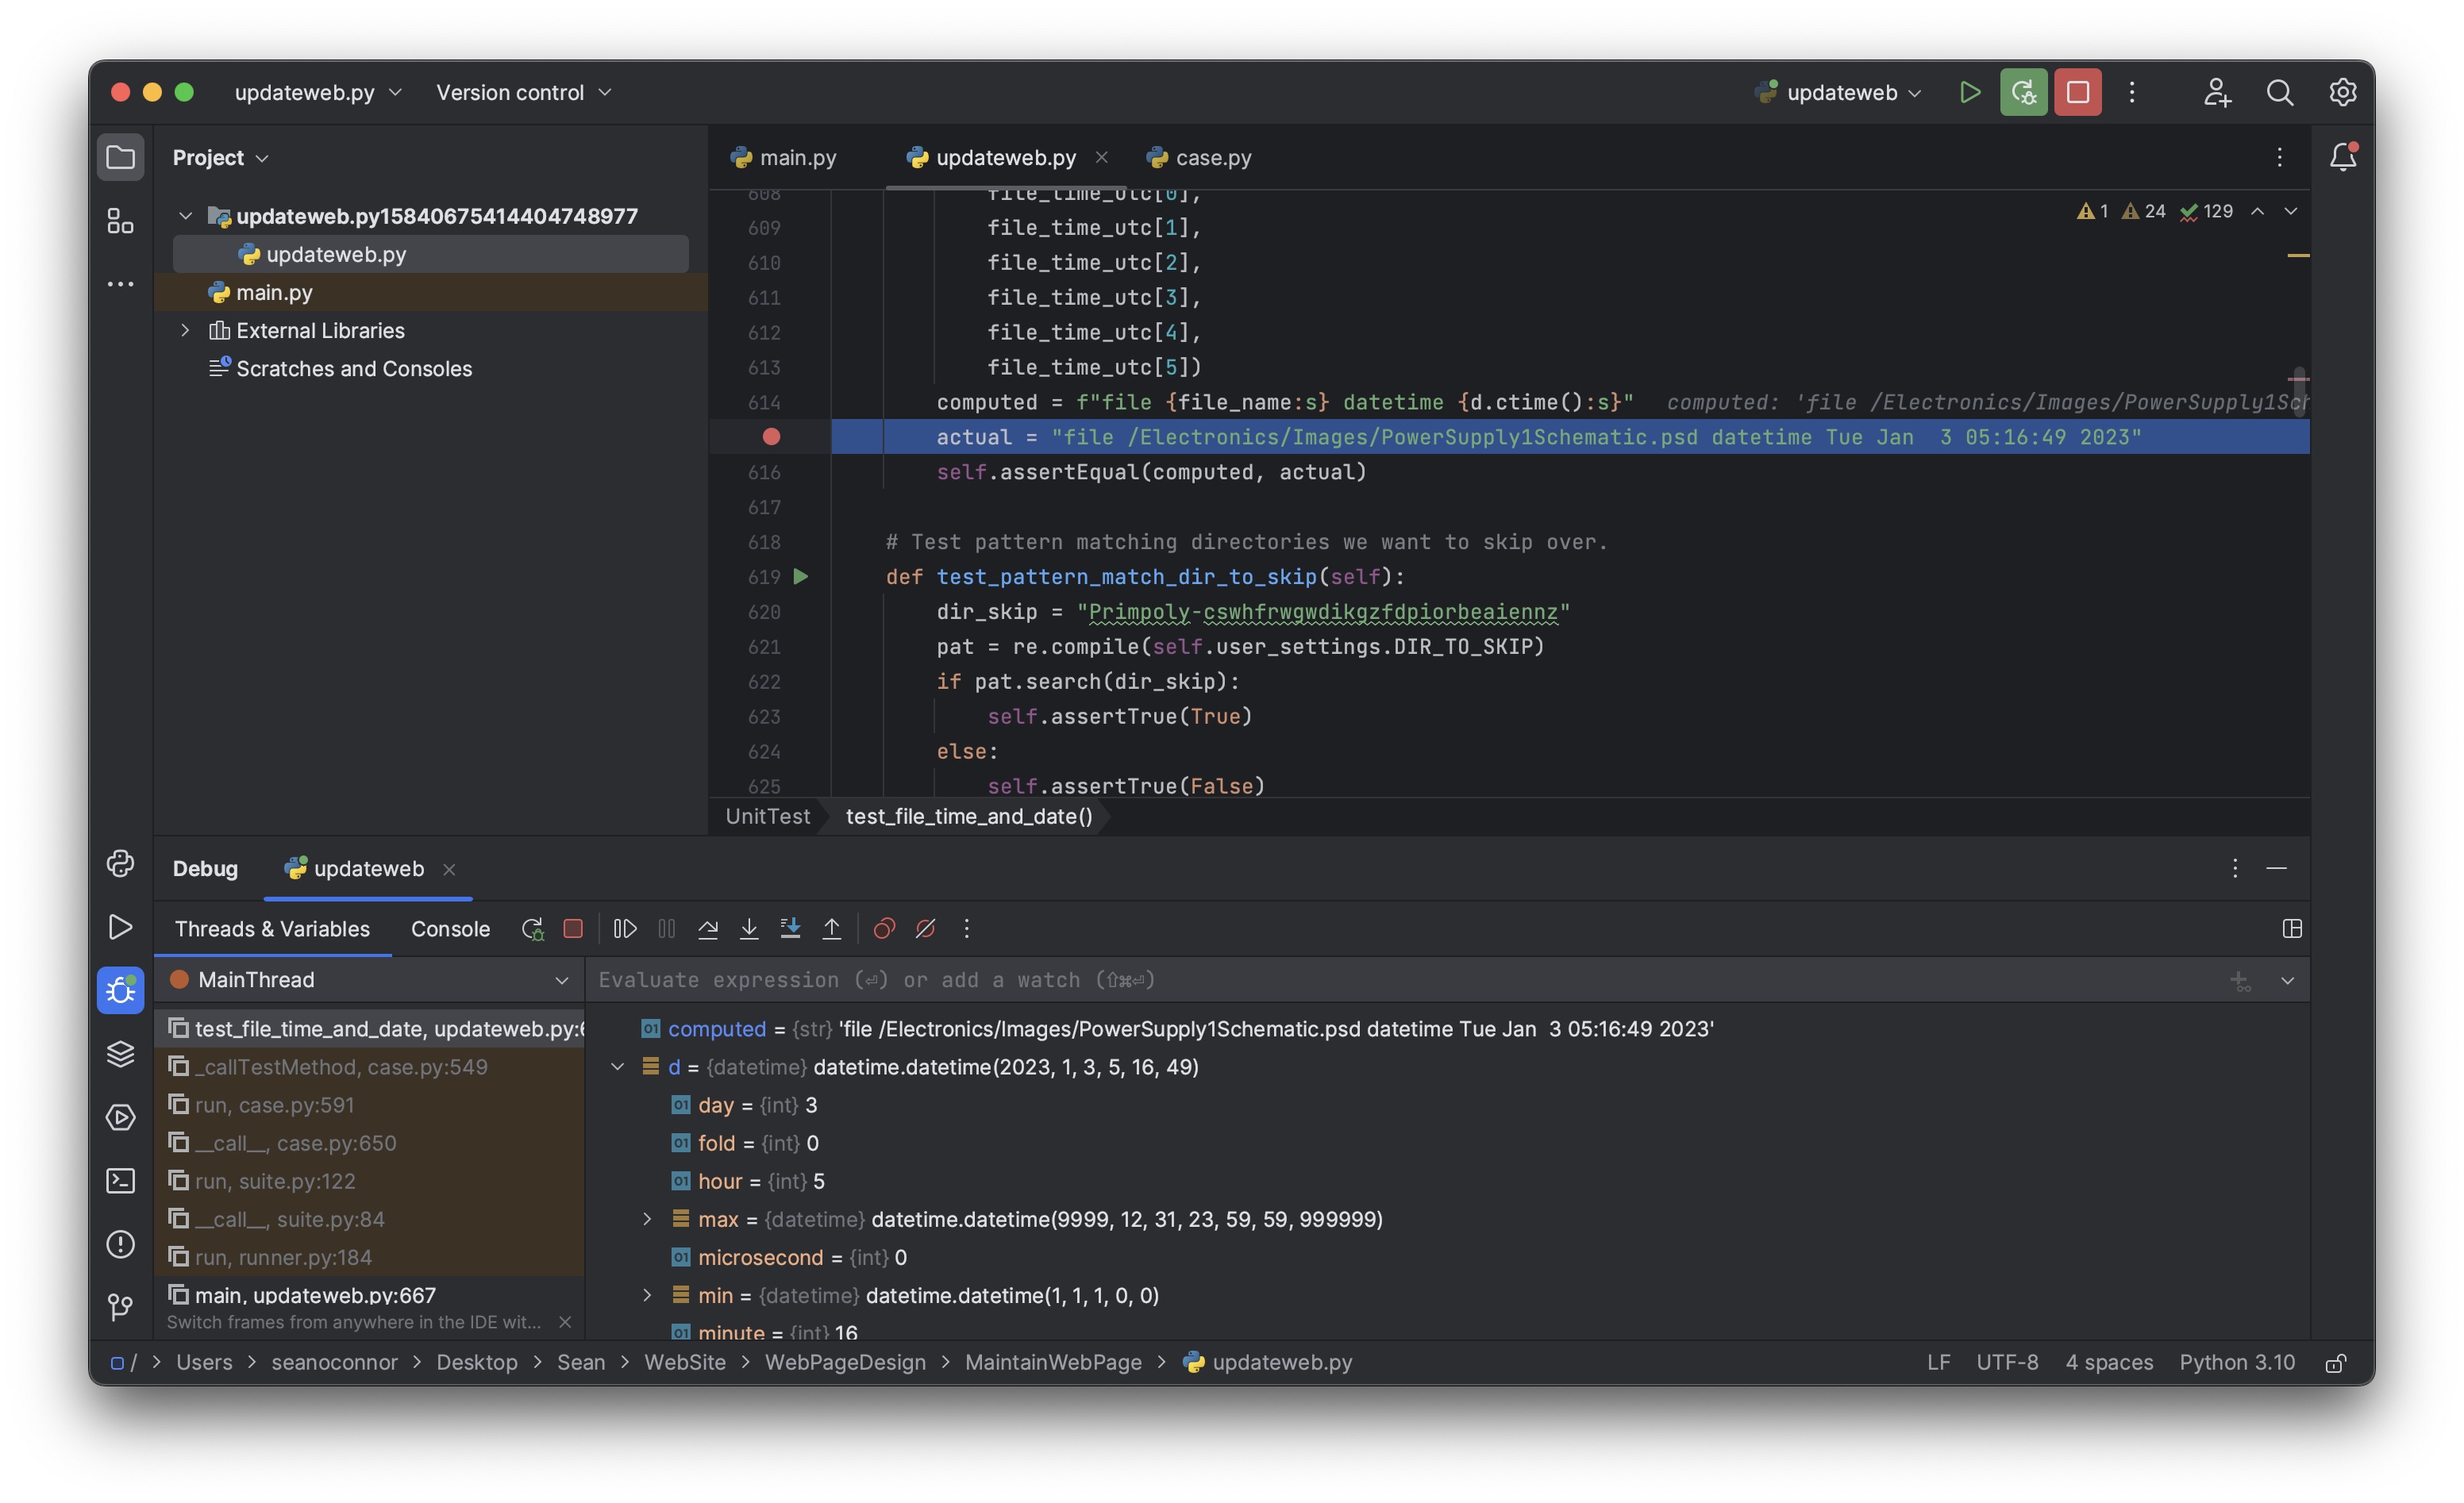
Debugging Python on the Command Line
In this example, we use my program updateweb.py The program has been set up to either run from the command line or as a module.
Run Python and import the debugger module, and the entire script itself
Set up the debugger to run starting in the main() function with arguments,
Set a breakpoint in main
Start running the program. We stop at the breakpoint,
List the source lines around the breakpoint
Print a variable
Backtrace shows the calling stack,
See (Pdb) help and the Online Python Manual for more information.
Common Lisp
LISP is always ten years ahead at any given time.

Ubuntu Linux
Macs Download the install package for the binary from Steel Bank Common Lisp. Unpack and follow instructions.
Once installed, you'll get a bare-bones command line REPL. Try running $ sbcl from the command line and try
You can also run a LISP script from file directly:
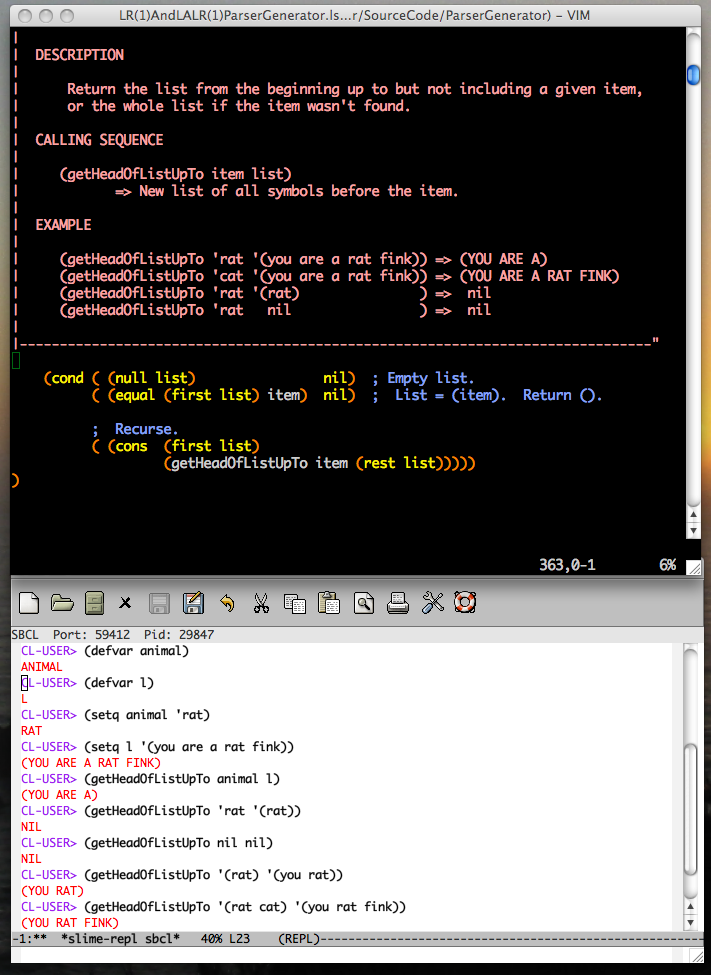
For convenience, I load my Common LISP parser generator project in the SBCL startup file .sbclrc
However, your life will be much easier if youw download and install Slime Unpack and install the slime directory in /Applications/slime then install this .emacs file in your home directory:
Vim, Ctags, Emacs, Slime, Steel Bank Common Lisp.
You should also install Emacs Invoke Emacs and with the command M-x slime go into Lisp interaction mode. Useful REPL commands are Control-c Control-p to move back one prompt, Control-c Control-n to move forward, Control-a and Control-e to go to beginning and end of the line, Control-x o to switch between buffers, Control-C Control-D d to lookup documentation for a symbol, and Control-X Control-S to exit emacs.
For LISP tutorials and references online see
- Practical Common Lisp by Peter Seibel
- On Lisp by Paul Graham
- Common Lisp the Language, 2nd Edition by Guy L. Steele, Jr.
I've also used CLISP
Perl
I was programming in Perl and switched over to Python after discovering this article.
FORTRAN
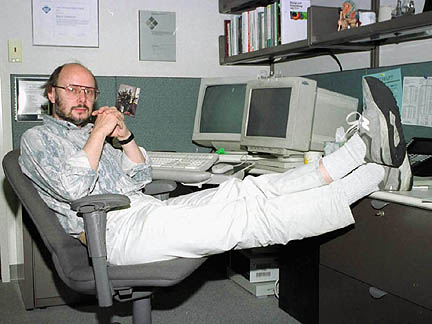
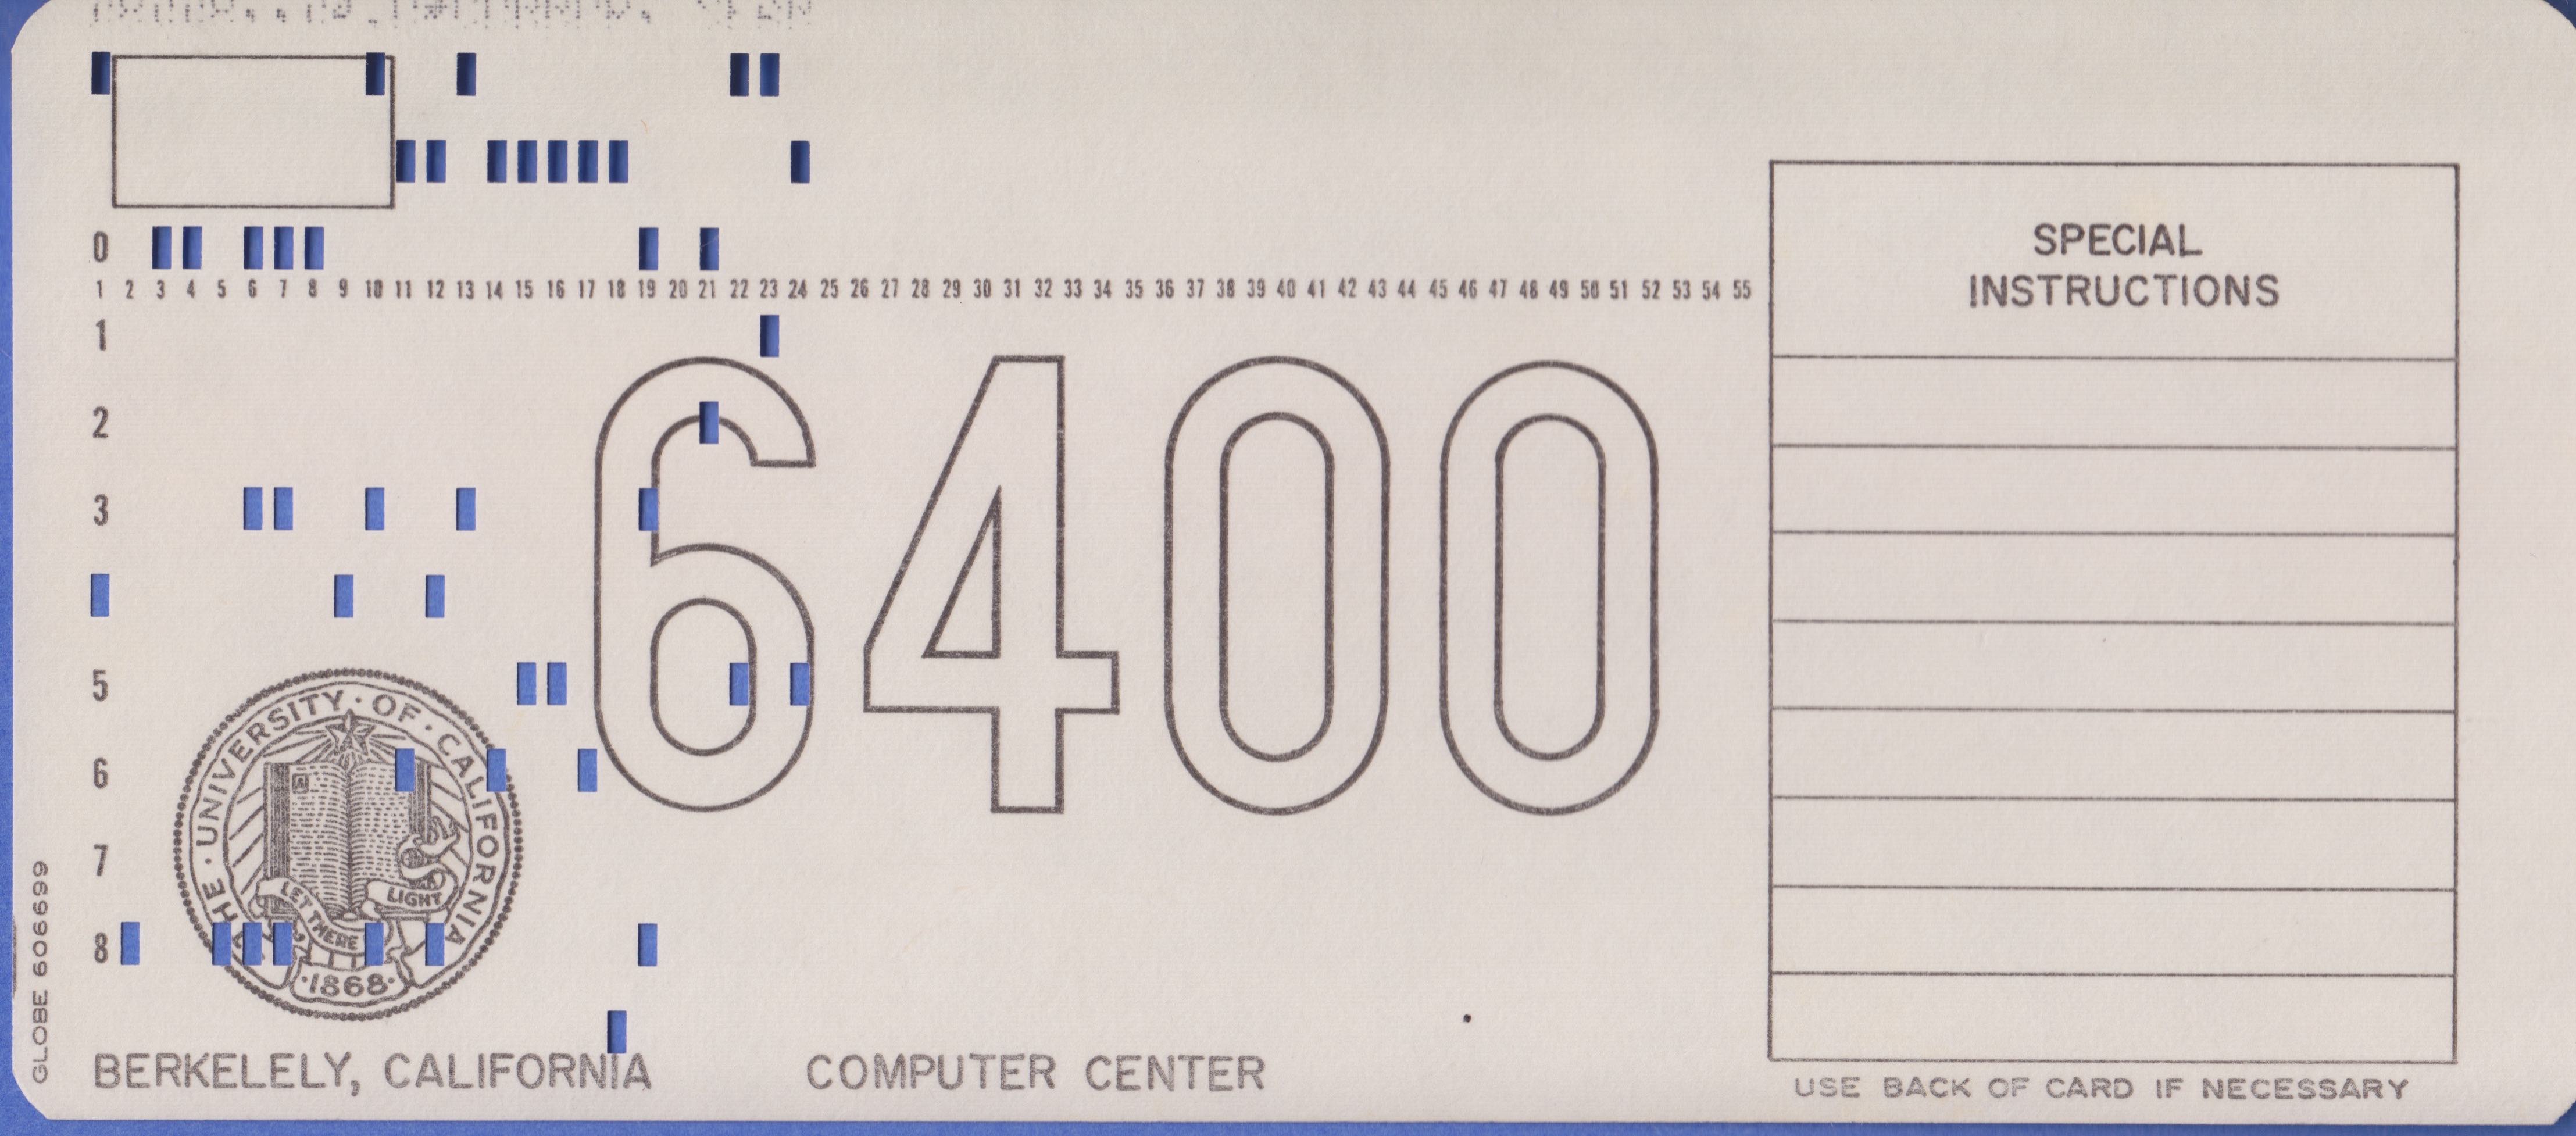
The first language I learned was FORTRAN from Bill Joy at U. C. Berkeley!
Berkeley Computing Center Punched card circa 1975.
It now has object oriented programming!
On Ubuntu Linux install GNU Fortran using
Here's a sample program
Build it and run it!
Math Software
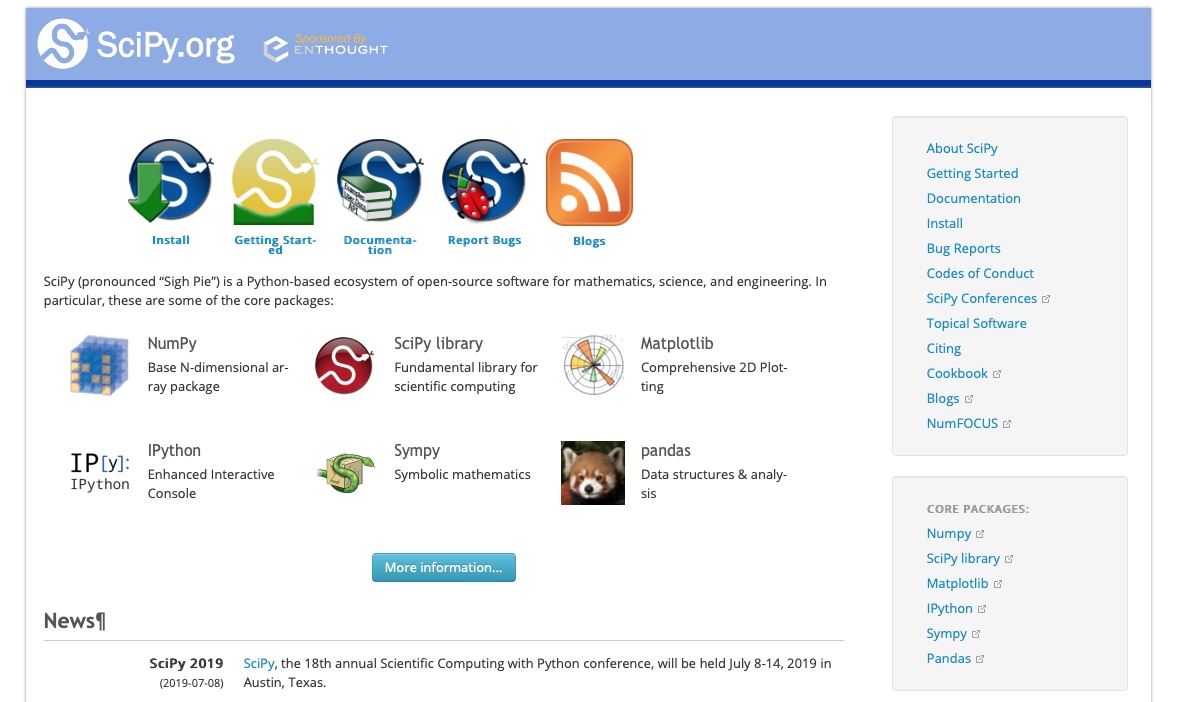
There are a number of free alternatives to MATLAB and Mathematica for symbolic and matrix computation.SciPy
SciPy is a scientific math suite for Python.
Here's how to install on Mac.
You can list the packages installed using either python -m pip list or pip list.
To uninstall a package, for example, numpy, do
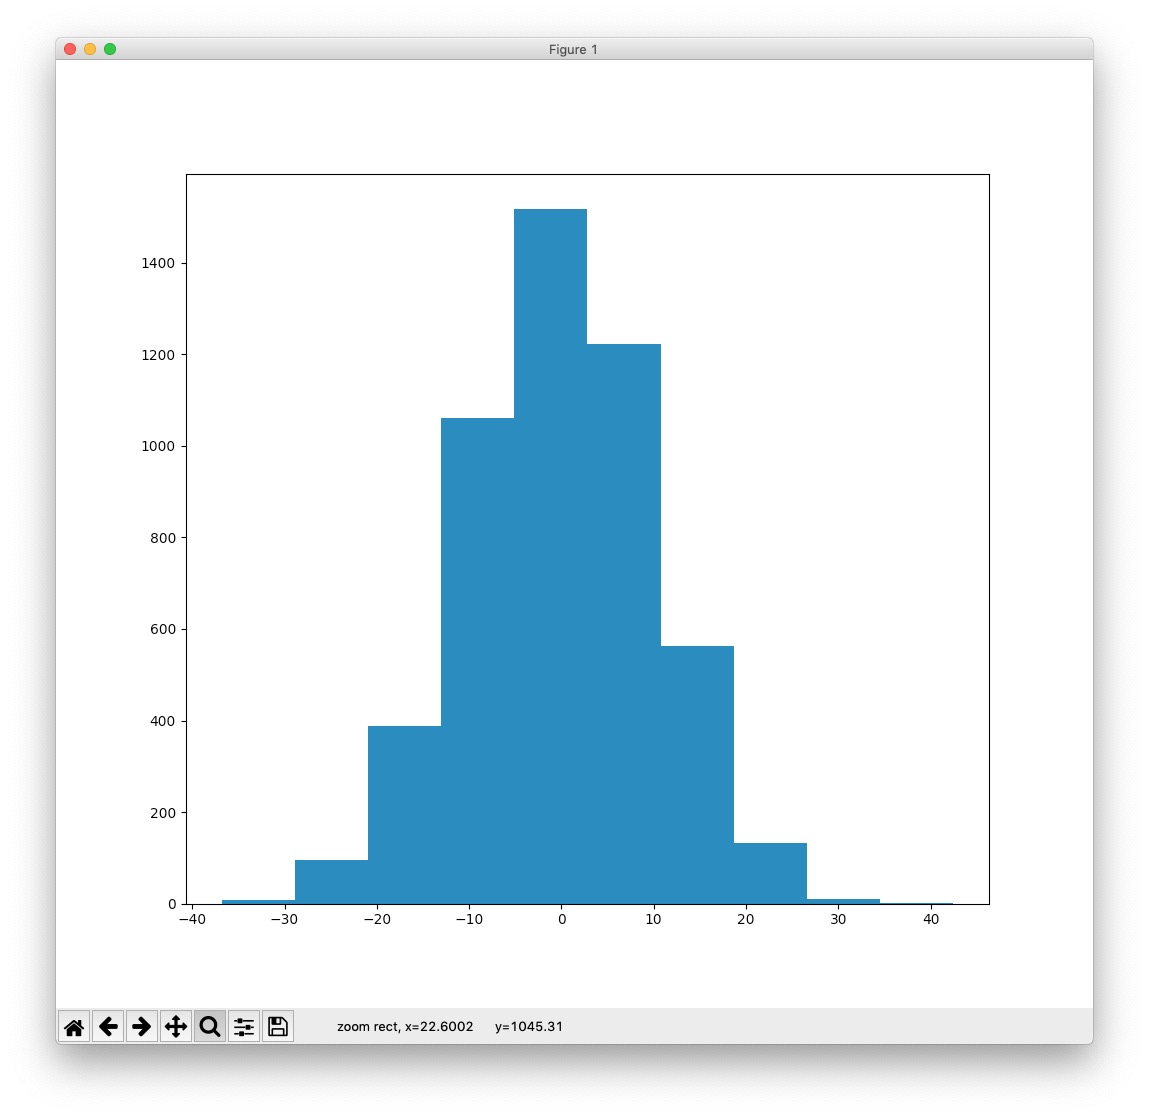
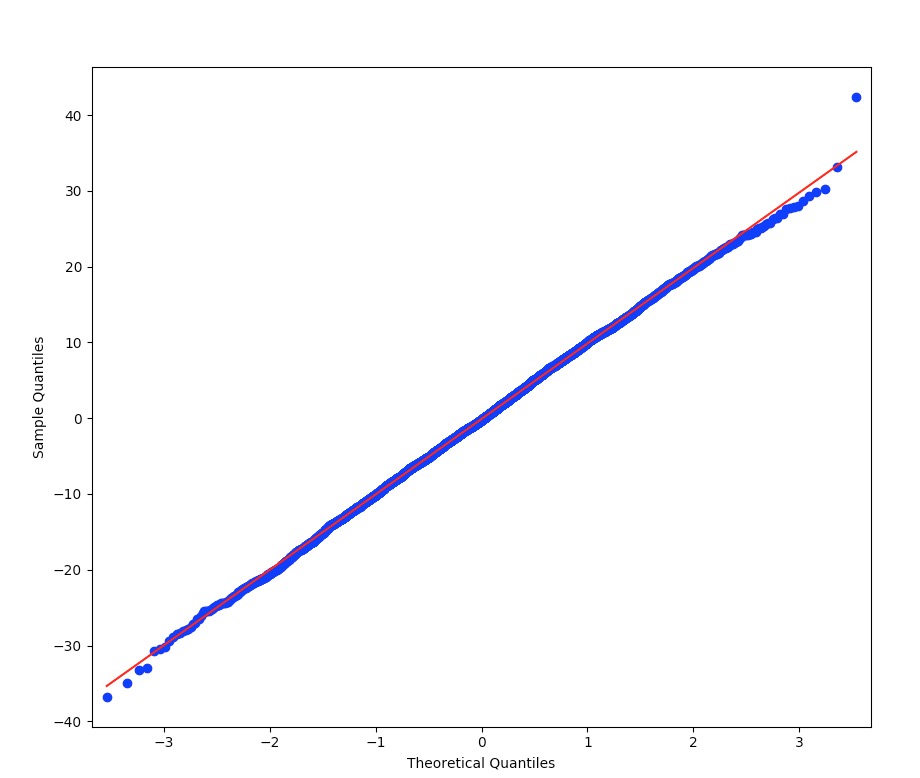
Here's an example taken from Normality Tests in Python Run python from the command line and type in these commands:
Normal Histogram
QQ Plot
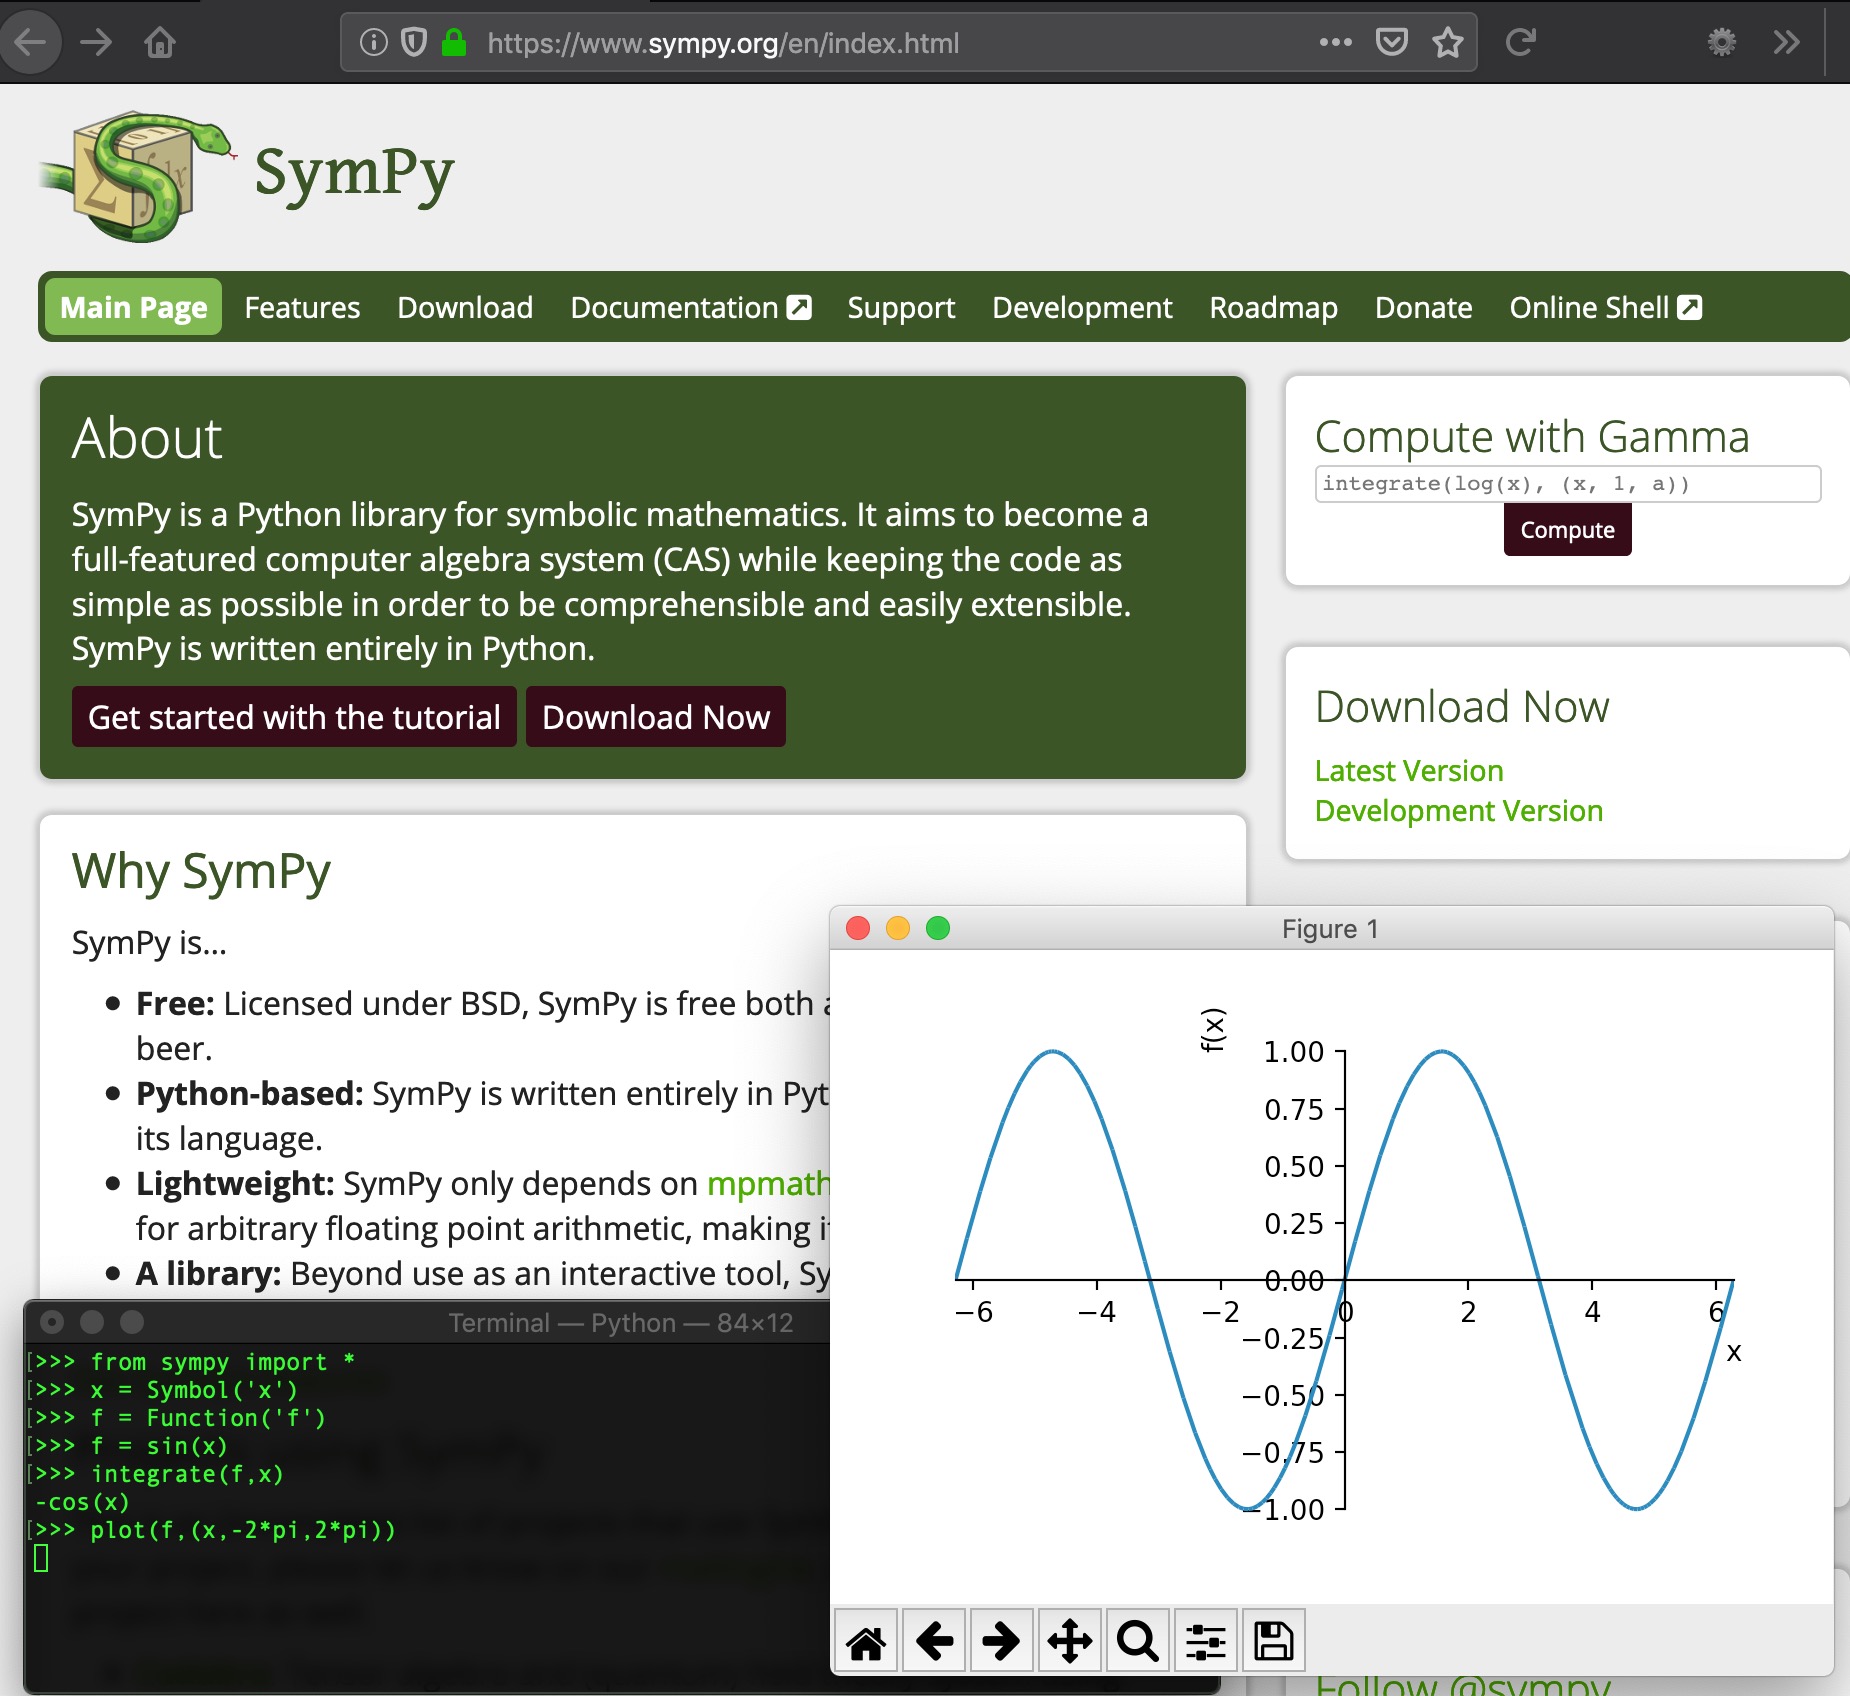
Sympy
Sympy is a symbolic math package built on top of Python.
Here's how to install on Mac.
First install mpmath by doing
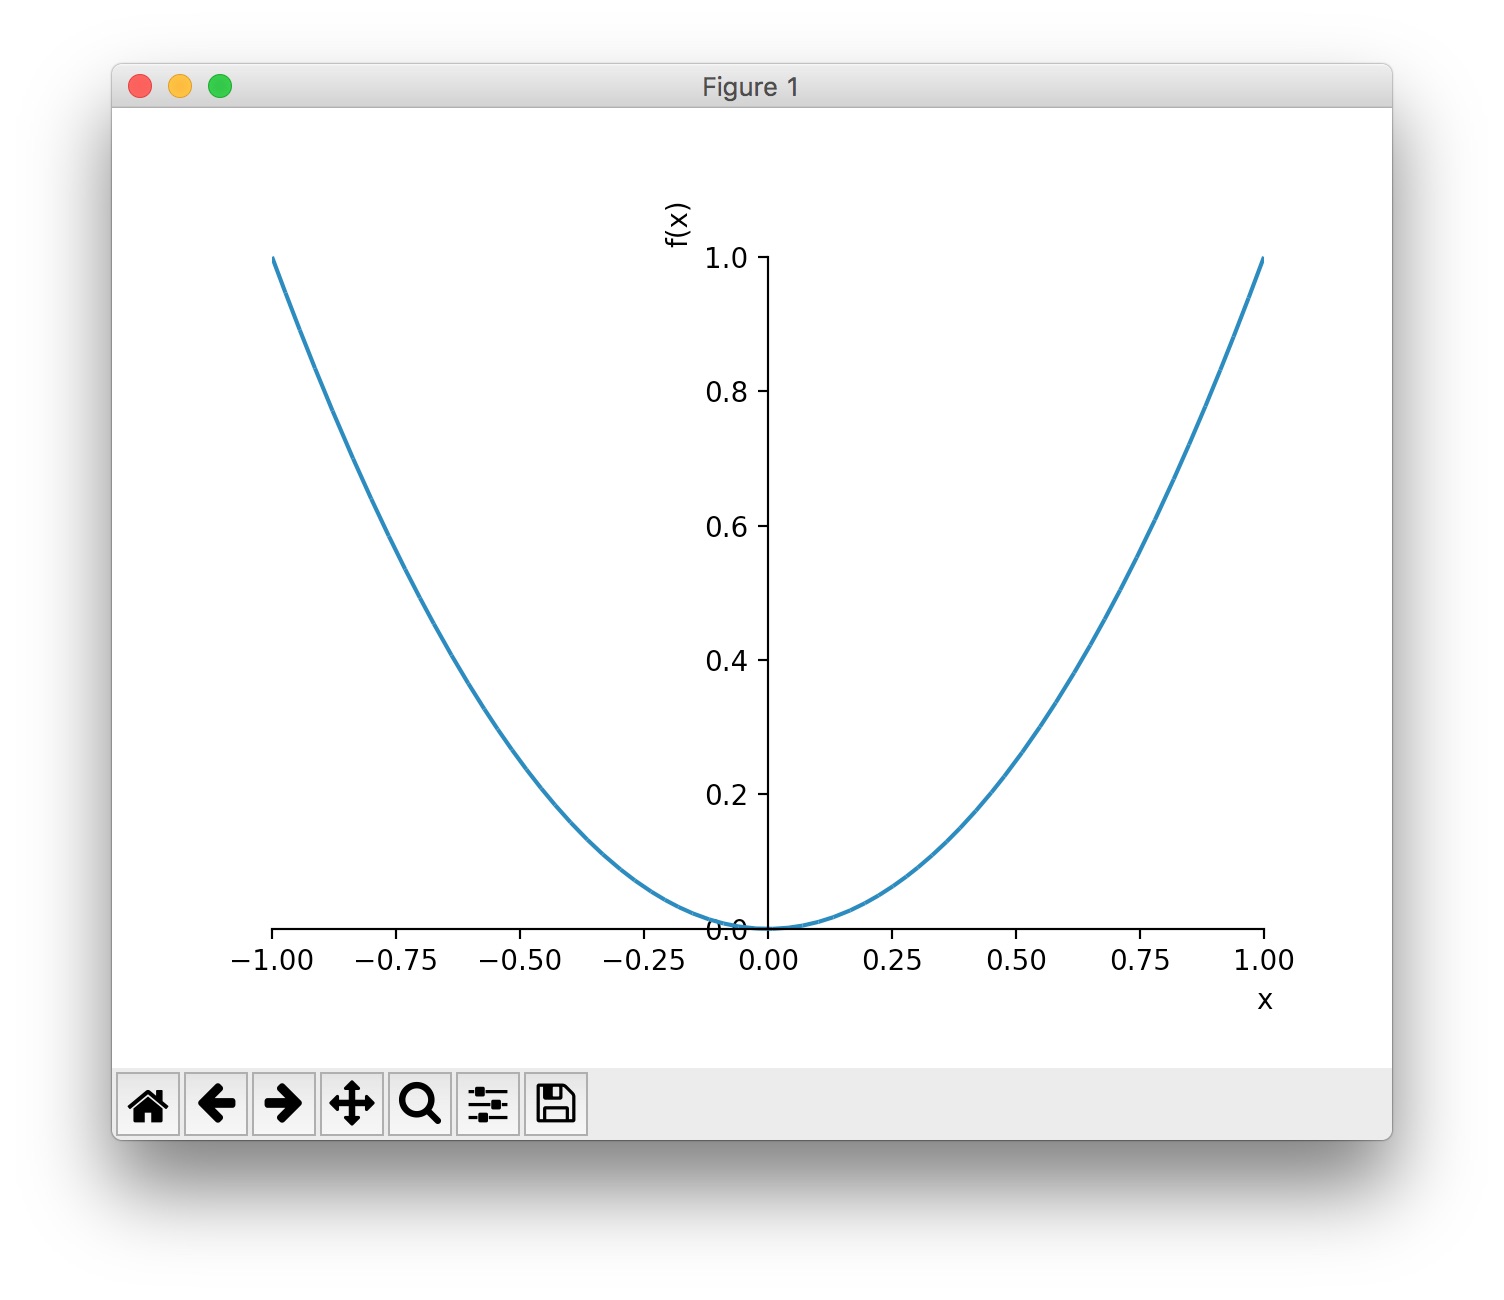
And here's a simple plot,
Sympy plot( x**2, (x,-1,1))
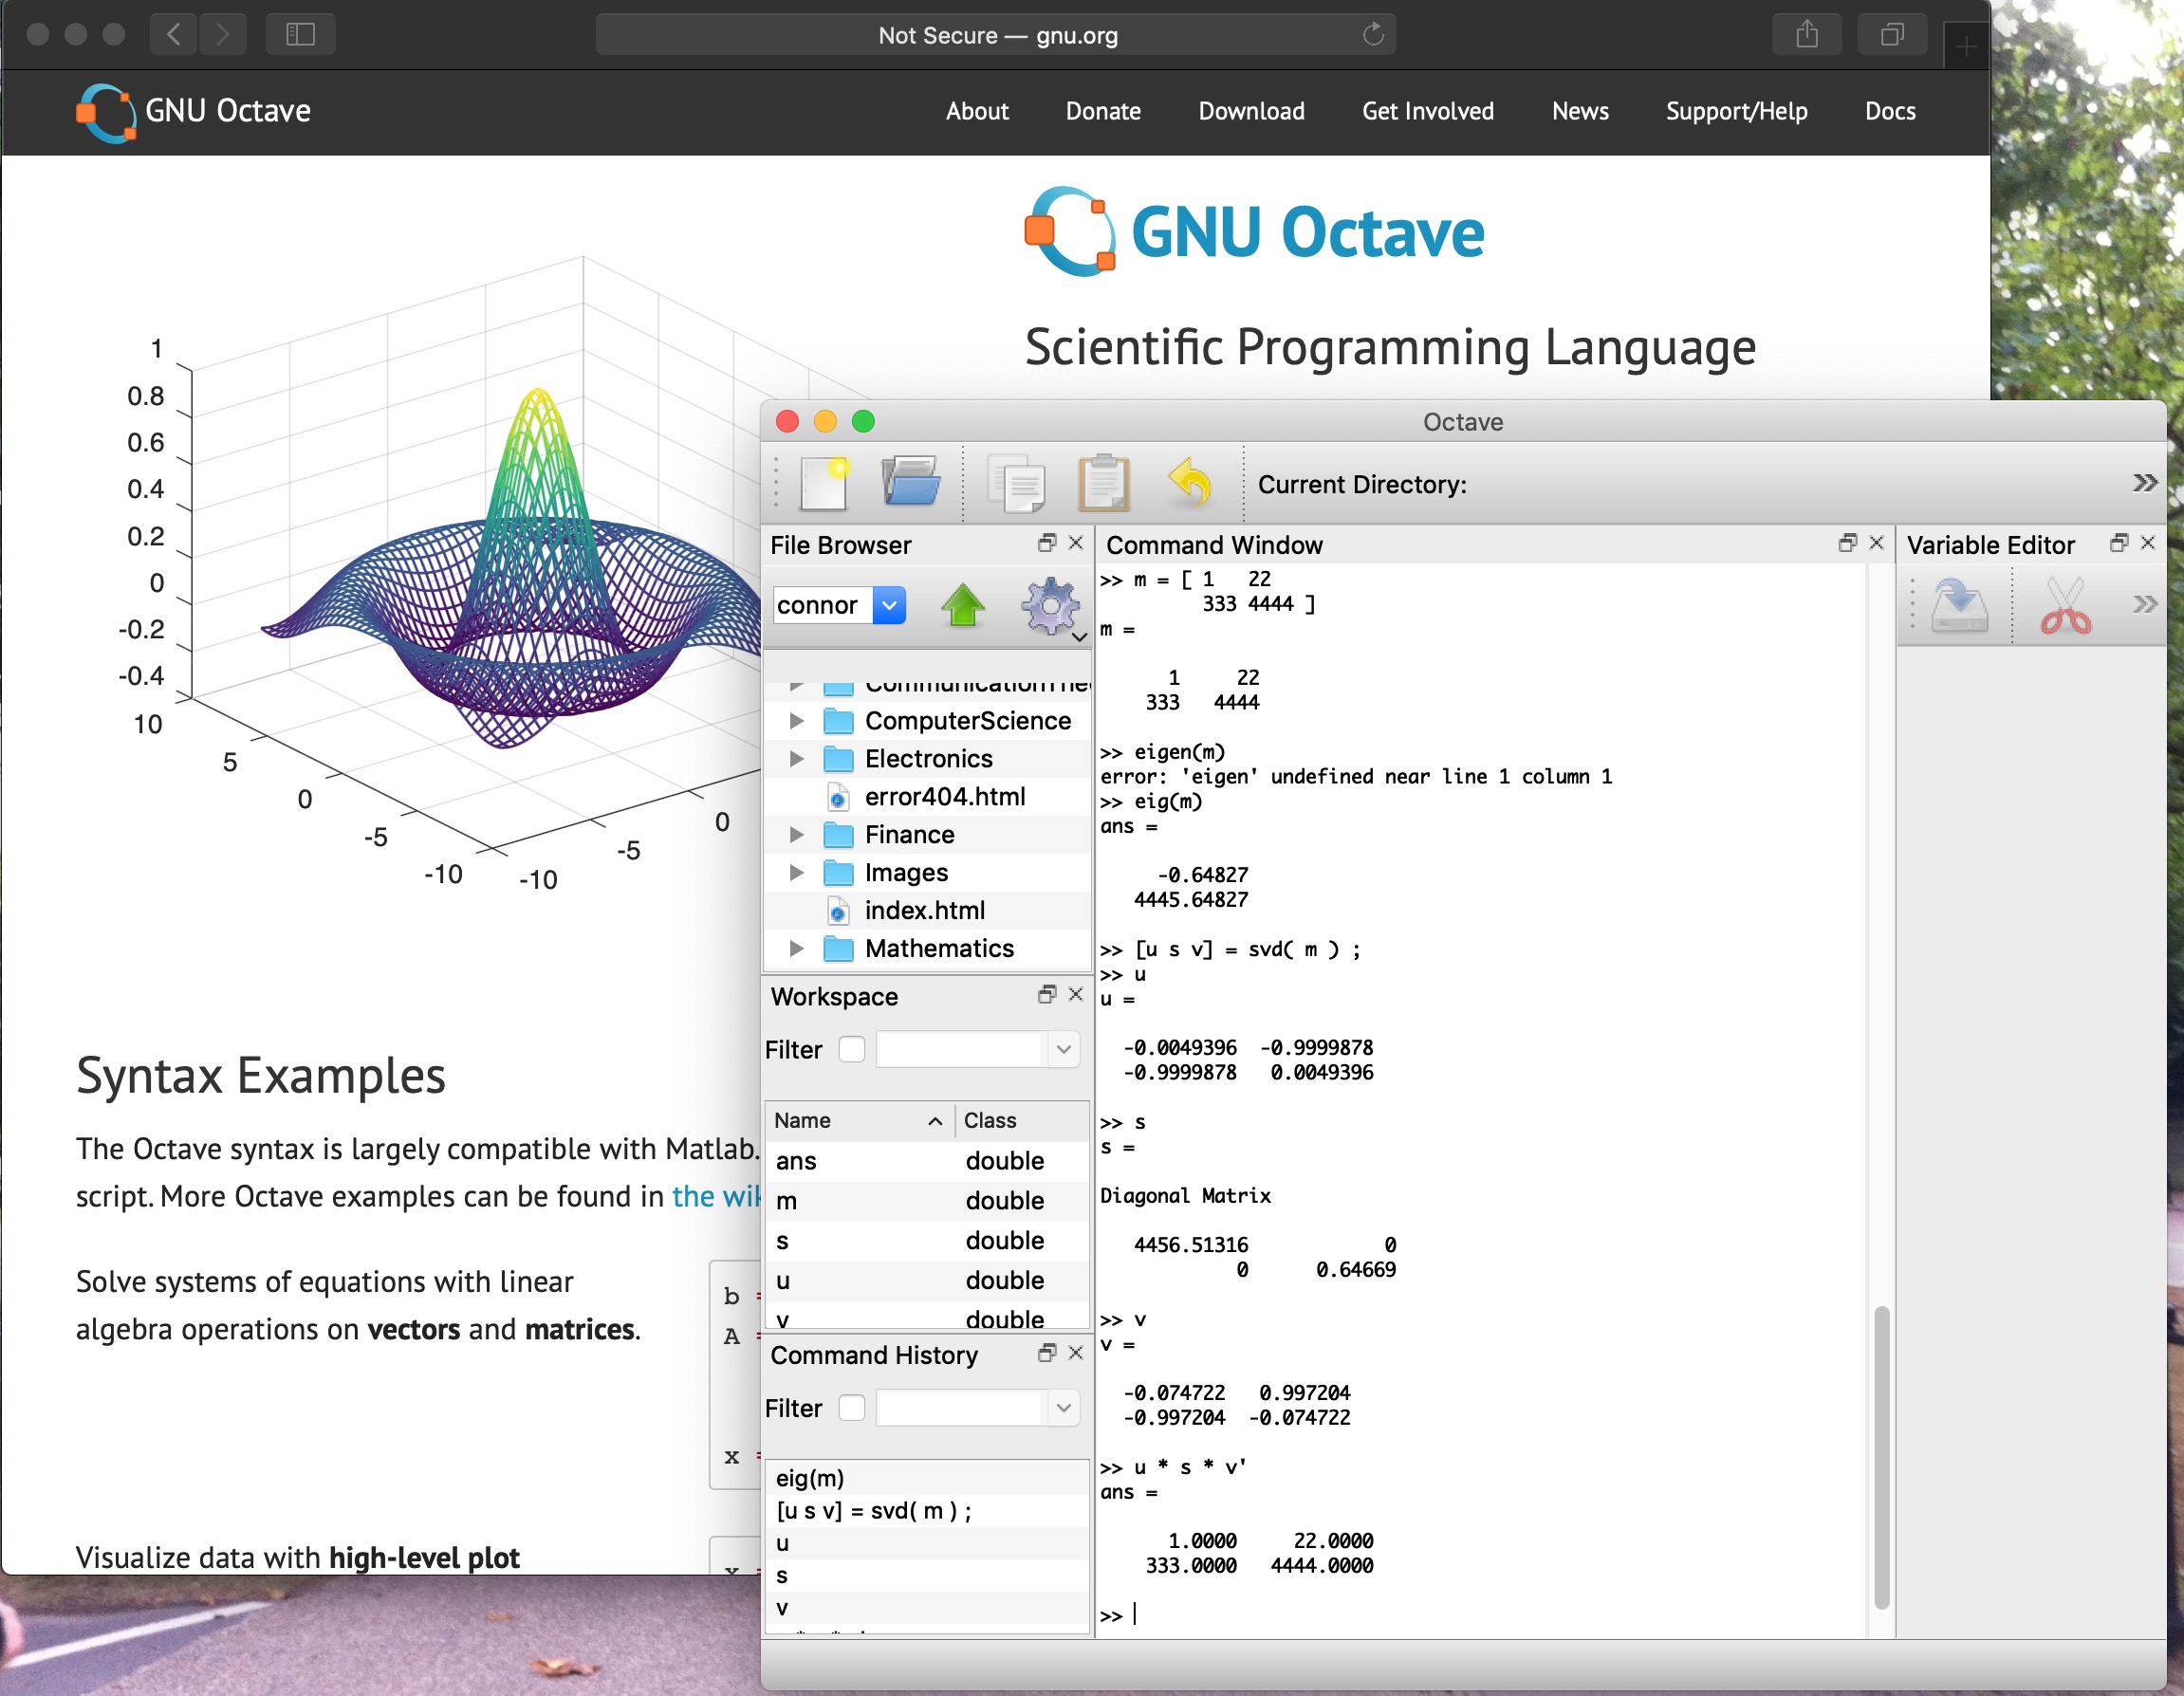
Octave
Octave is a free MATLAB clone.
Run Octave.app from /Applications. It comes up in a terminal window. In the window, cd to your working directory containing your MATLAB .m files. Type the name of your MATLAB function or type the name of the .m file if you have just an inline main program.
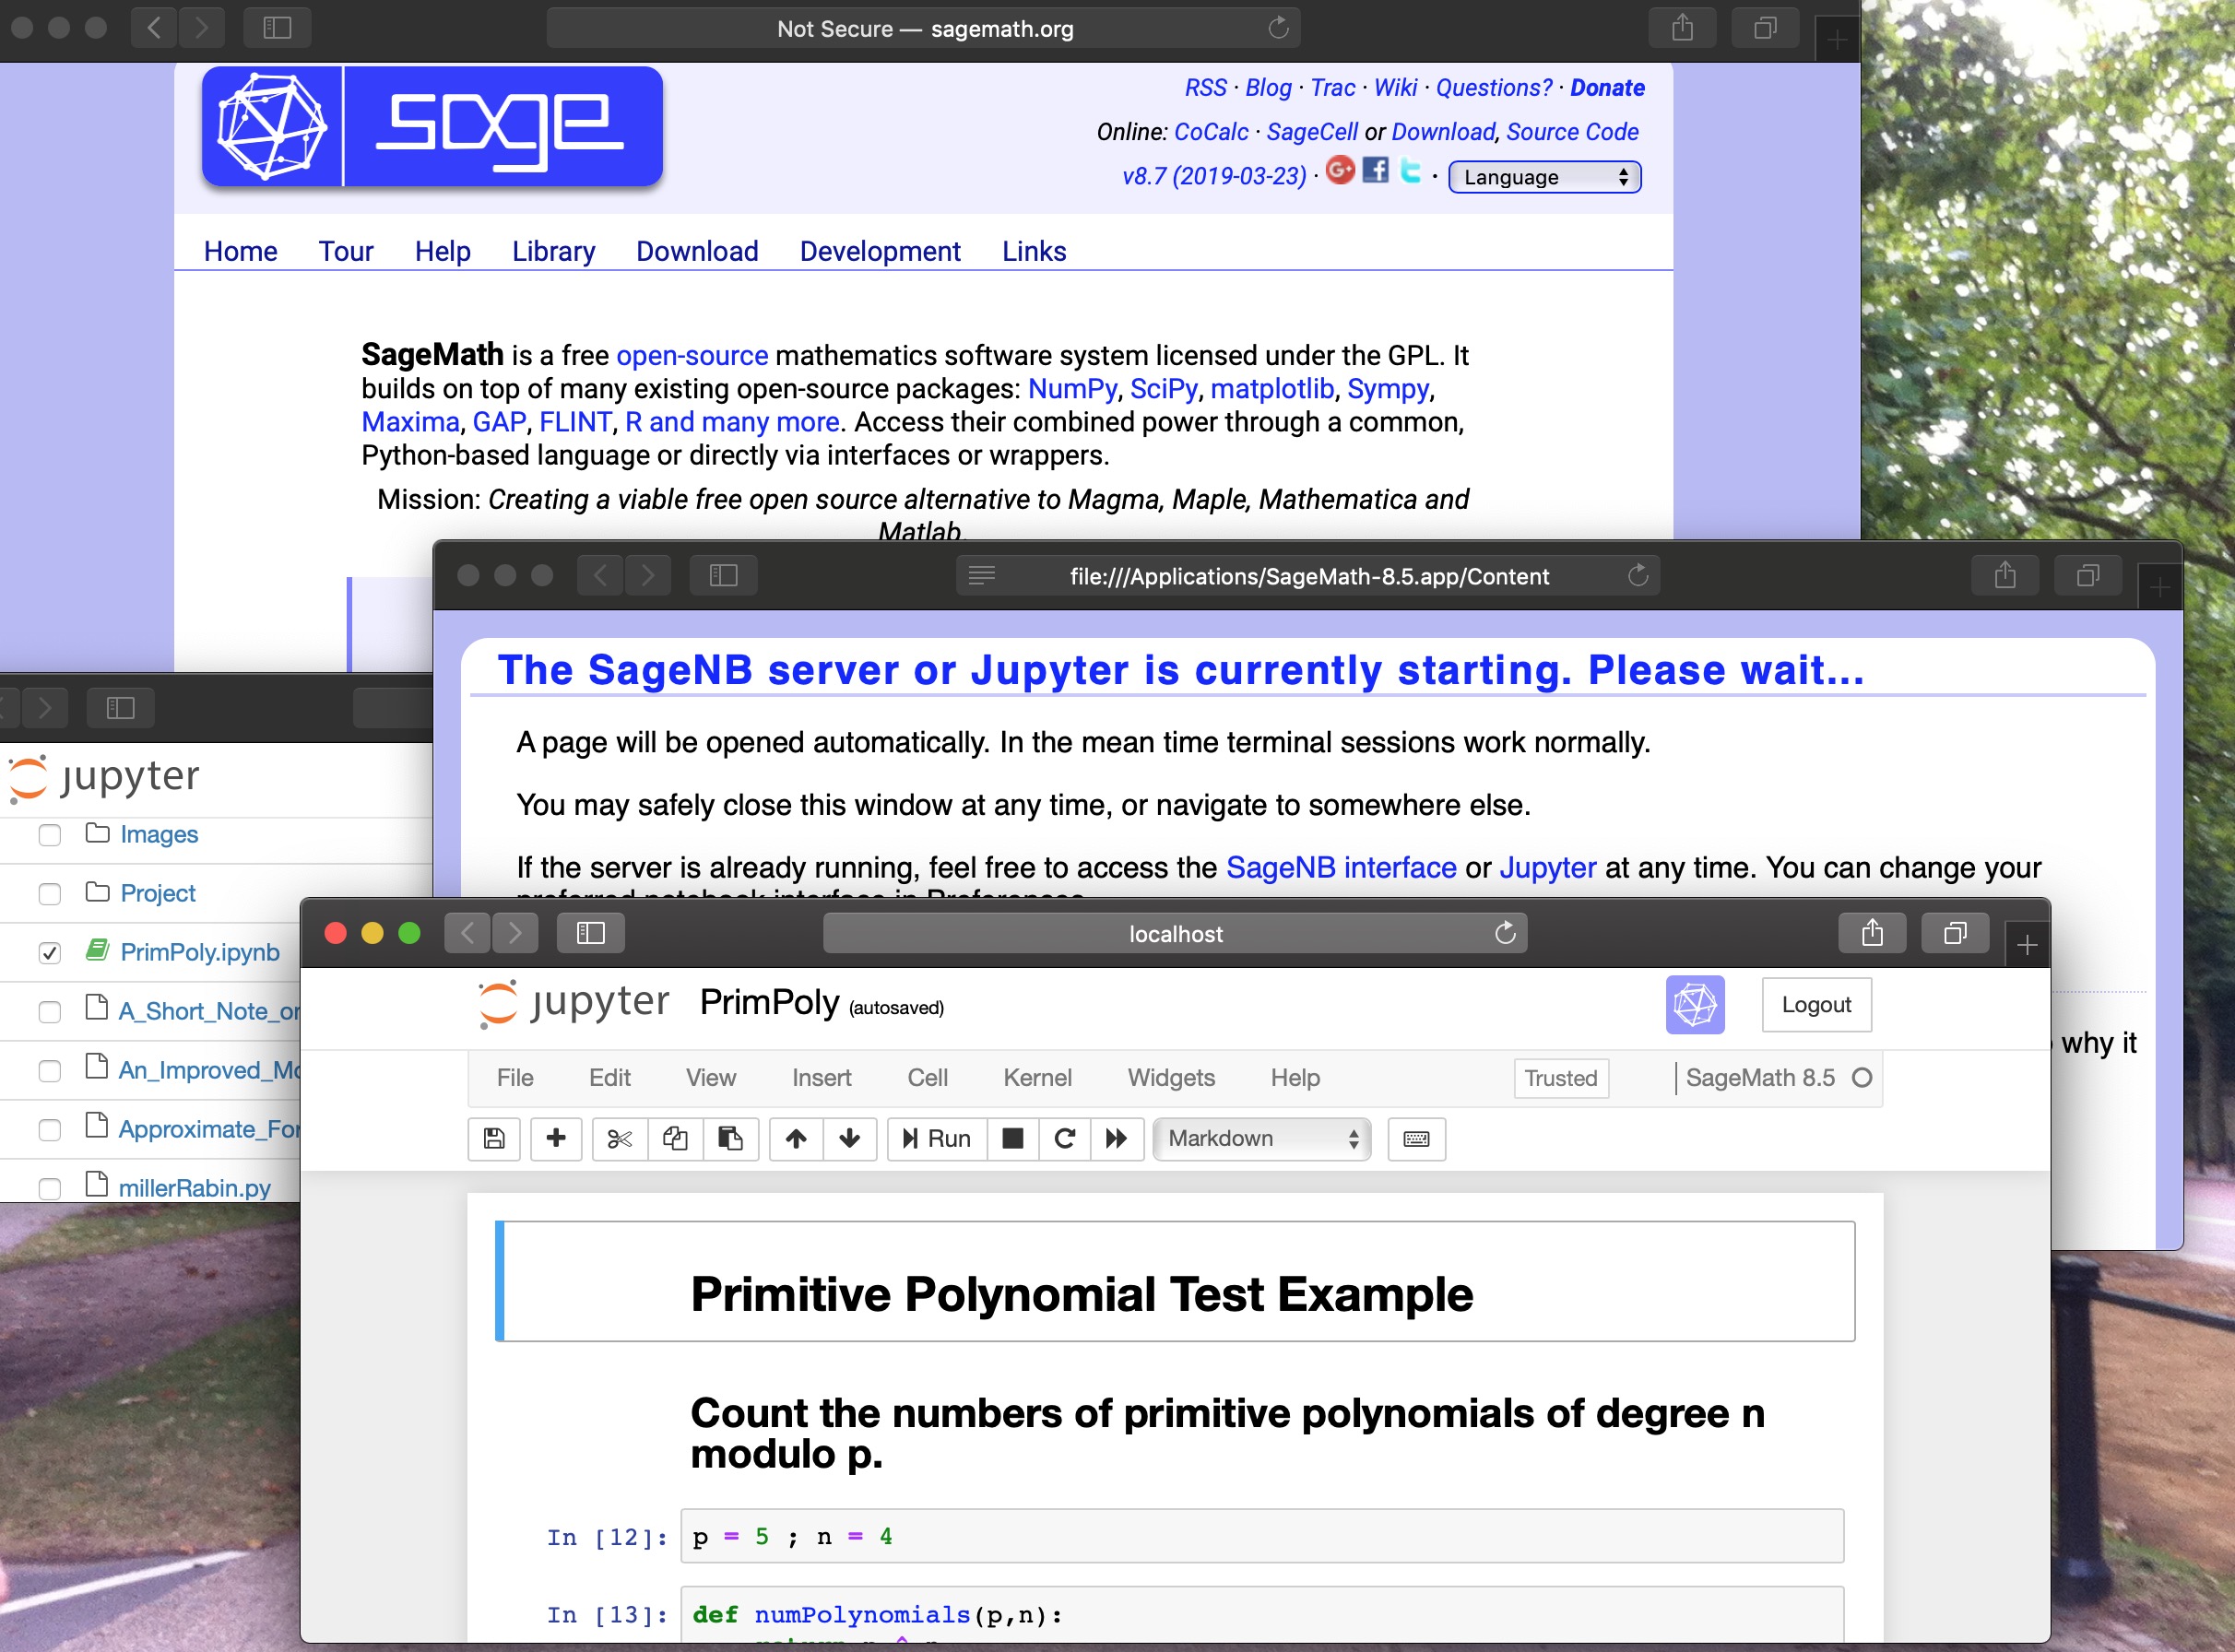
SageMath
SageMath is a free mathematics software system comparable to Mathematica. You can interact with it using the Jupyter notebook interface. Follow the download instructions. Double click to launch. When you launch it, it will open up a couple of windows in your default web browser. This takes a few minutes, so wait patiently.
I've used it on my primitive polynomial finder
R
R is a statistical and plotting language.
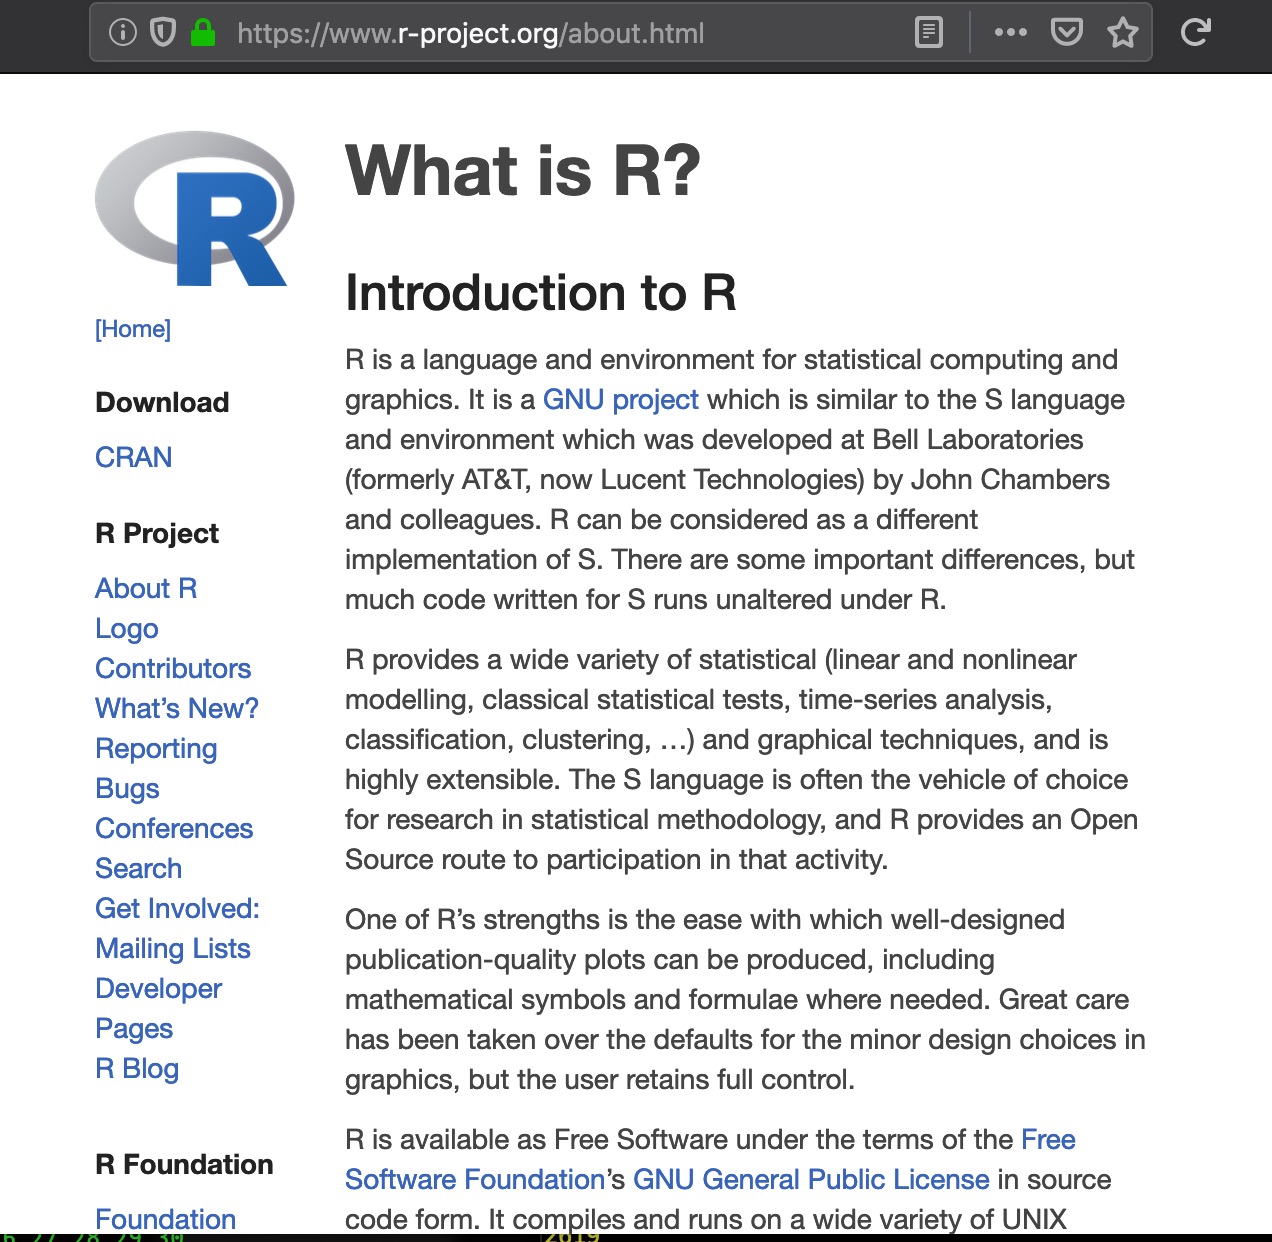
For the Mac you can Download R as a package. Be sure to check the signature of the *.pkg file before you install it.
EDITORS
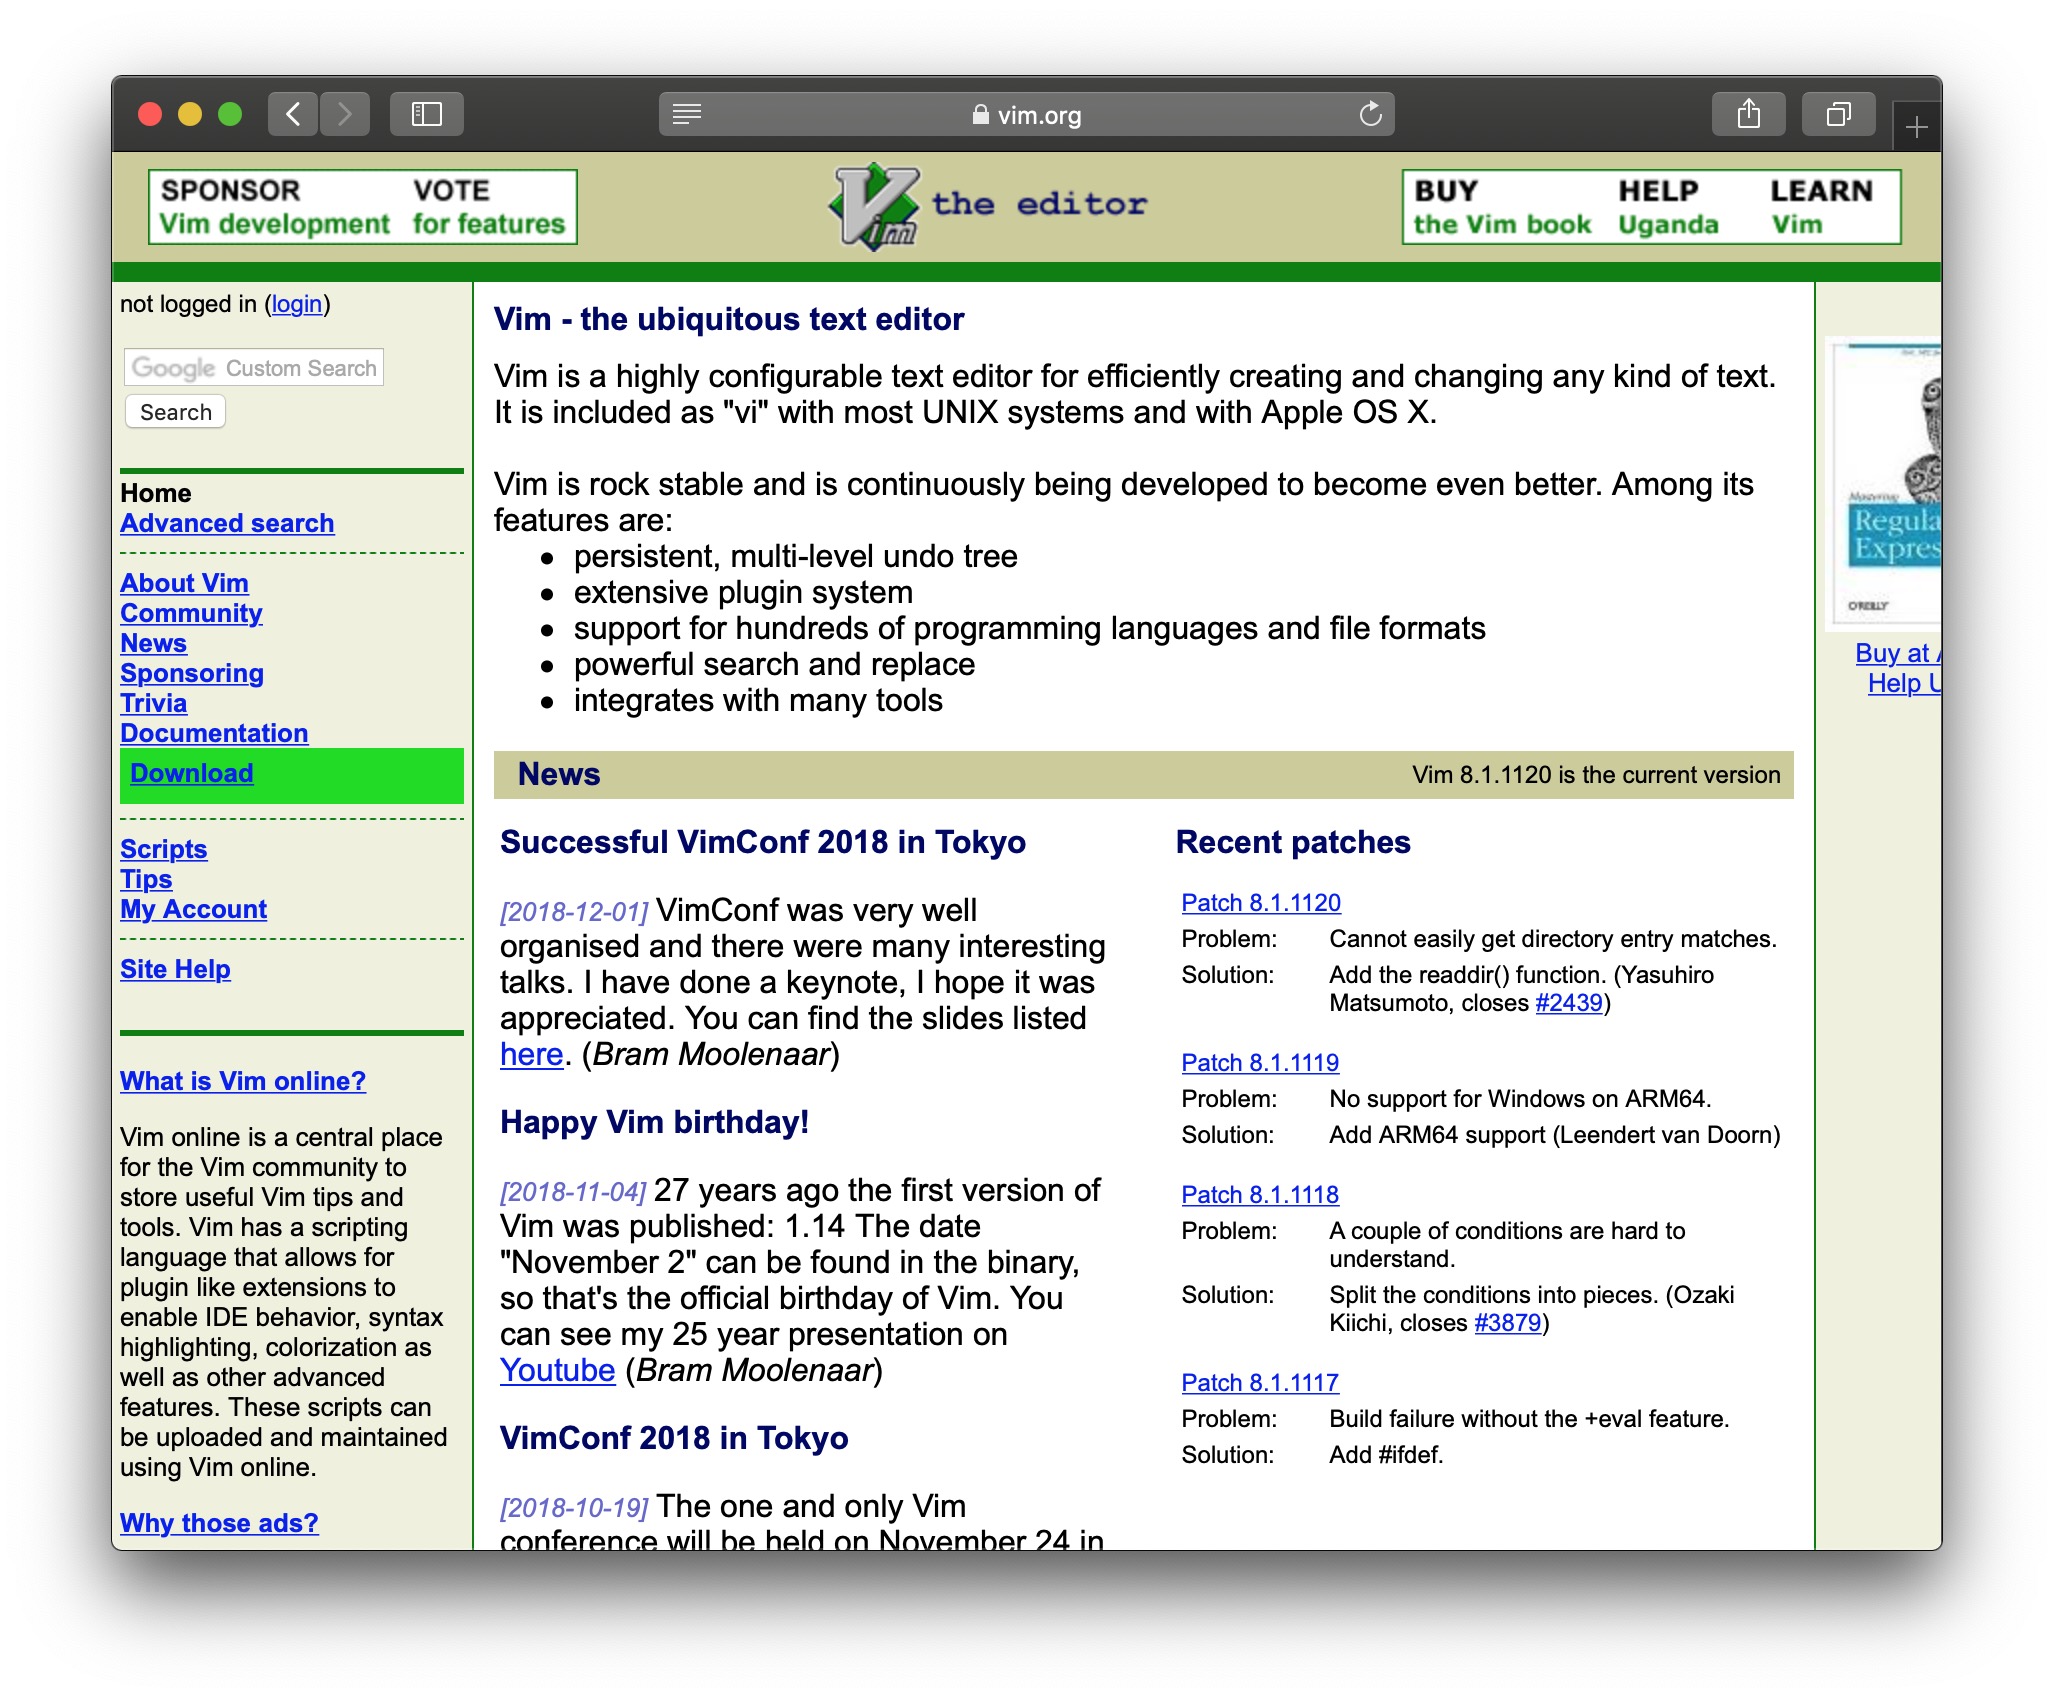
VIM Programmer's Editor
Download gvim from Vim for Mac and Ubuntu Linux. Don't forget the Vim User Manual and tutorial.
Don't forget to define the gvim function in your .bash_profile.
In Ubuntu Linux install gvim like this:
I've customized the Vim GUI in the startup file .vimrc which lives in the home directory ~ on Mac or Ubuntu Linux. Here is my .vimrc
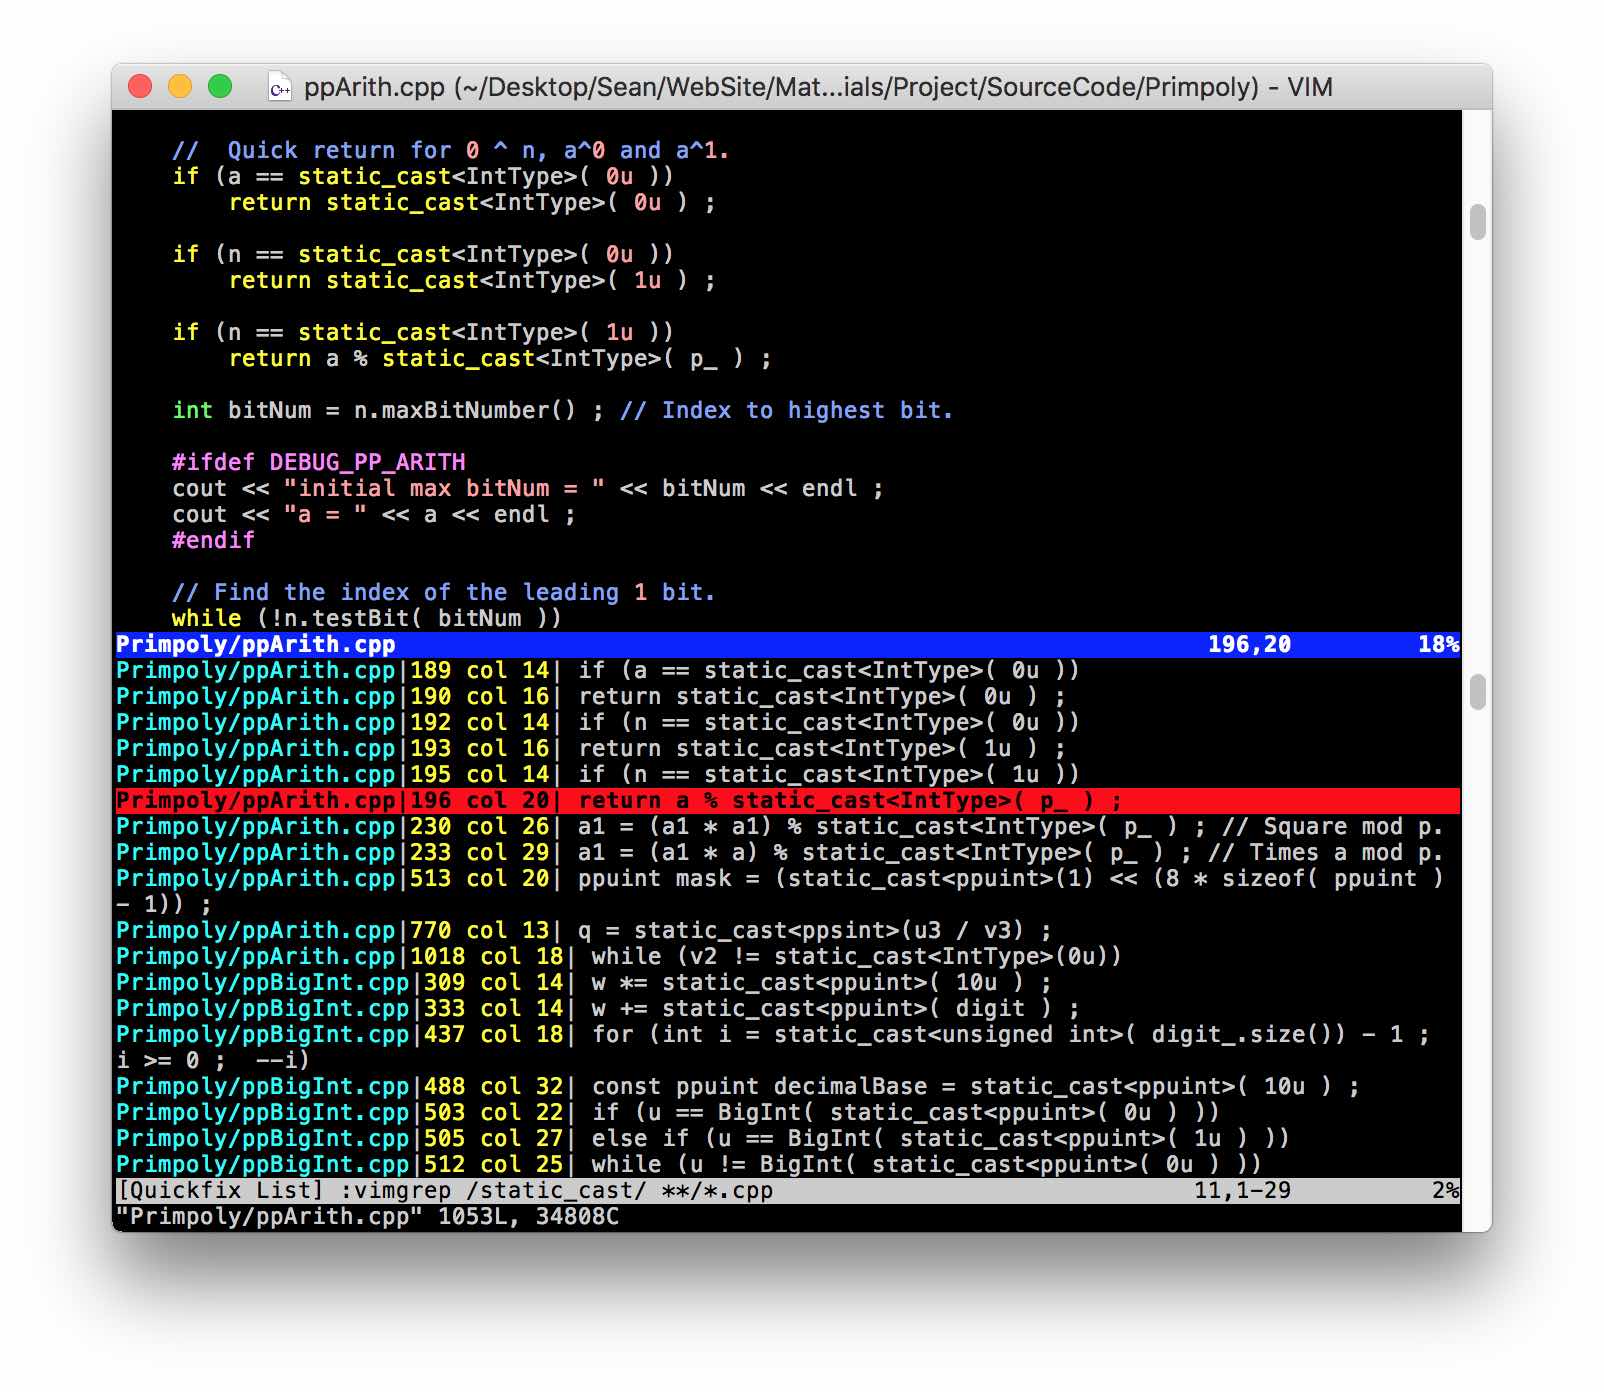
Searching Multiple Files in Vim
For example, to search all *.cpp files in the current directory for the word static_cast, do this on the vim command line:
You can then go to the line containing the pattern you want and hit return to go to the file.
Searching Patterns in Multiple Files in Vim
Or better yet, you can use ack instead of grep for searches using the ack.vim plugin
File Differences in Vim
To do file differences, load the first file, ignore whitespace with :diffopt=iwhite, then do :diffsplit <second file name>. :diffupdate will resync if needed.LibreOffice - Free Replacement for Microsoft Office
LibreOffice is free office suite compatible with Microsoft Office. Their apps can replace Excel, Word and PowerPoint. There are also Math and Database apps. LibreOffice apps can read Excel, Word and PowerPoint files, but may not be able to write recent versions of the file format. Say "yes" when the installer asks for permission to install and "yes" when LibreOffice asks to view documents in your directory.
ΤεΧ
For macOS download an install bundle from the MacTex TeX User's Group,

For Ubuntu Linux install using the install instructions,
Then try it out on a LaTeX file by processing it to a .pdf
View the .pdf file with either
or
Be sure to read the quickie introduction A (Not So) Short Introduction to LATEX2ε
Art Software
GIMP Paint Program
Similar to Adobe Photoshop with paint tools and layers, but free, GIMP runs on both Mac and Ubuntu Linux download it and its documentation from Gimp
Gimp
In Ubuntu Linux install with
Blender
Blender is a free 3D rendering and animation tool. I have a worked example on my art page.
Inkscape
I use Inkscape to do the drawing and generate SVG files.
To install on Ubuntu Linux,
Right click on the Dash, and Add to Favorites
INTERNET
Netzero ISP
I used connect to the internet through the dialup telephone line using Netzero but now I use AT&T Uverse.

FTP
On macOS I use the FTP client Transmit. Not free but very easy to use.
On Ubuntu Linux I use the free FTP client FileZilla. which is easily installed,
Web Browsers
Download the Firefox, Opera and Chromium browsers. Safari comes with MacOS.
Email Clients
On Ubuntu Linux install Thunderbird email,Zoom
Install Zoom client for virtual meetings with other humans.
Antivirus for Mac
Install free Avast Antivirus Mac because it's prudent.
GAMES
Stellarium
Stellarium is a free planetarium program.
 On Ubuntu Linux install using
Red Pill Screen Saver
Get the source code from GitHub opx3 / RedPill2. You can clone the repository using

Build in XCode in Release mode. Let XCode update your settings. Double click on RedPill.saver to load it.
Exif Metadata Read/Write Tool
Exiftool lets you view and rewrite metadata in files. For a book in PDF format, the title will be the file name and the author will be read from the metadata. Set the author using the command
APPENDIX
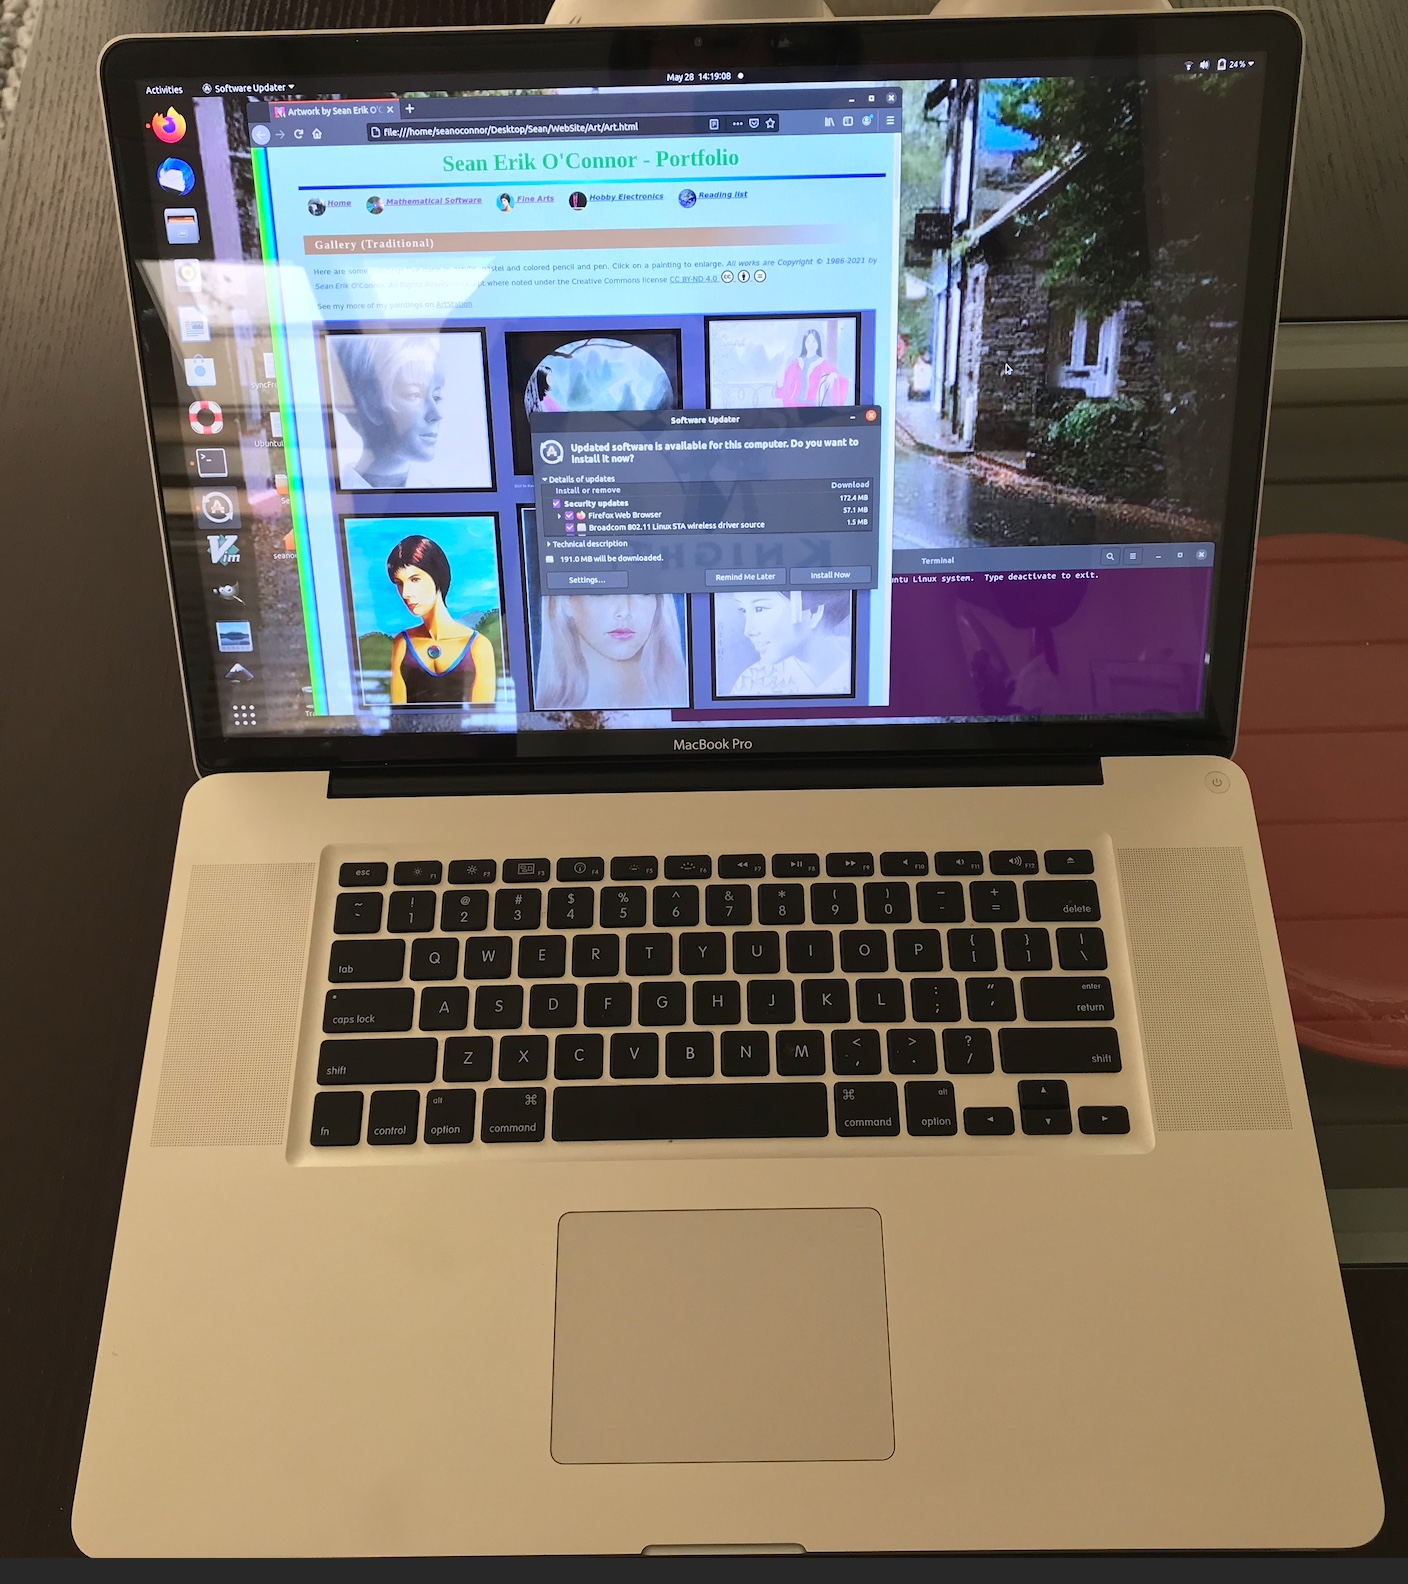
Installing Ubuntu Linux on a 2009 17 Inch MacBook
Too slow to really be useful, but here for fun.
Preliminaries
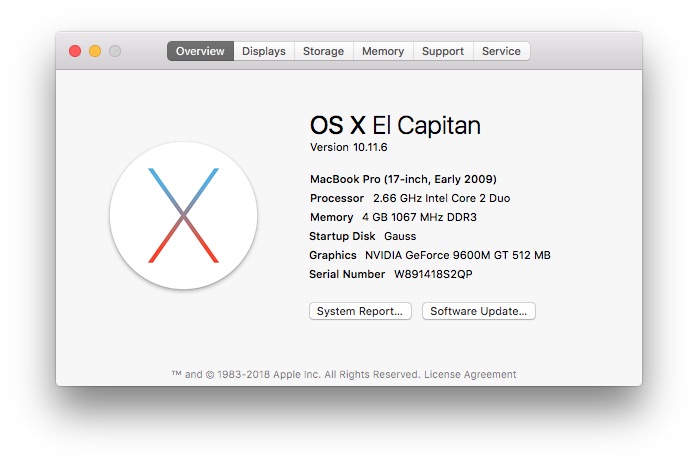
I will install on an old MacBook Pro (17-inch, Early 2009) running OS X El Capitan Version 10.11.6 (15G31).
You can read through these excellent guides on Install Linux on a Mac and how to dual boot Linux and macOS I took a little from both and from the Ubuntu web site documentation.
Installing the Boot Loader
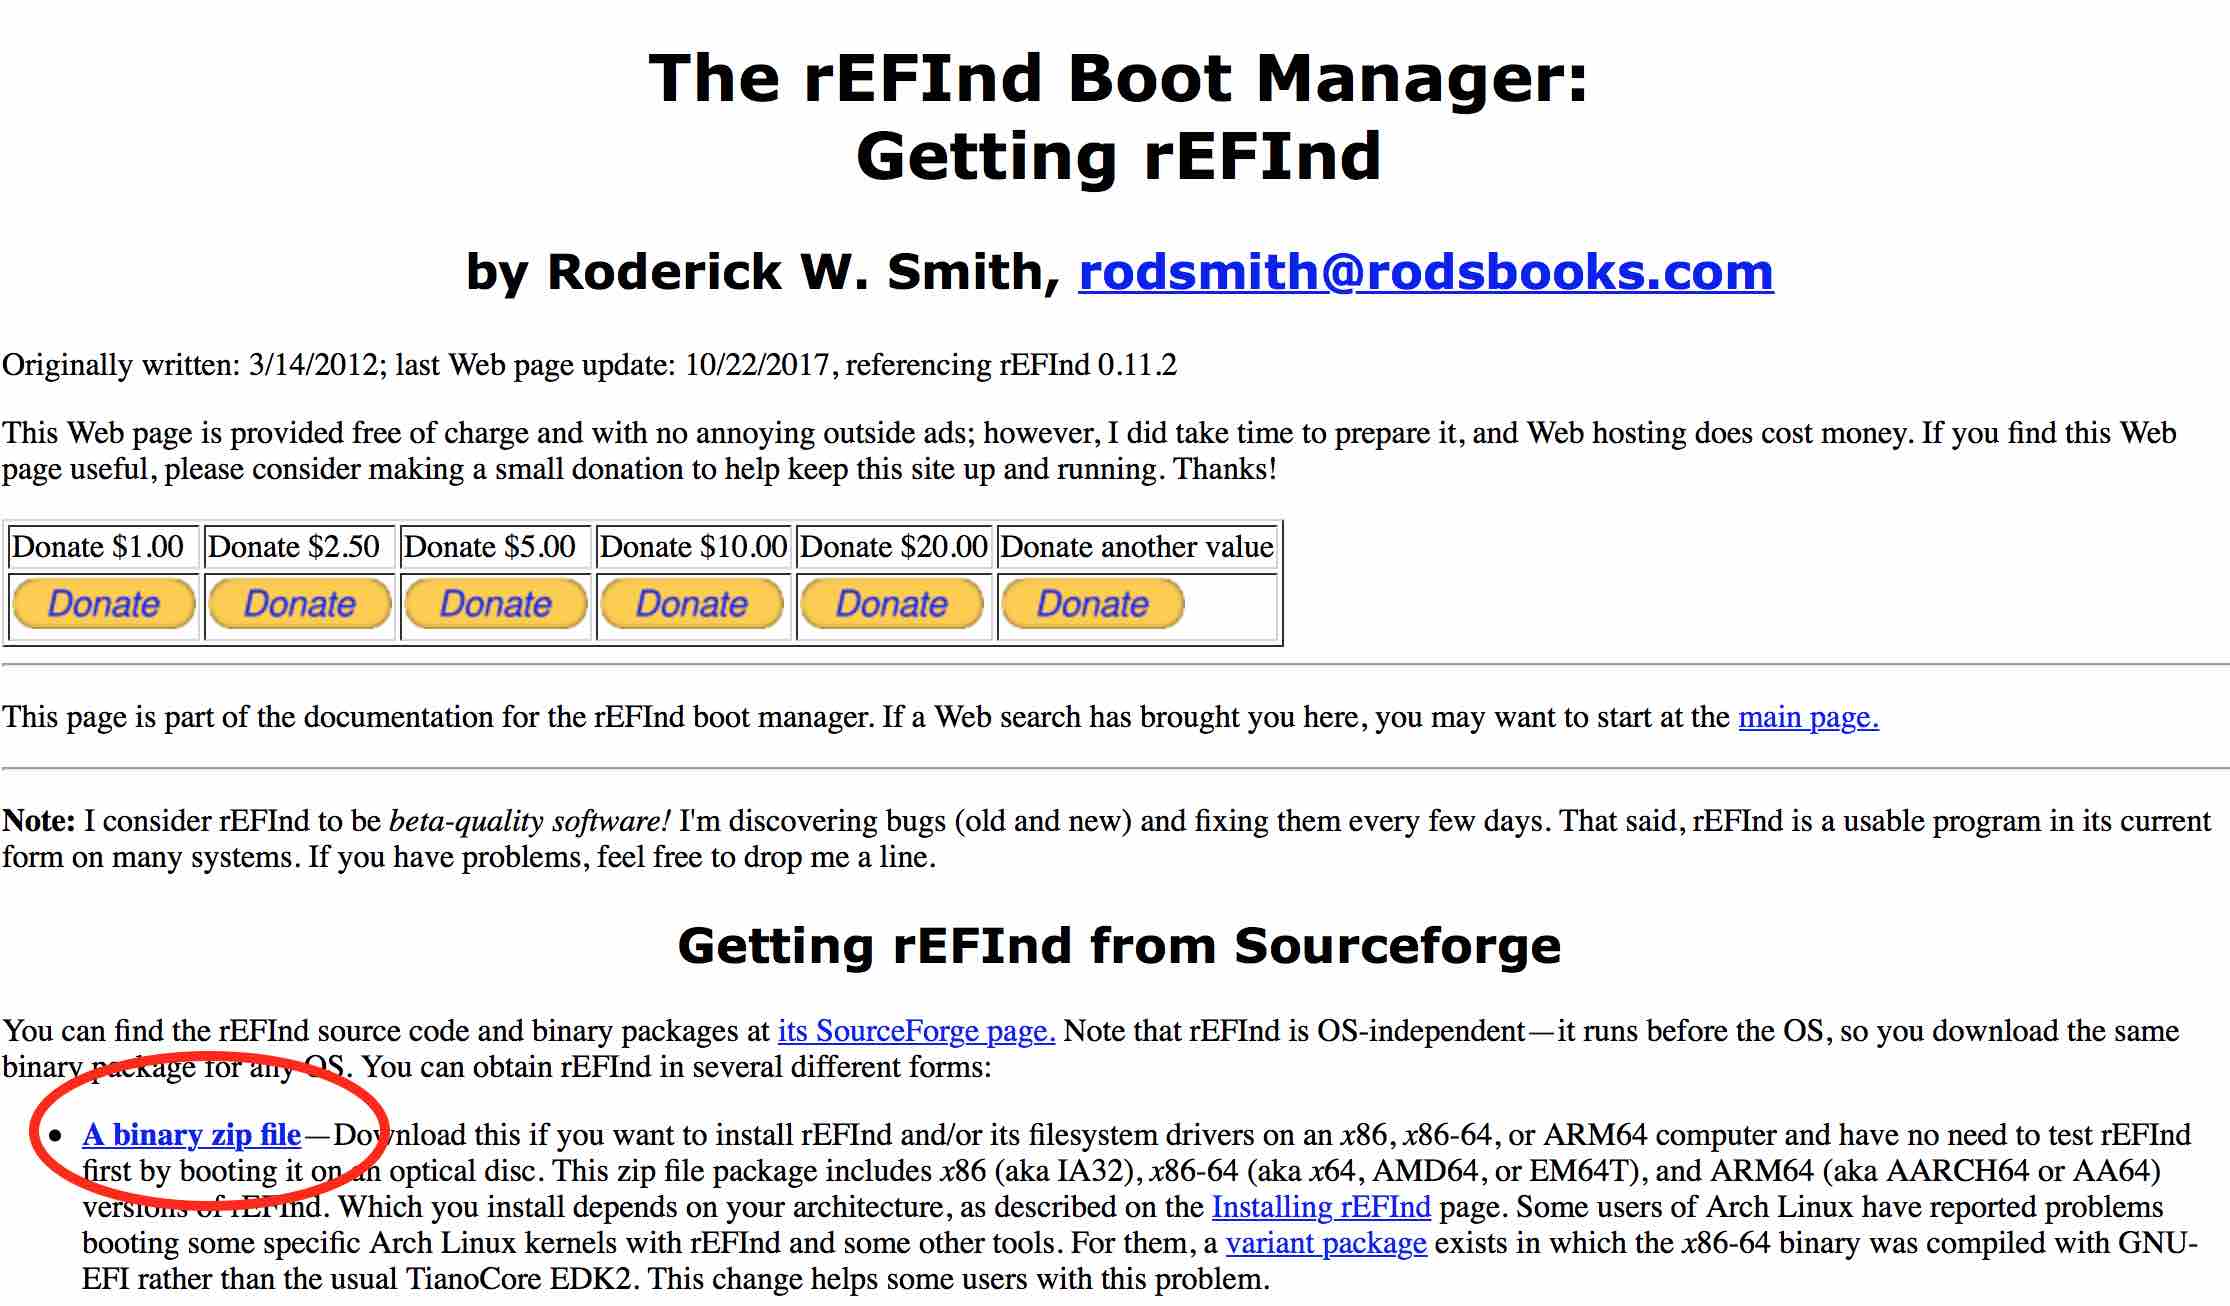
The Mac's own boot manager has problems recognizing the Ubuntu OS. Thus you need to install a third party EFI (Extensible Firmware Interface) boot manager to be able to dual boot the Mac into Ubuntu or macOS. Visit the rEFInd Boot Manager Web Page. Download rEFIfind version refind-bin-0.11.2.zip
Downloading rEFFind
Disable SIP (System Integrity Protection) so you can install the boot loader. Shut down the Mac for 30 seconds. Then reboot in recovery mode. You can hold down the Option key and select the Recovery Disk. Select Terminal from the OSX Utitities menu bar and type csrutil disable. Then reboot again.
Unzip and install. You'll see I've already installed it once before.rEFInd
Now Shut Down your Mac.
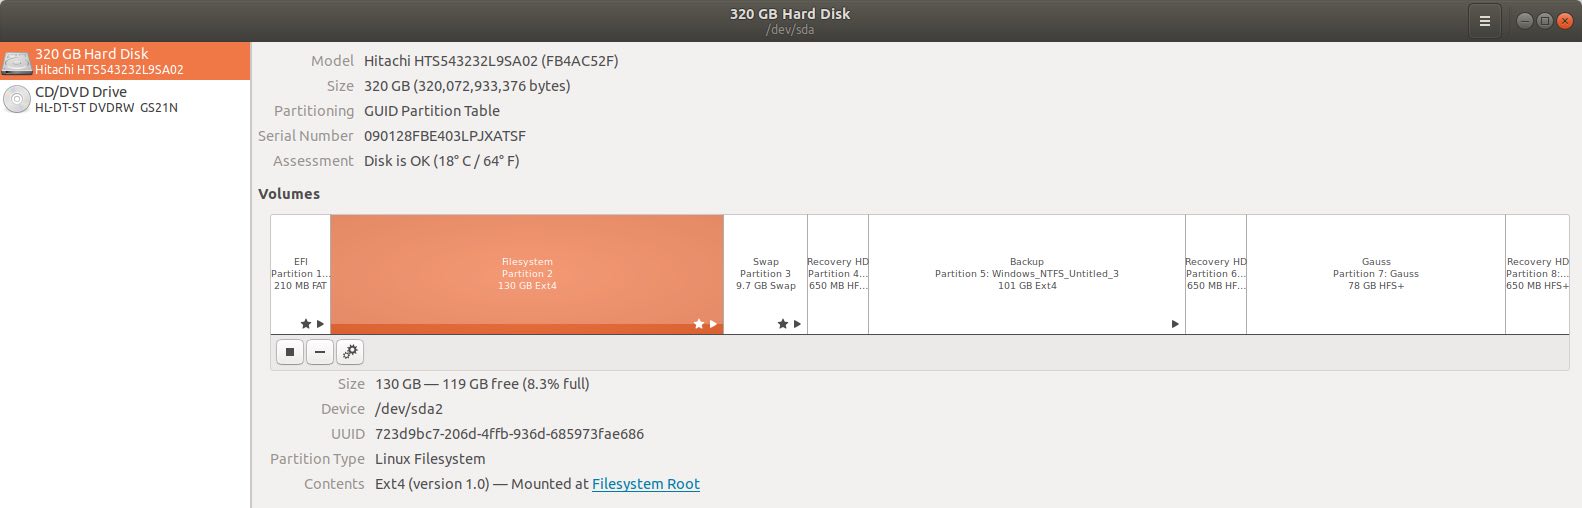
Disk Drive and Partitions
Bring up the Disk Utility and resize your macOS partition smaller to give more room to Ubuntu. If you have extra non-contiguous partitions which you cannot merge, you can at least format them as ExFat so Linux can see them later.
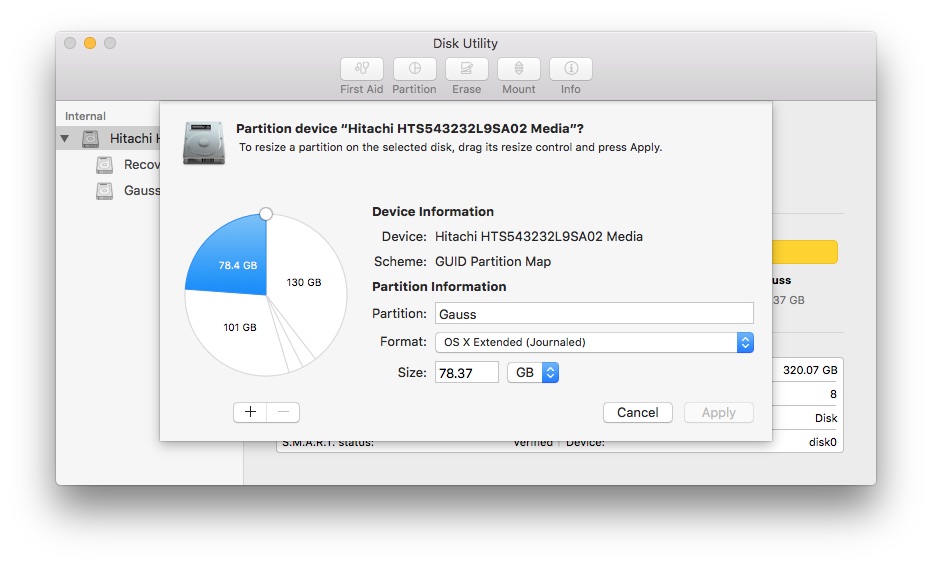
In detail, here are our disk partititions,
Create a Bootable Ubuntu USB Stick
Download Ubuntu Desktop, version Ubuntu 22.04.1 LTS (Jammy Jellyfish). You'll get a file in your Downloads folder called ubuntu-22.04.1-desktop-amd64.iso
Create a Bootable USB Stick for Mac. I'll go through a worked example below.
You'll need a 2GB USB thumb drive or larger. Insert it and bring up Disk Utility with the option of Show All Devices

Select the device, not the volume. Make sure it's NOT you hard drive or backup drive!
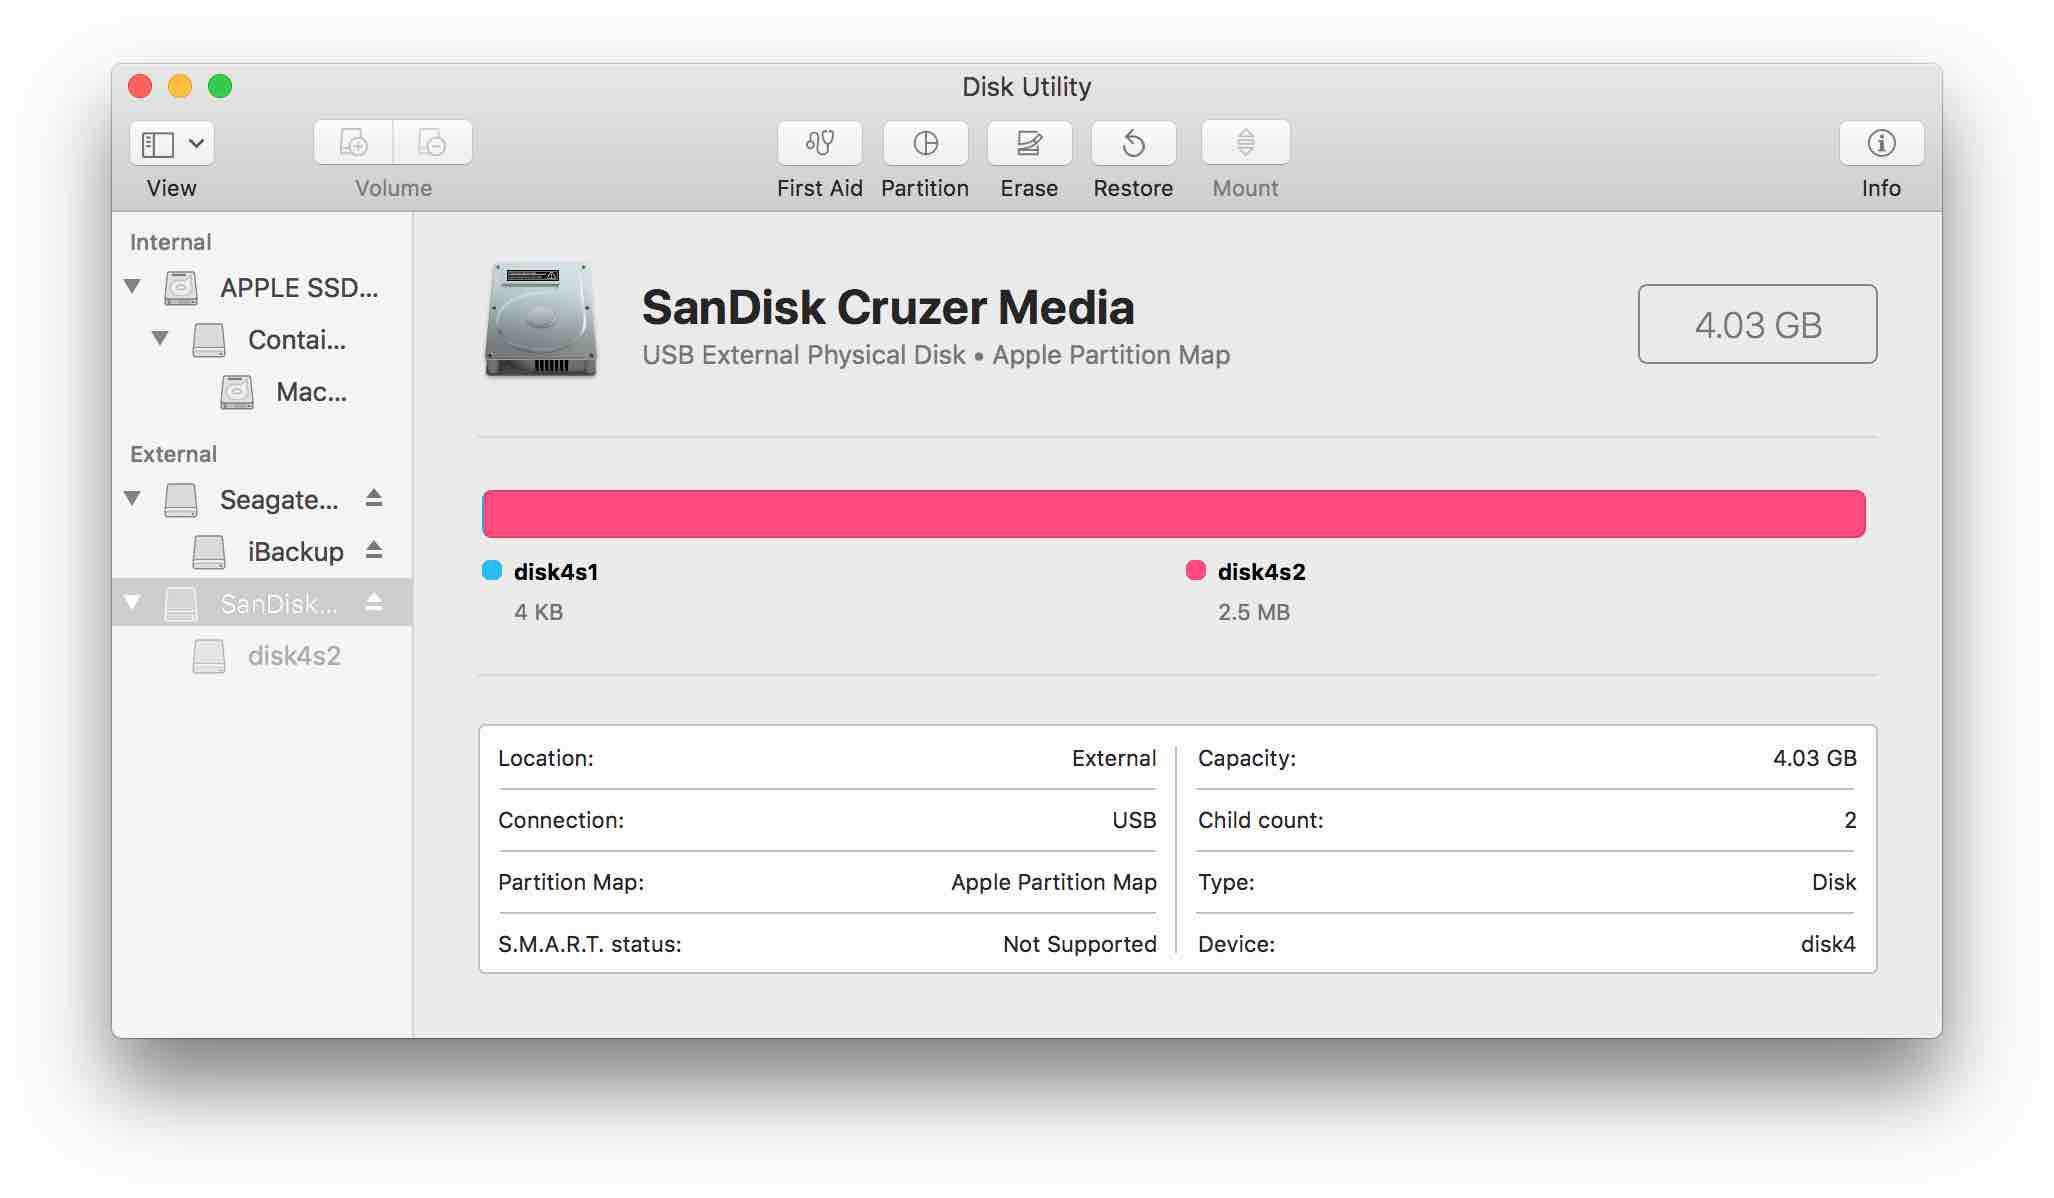
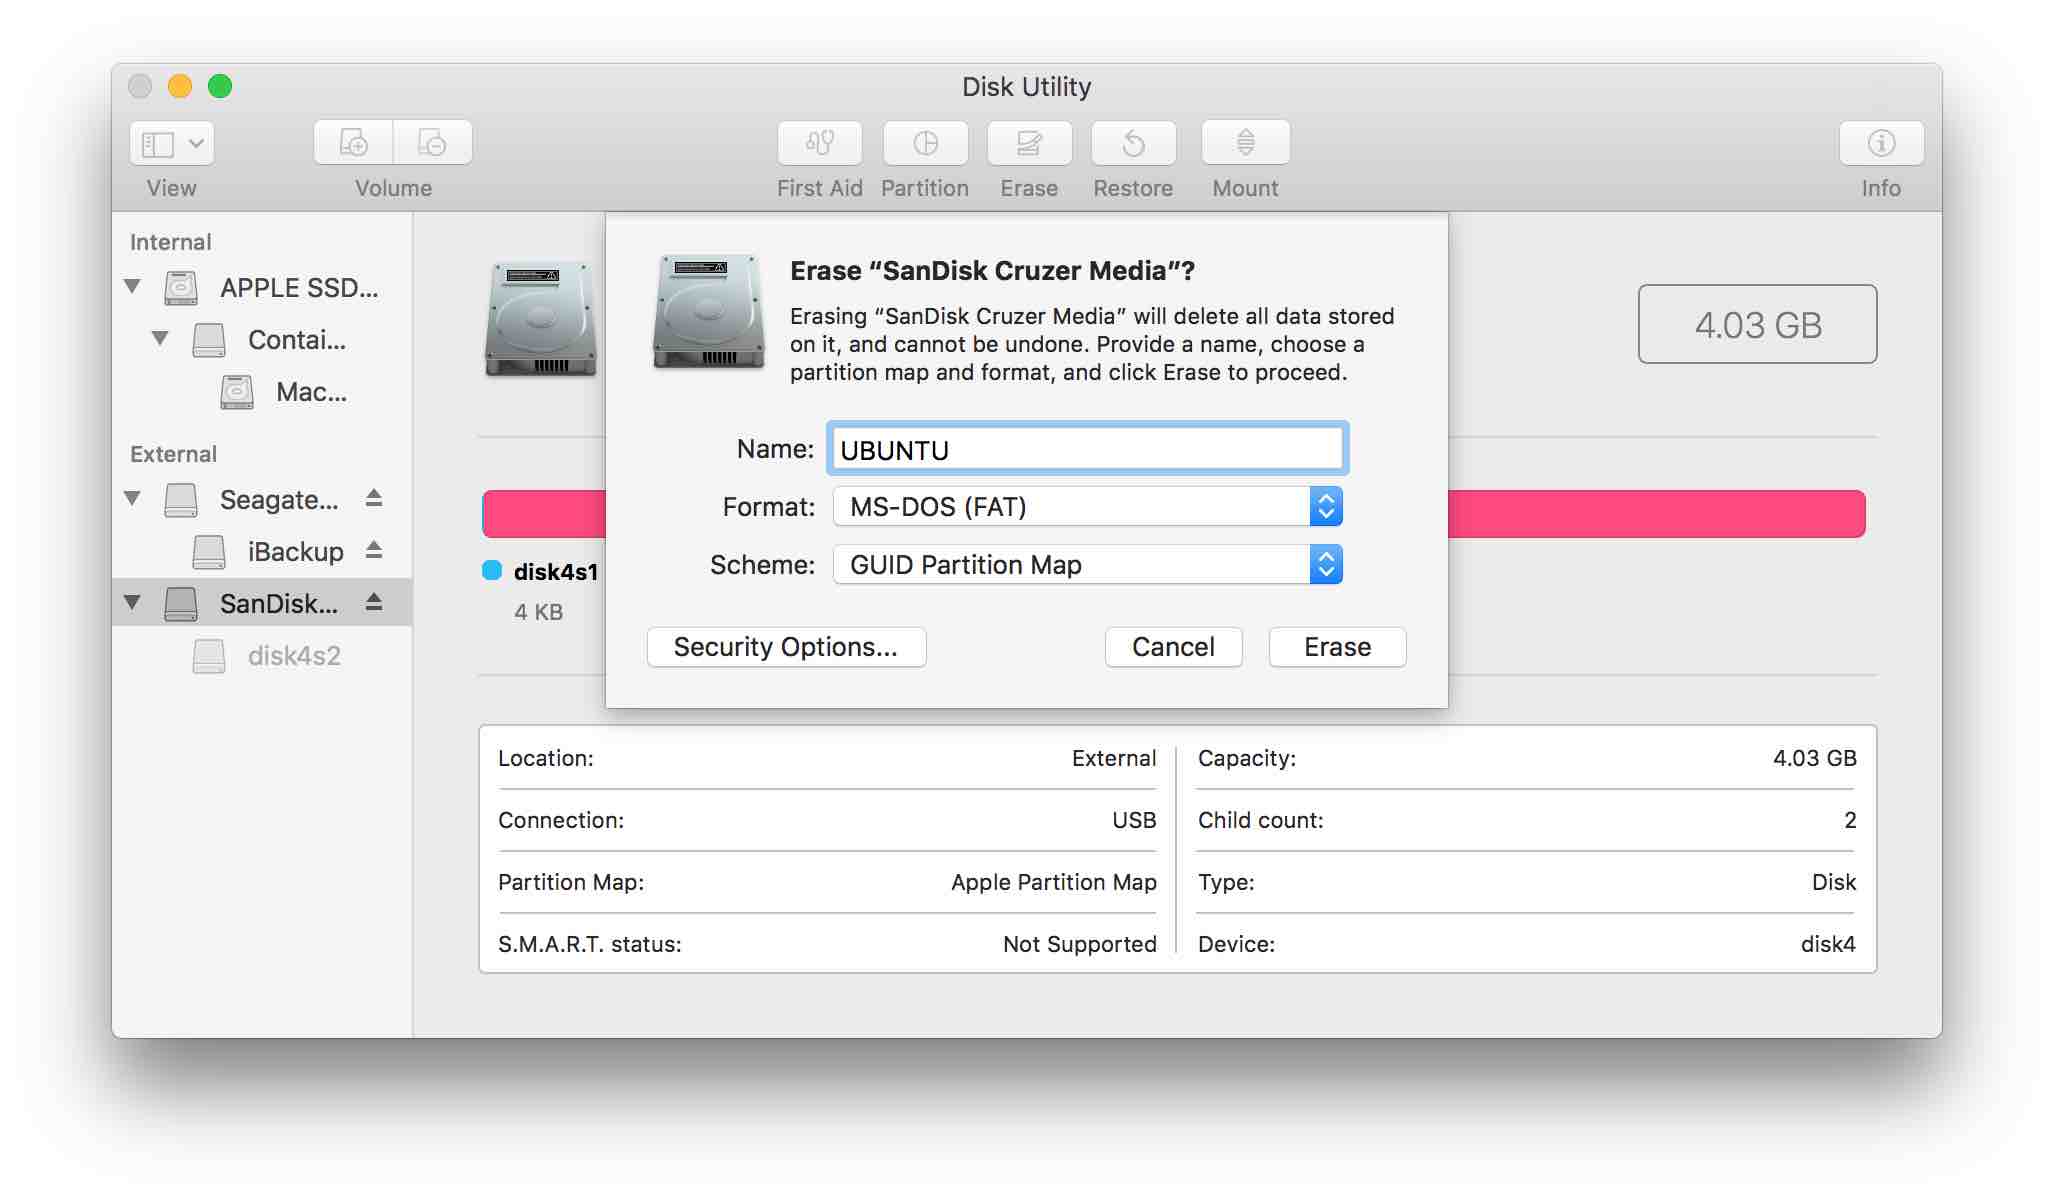
Now erase the disk specifying format = MS-DOS (FAT) and Scheme = GUID Partition Map
Next, install the open source utility Etcher, downloading the version for macOS.
 Now run it, selecting the Ubuntu ISO file and the thumb drive the push Flash.
Etcher will ask for your system password and give you an estimated time.
Now run it, selecting the Ubuntu ISO file and the thumb drive the push Flash.
Etcher will ask for your system password and give you an estimated time.
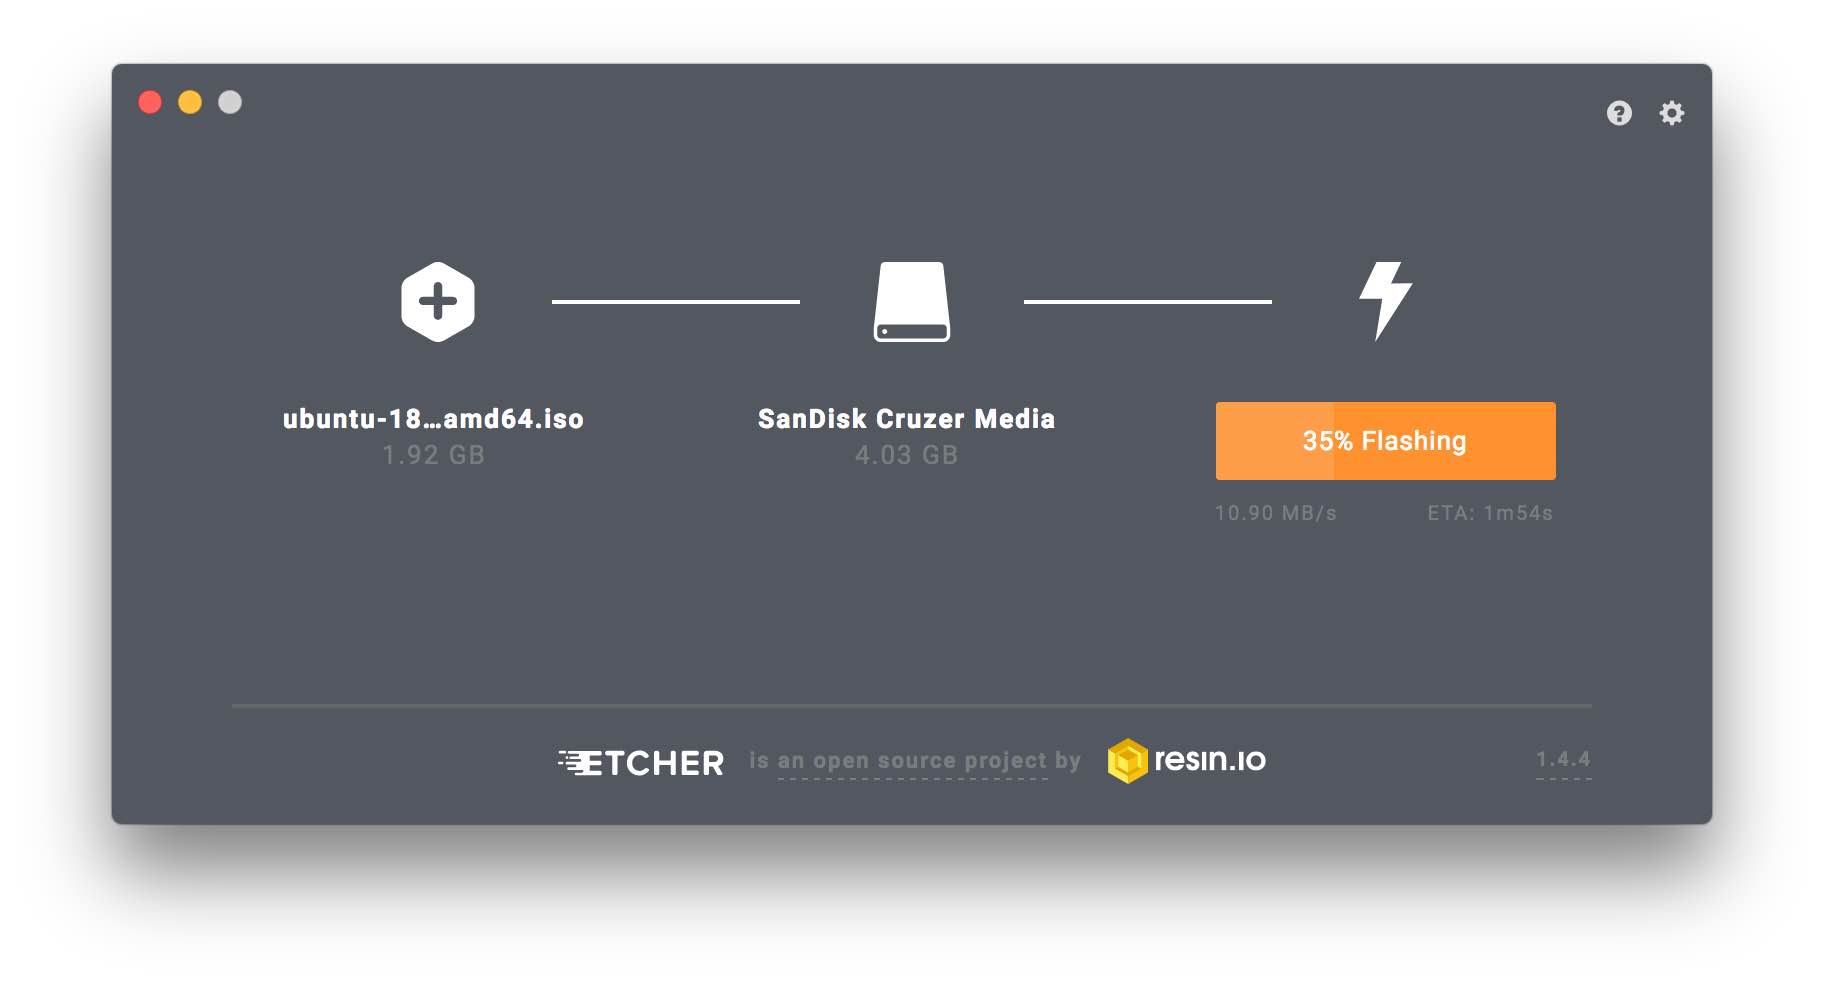
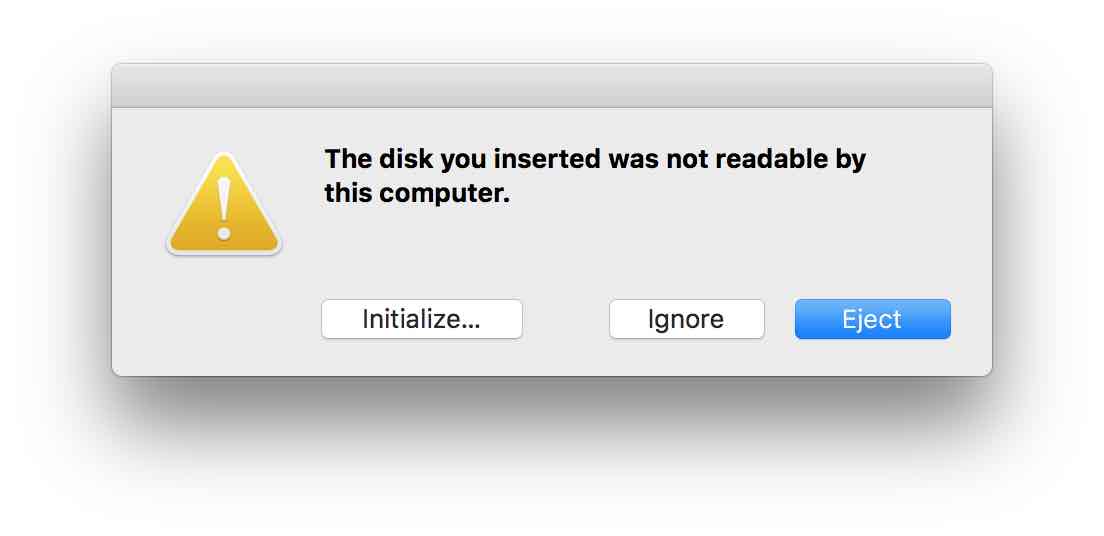
After completion, select Eject
Install Ubuntu
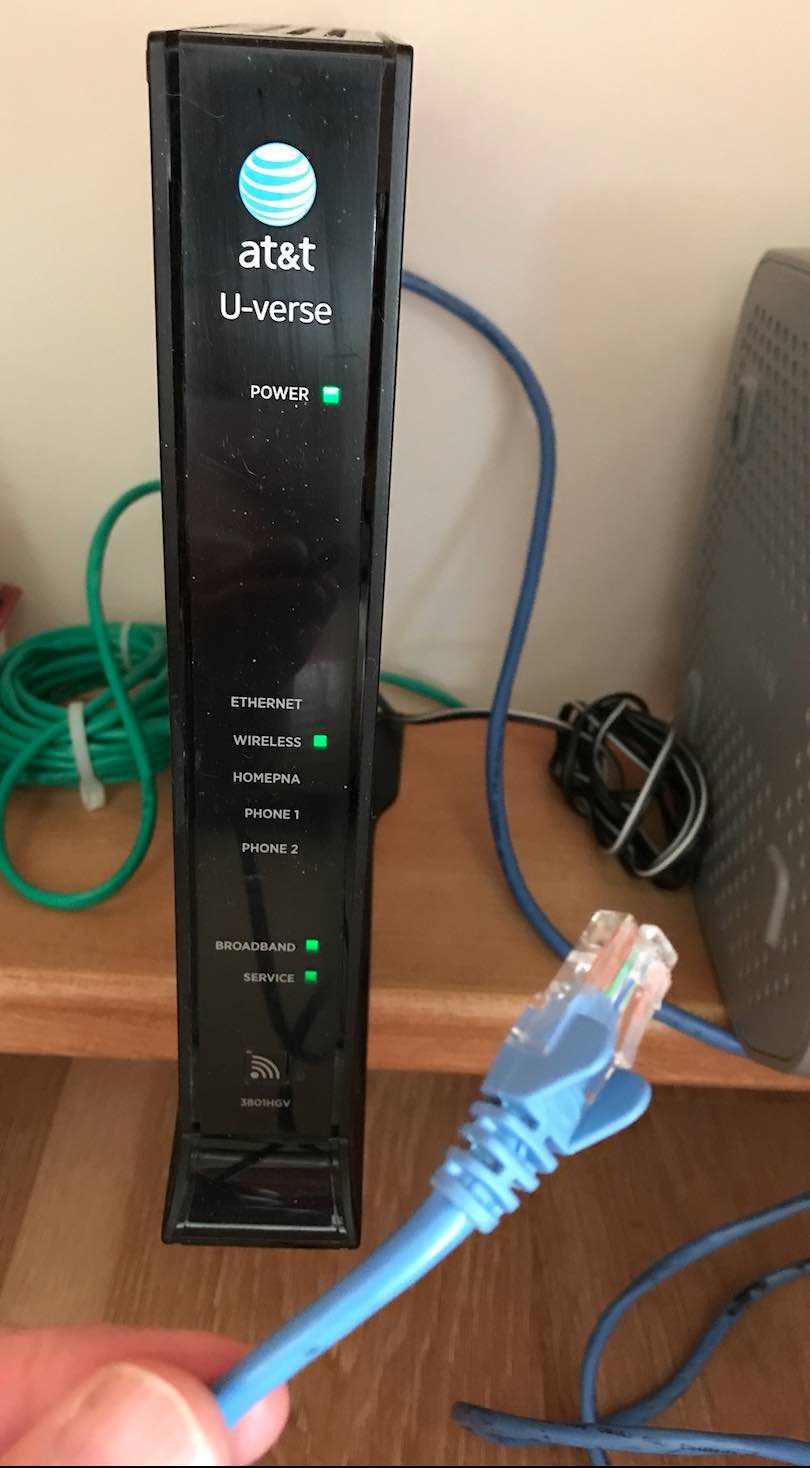
Connect an Ethernet cable to your Internet Service Provider and the other end to your Mac; use a USB to Ethernet dongle if you don't have a native Ethernet port on your Mac.
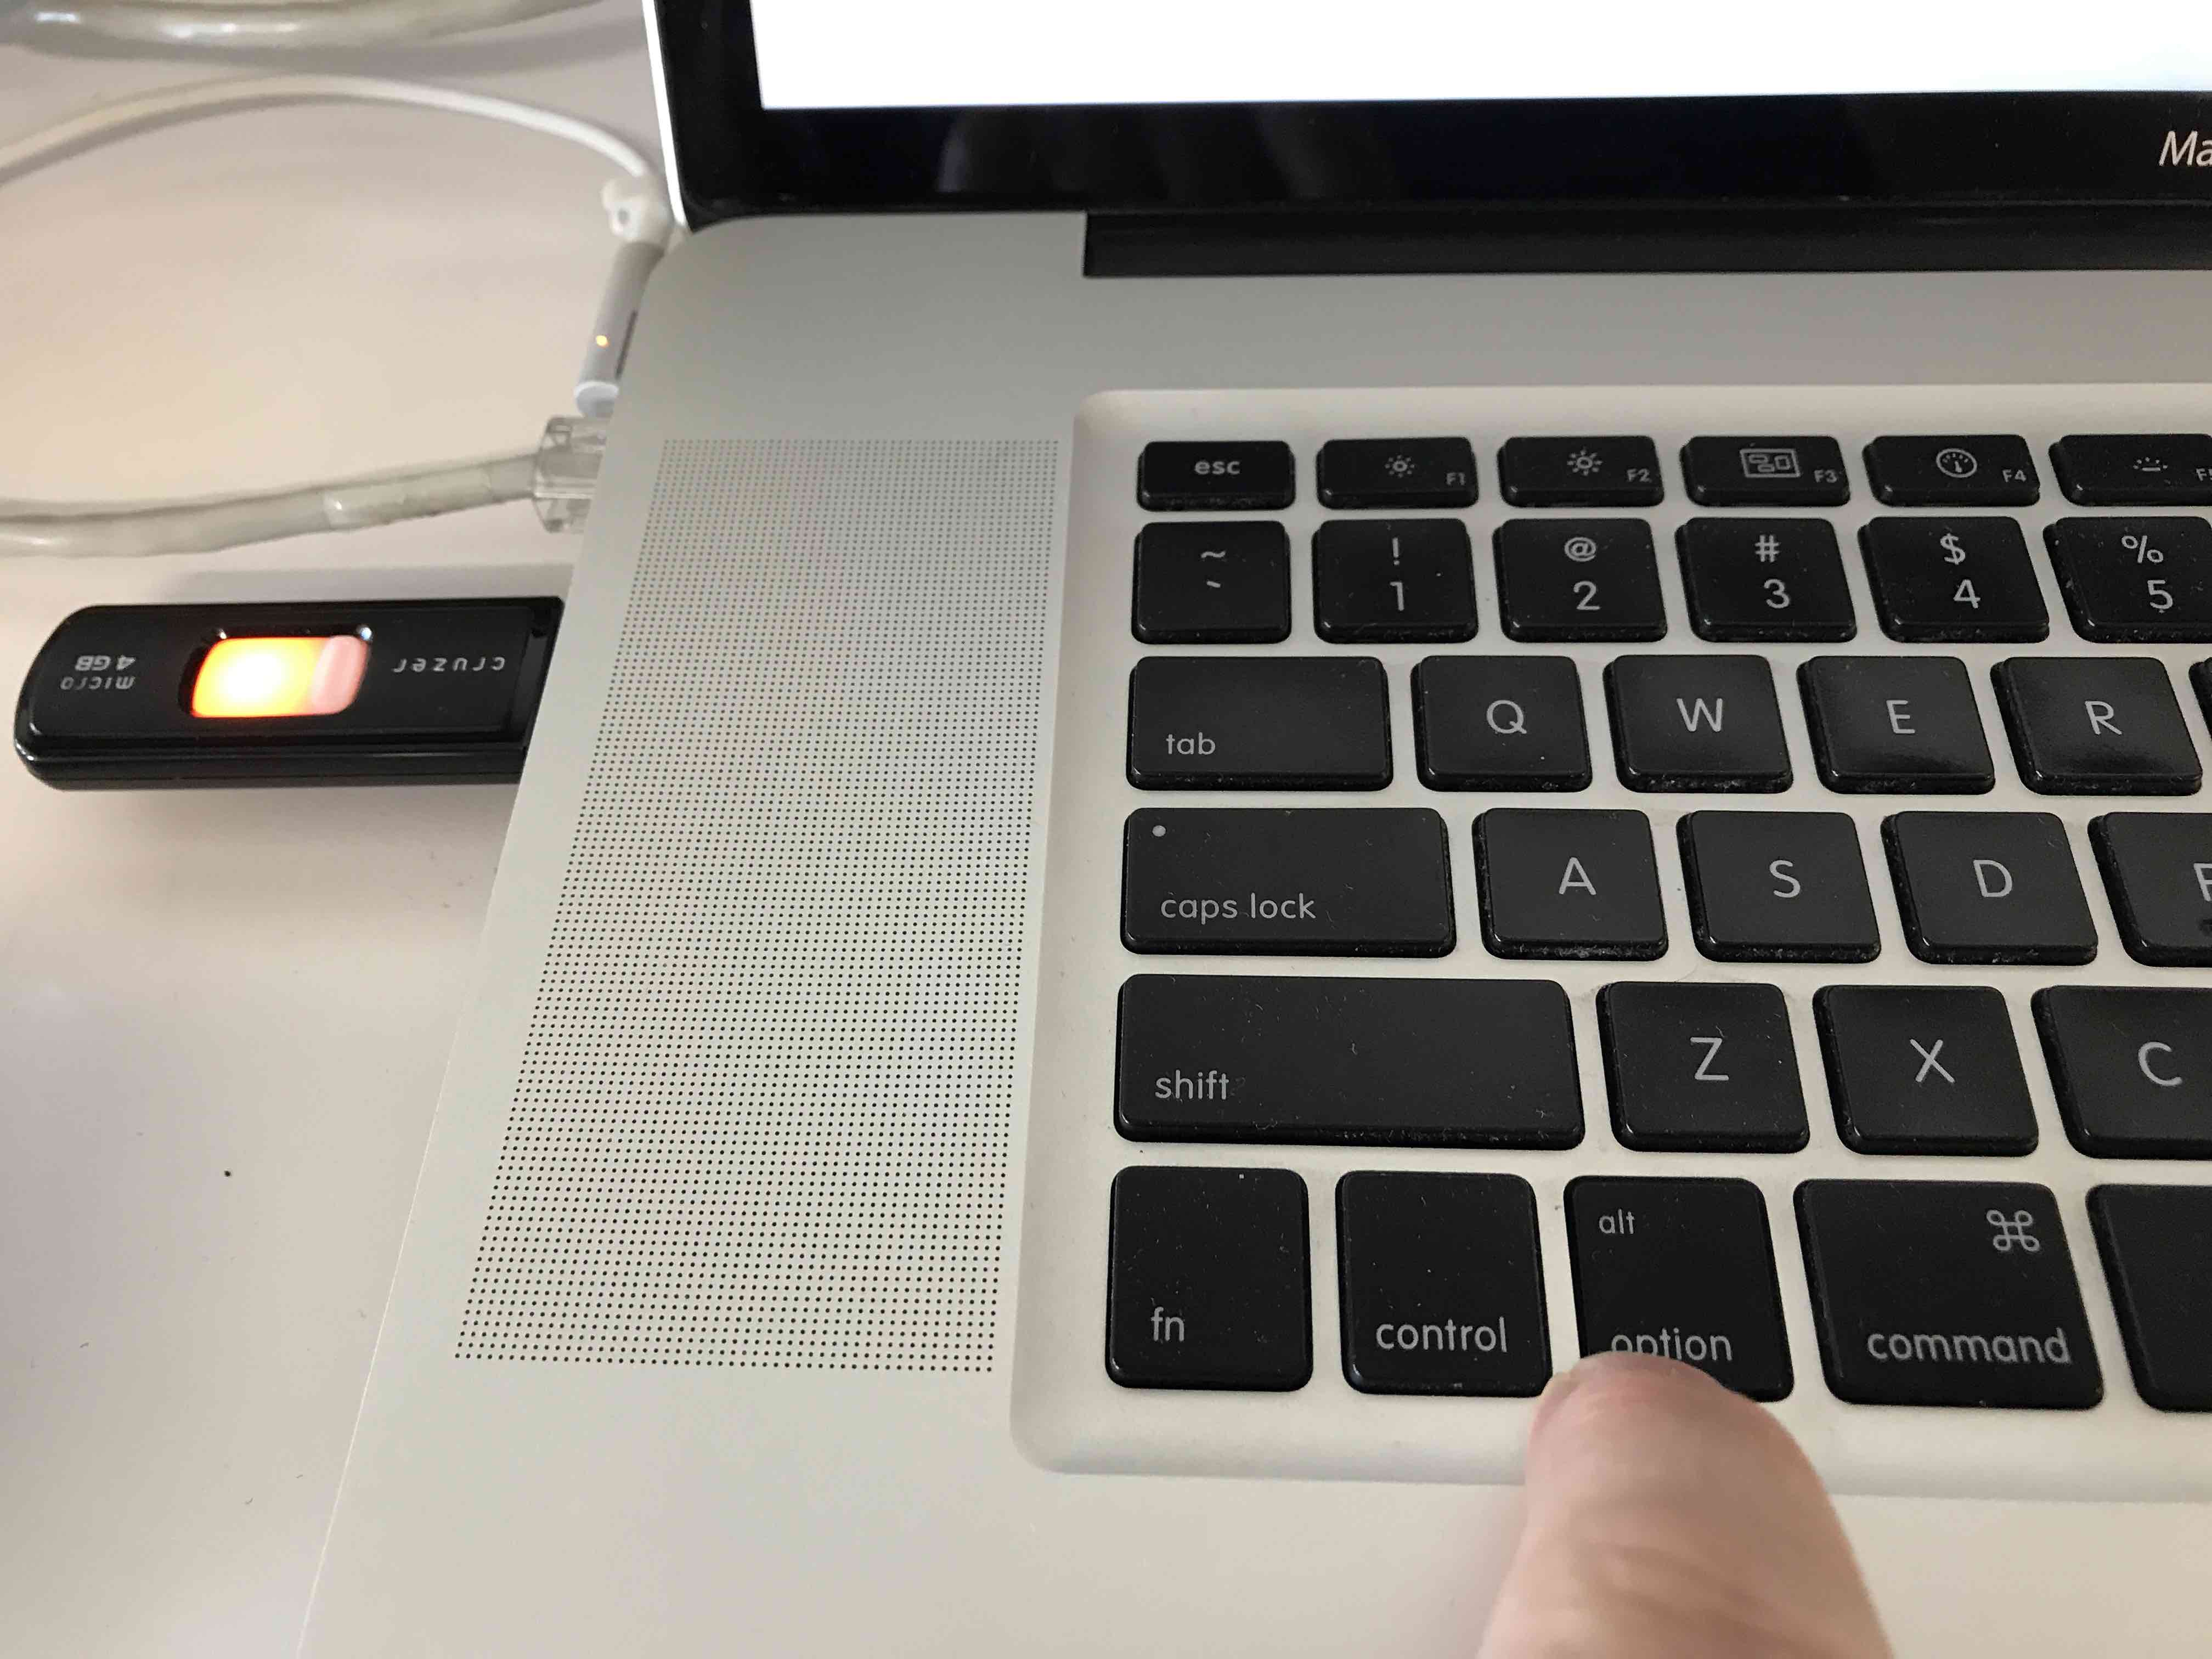
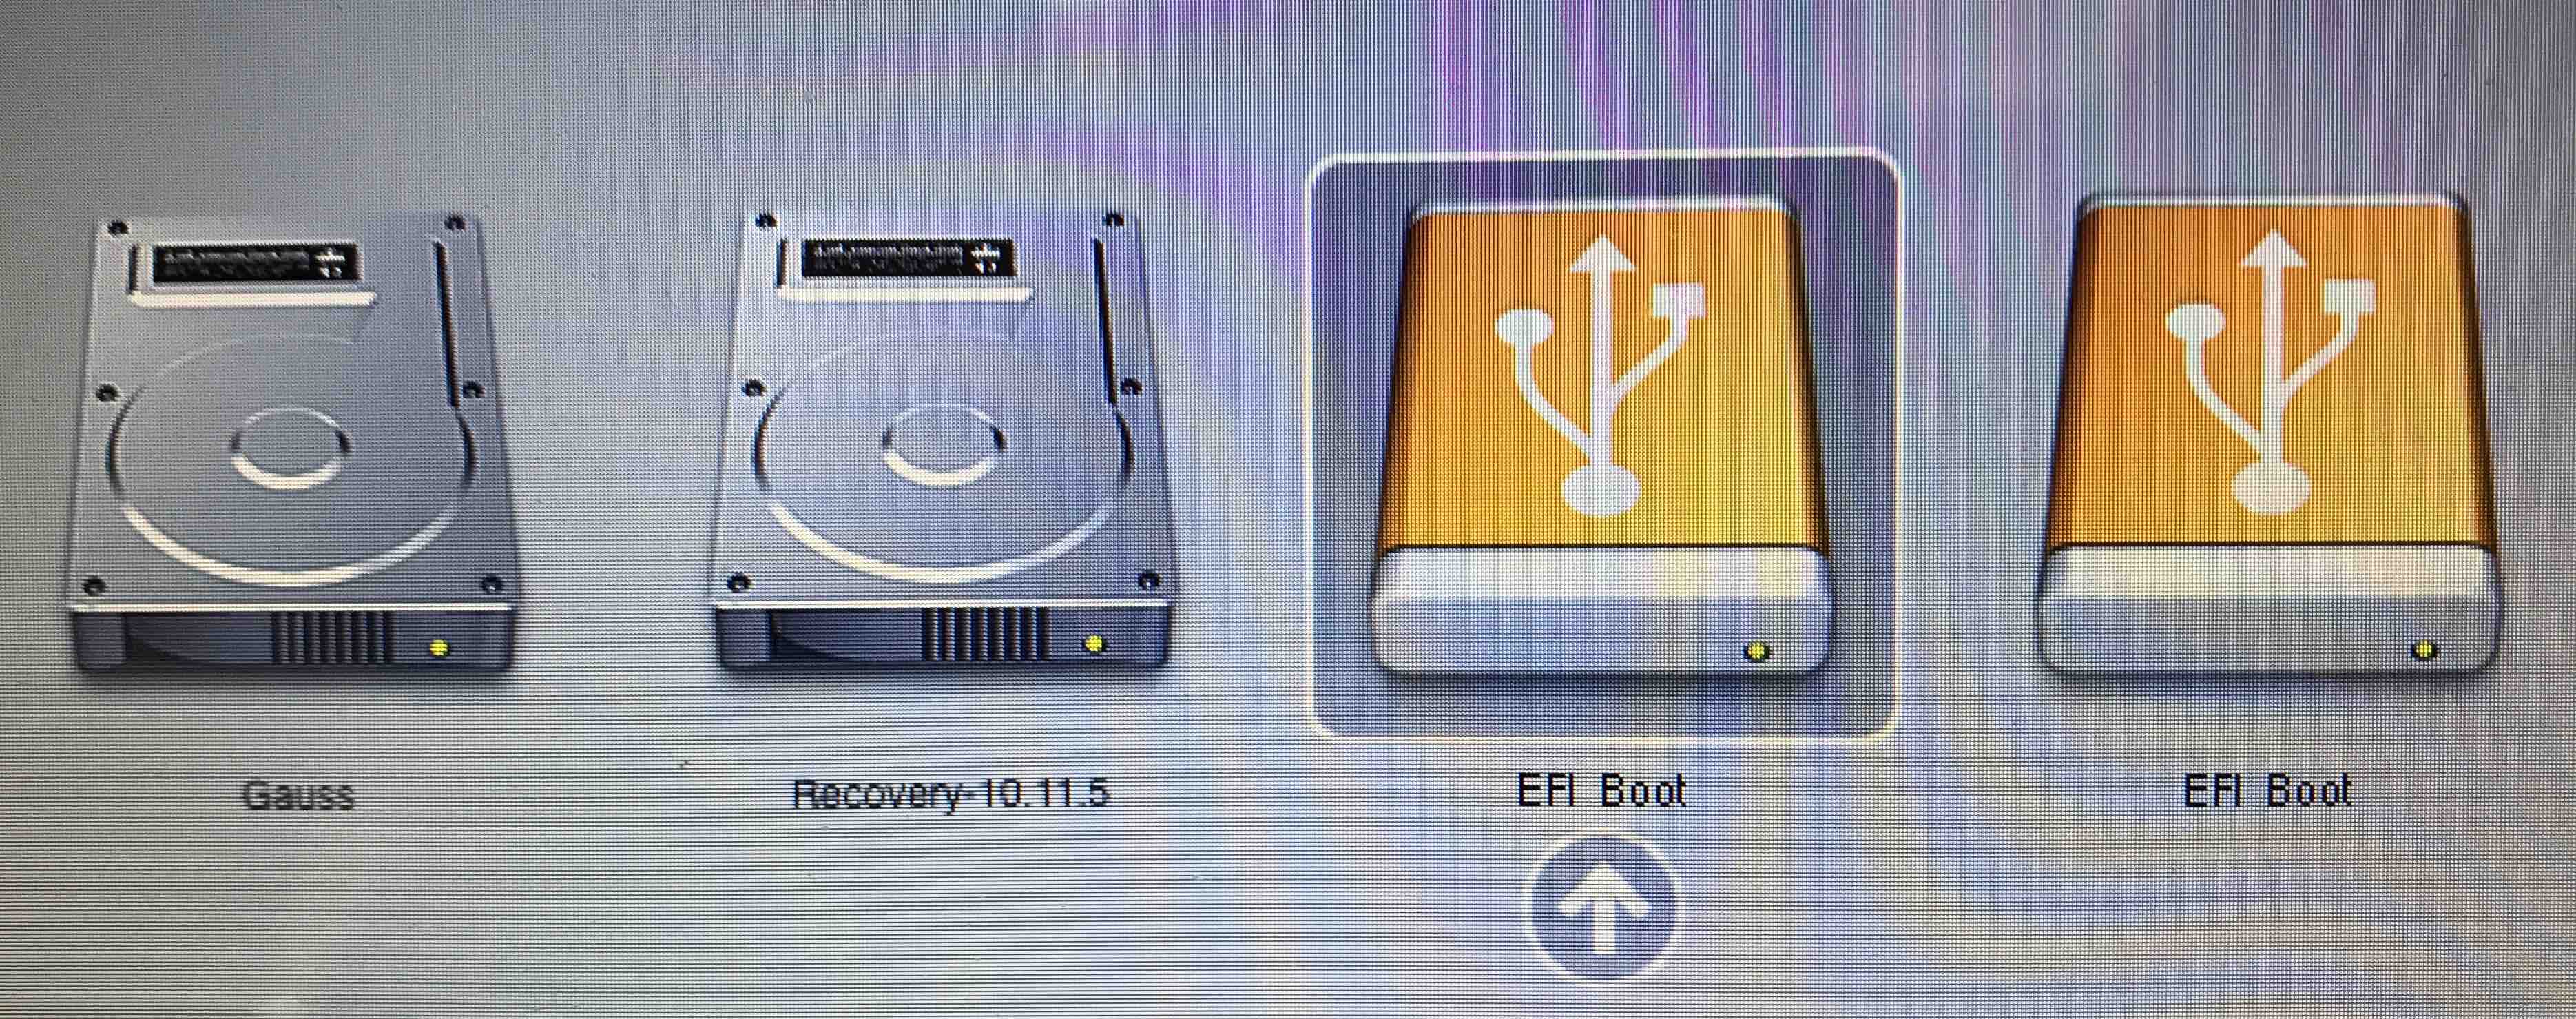
Plug the USB drive containing the Ubuntu Linux distribution into your Mac. Restart your Mac. If you installed rEFInd the boot manager will automatically appear. Select the EFI Boot icon from the list in the boot device menu.

If you have a problem seeing the boot manager, or if you already have done an Ubuntu installation do this: as soon as the Mac starts to boot up, hold down the Option key. Keep holding it down until you see the Mac's boot manager display a list of available devices you can start up from. Select the EFI Boot icon from the list in the boot device menu.
Now go through the Ubuntu installation process.
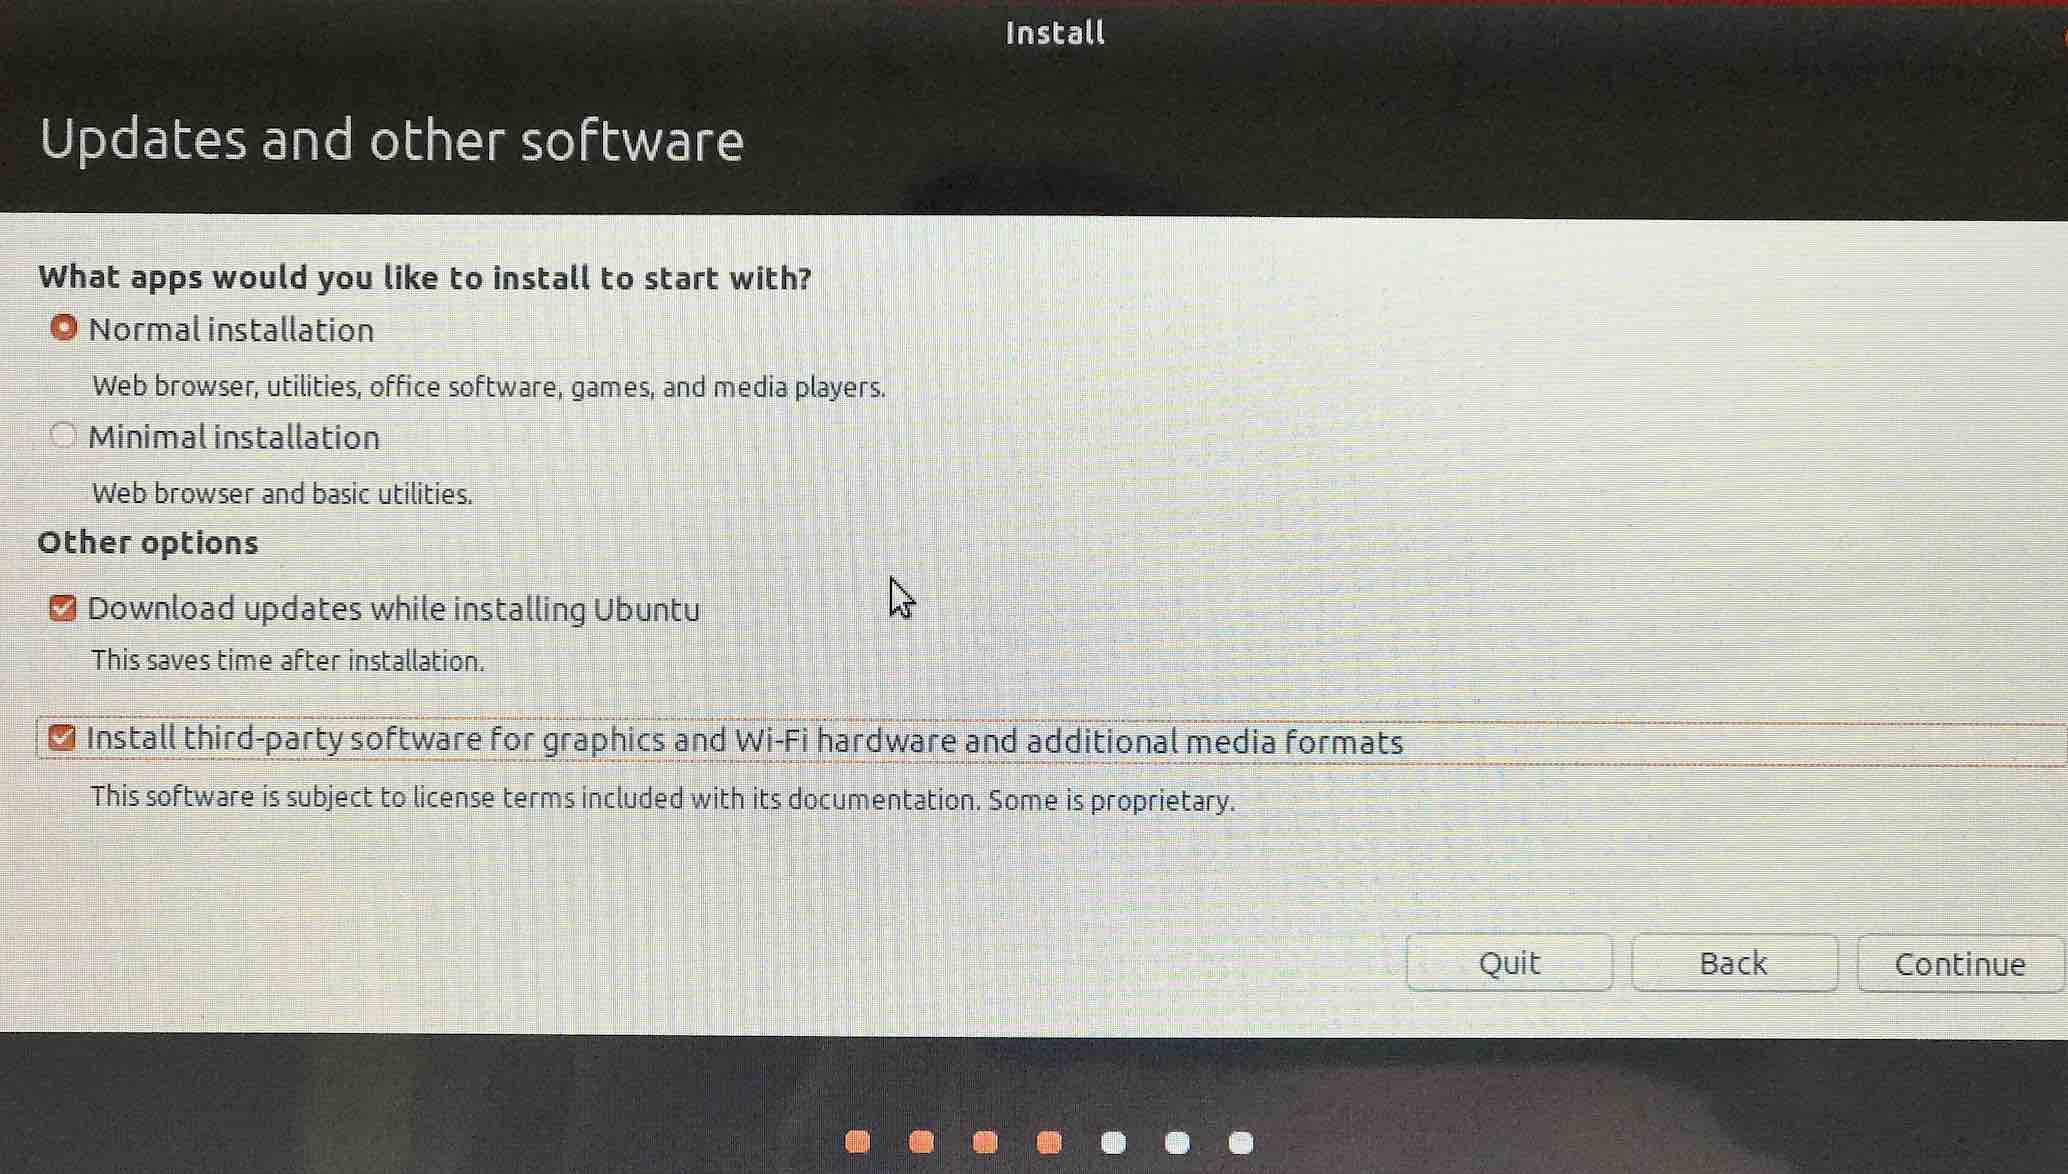
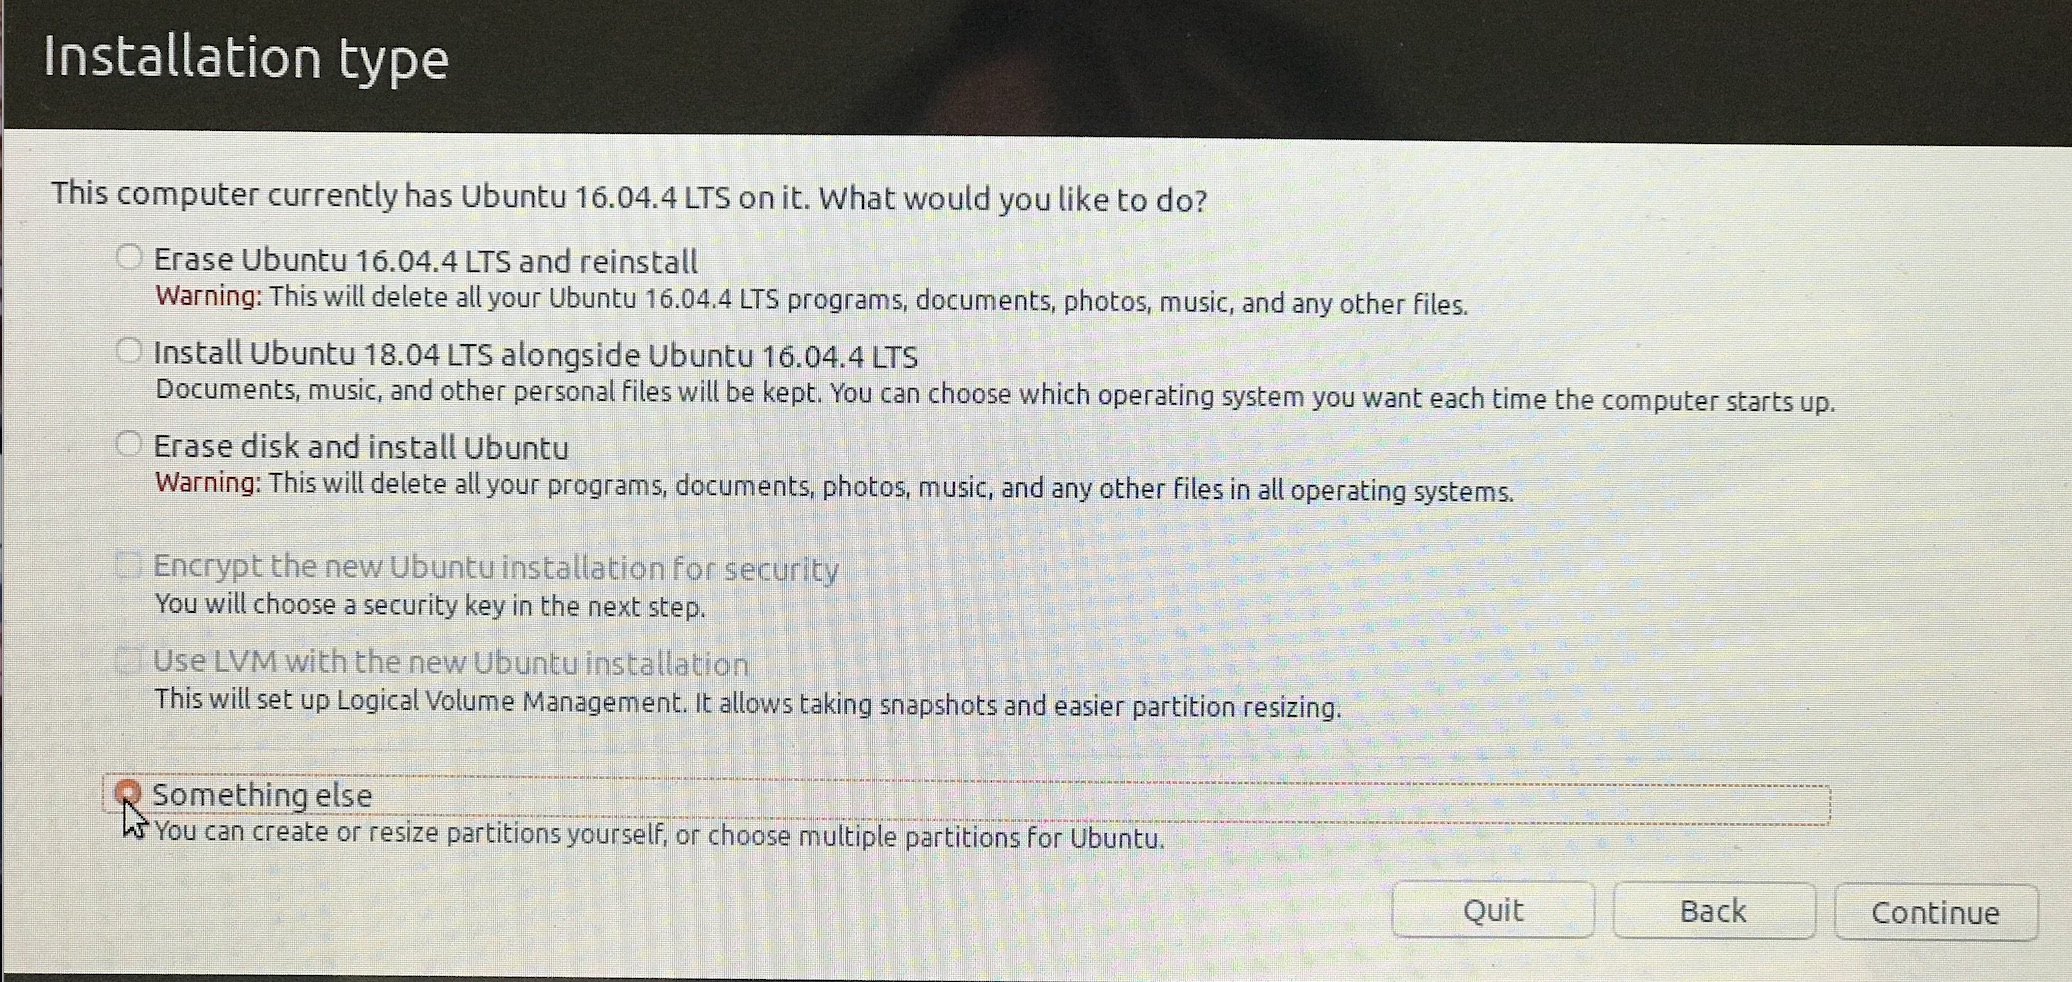
You'll see either This computer currently has no detected operating systems. Or if you had previously installed Ubuntu, This computer has Ubuntu 22.04.1 LTS (Jammy Jellyfish) on it.. Select something else since we want to fiddle with partitions.
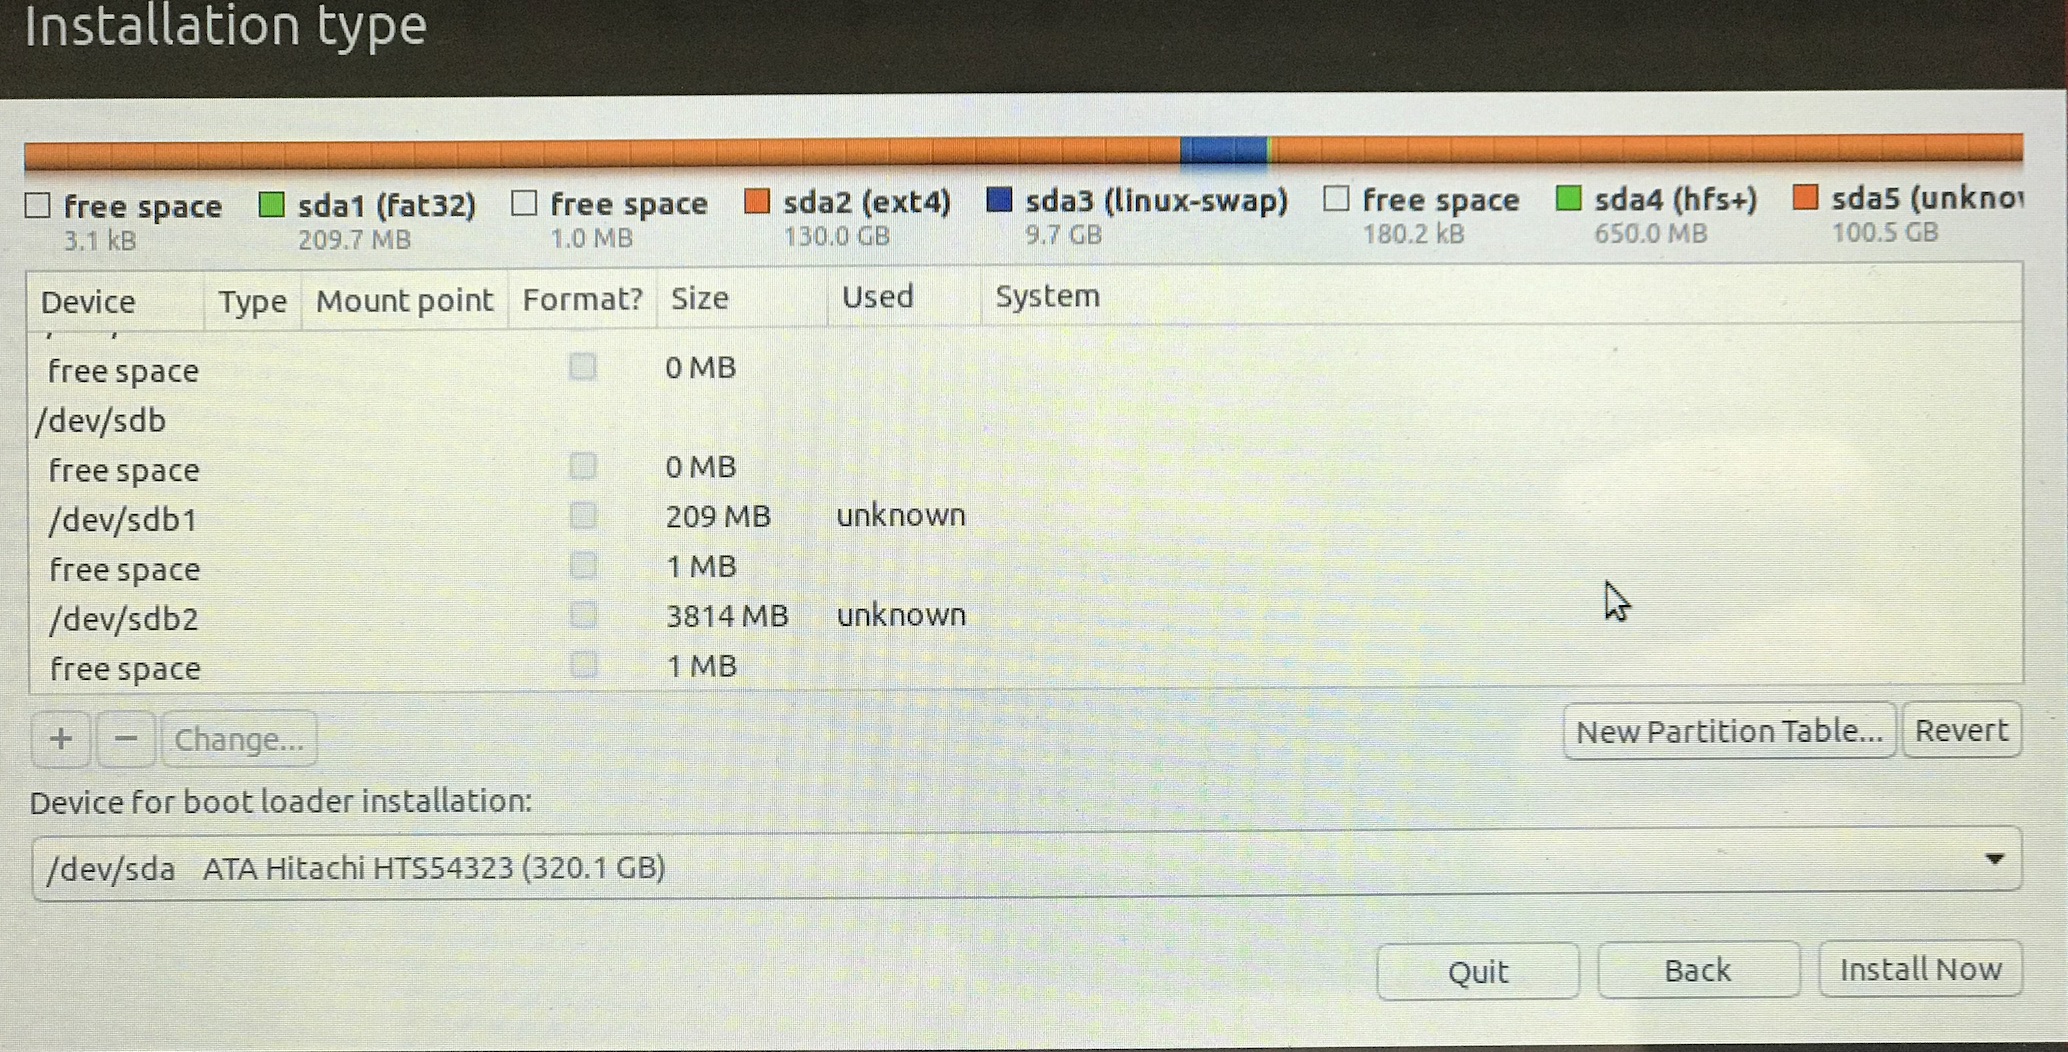
Here is the list of partitions,
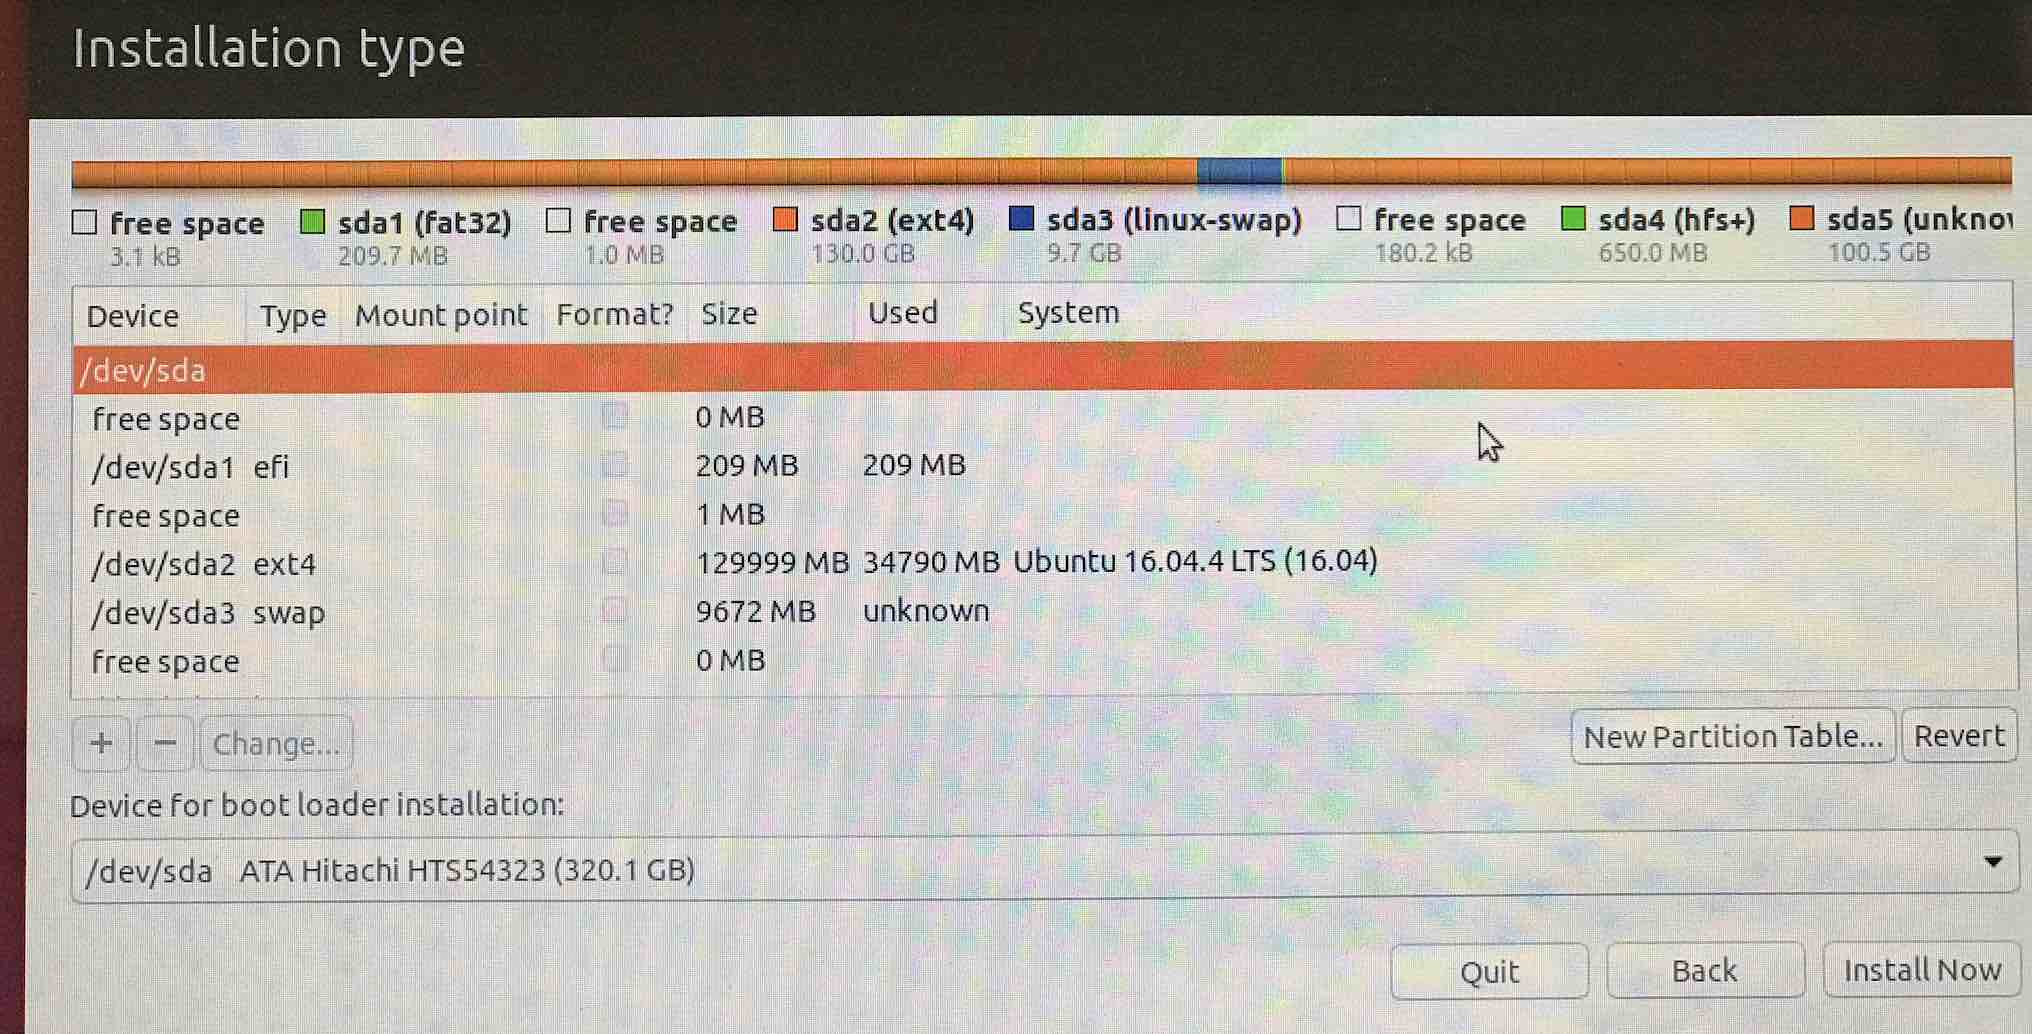
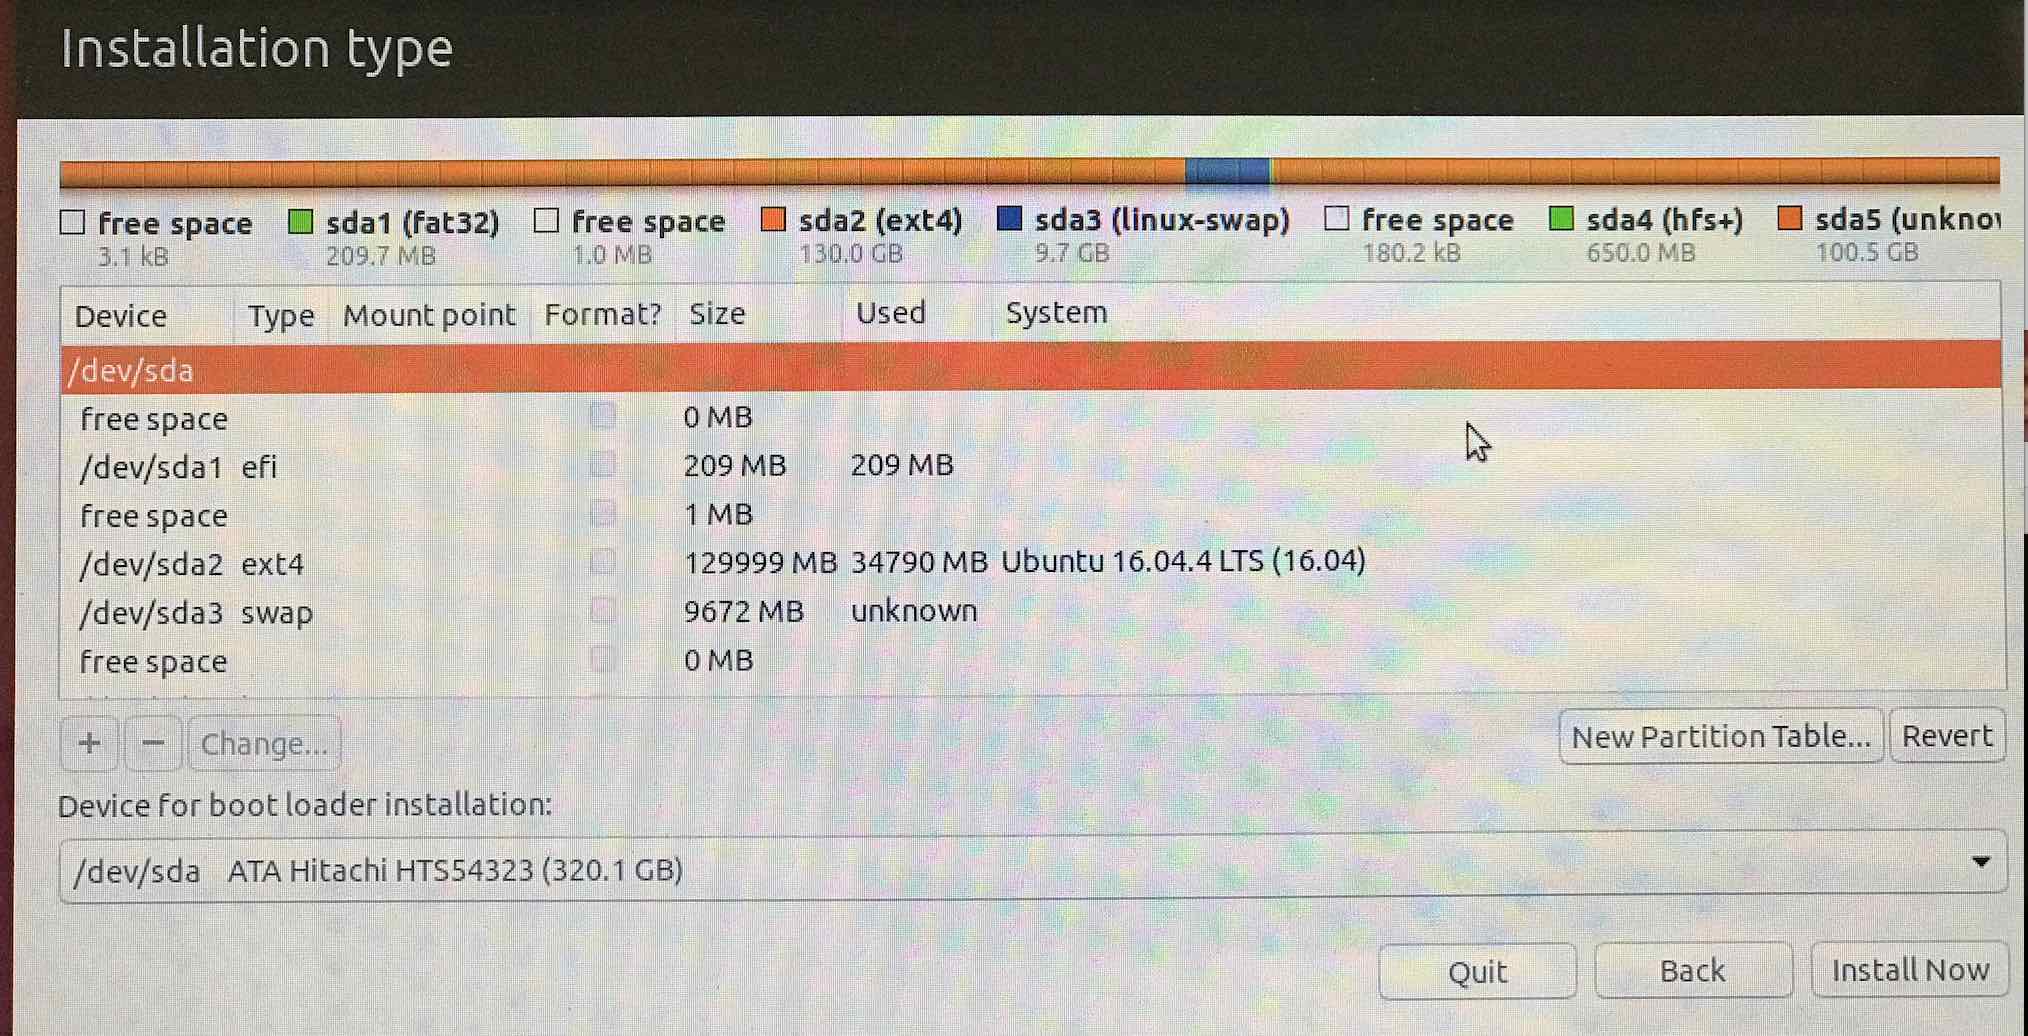
Now select the partition you want to use for Ubuntu (the 130GB) and hit - to delete it. You'll see it converted to free space.
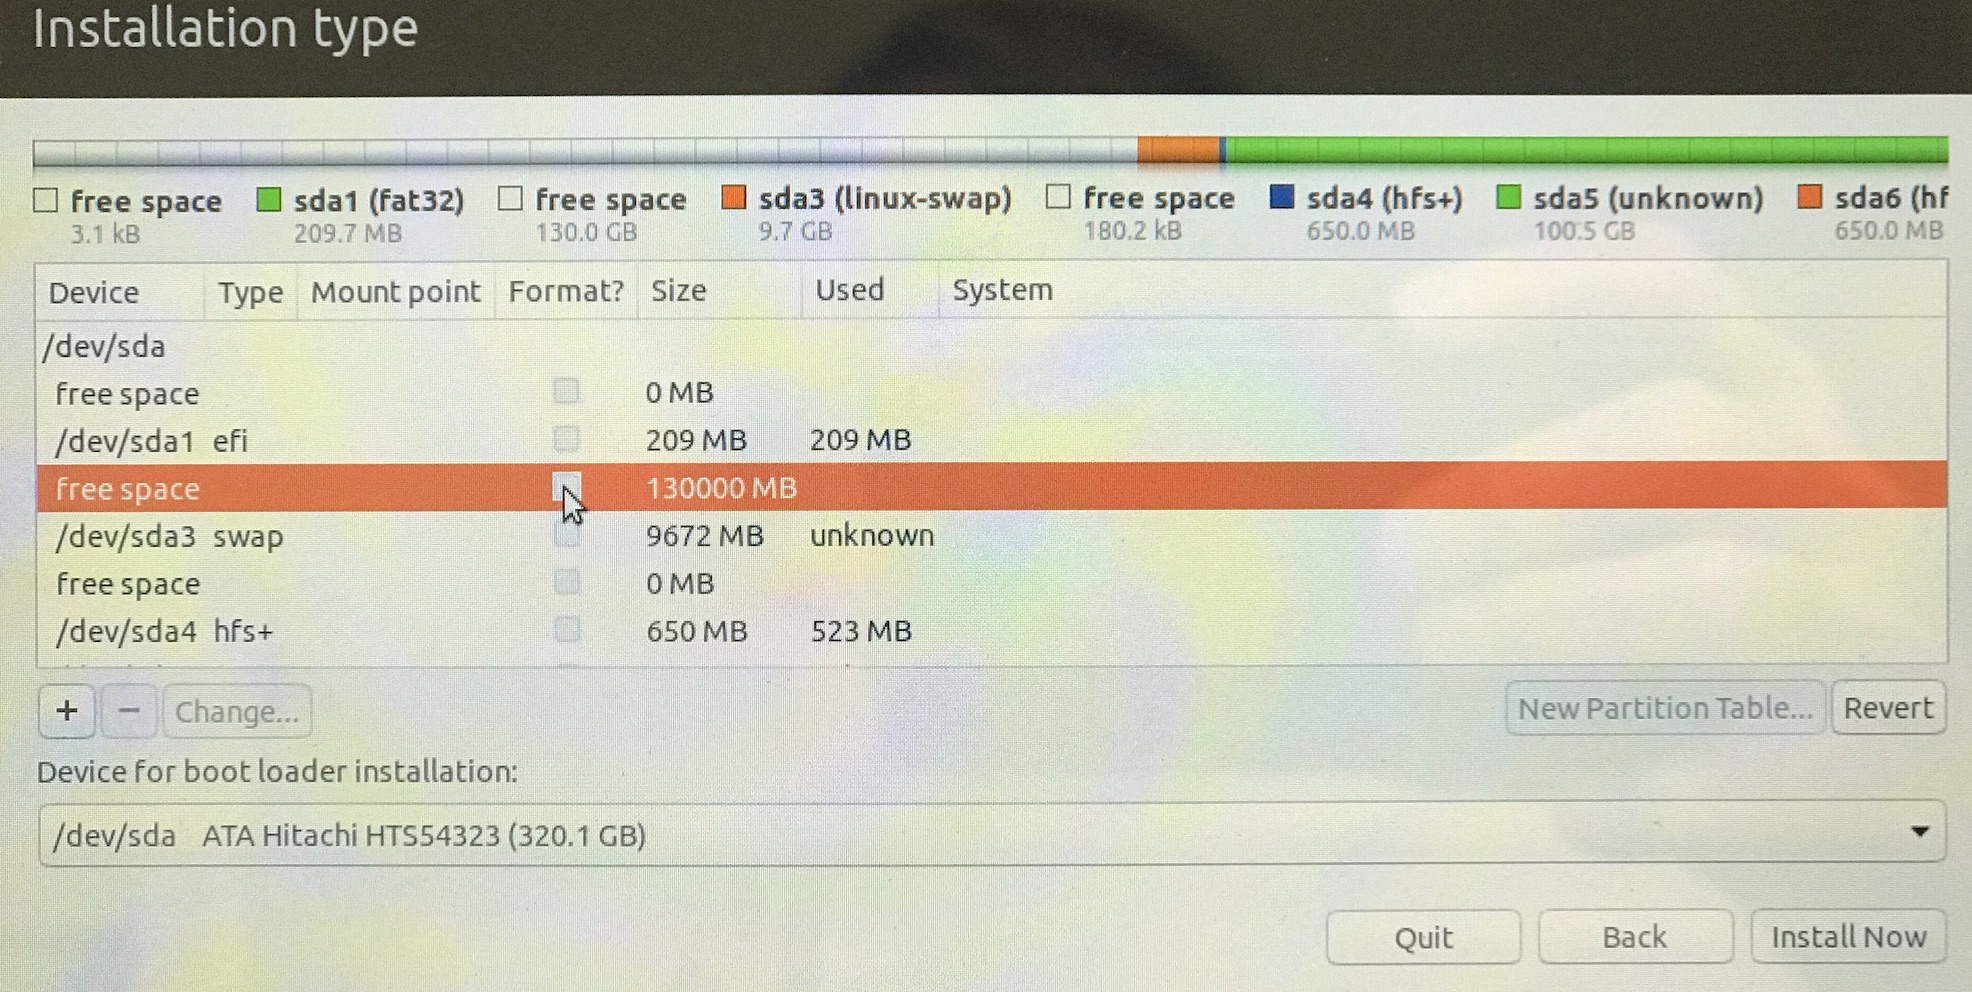
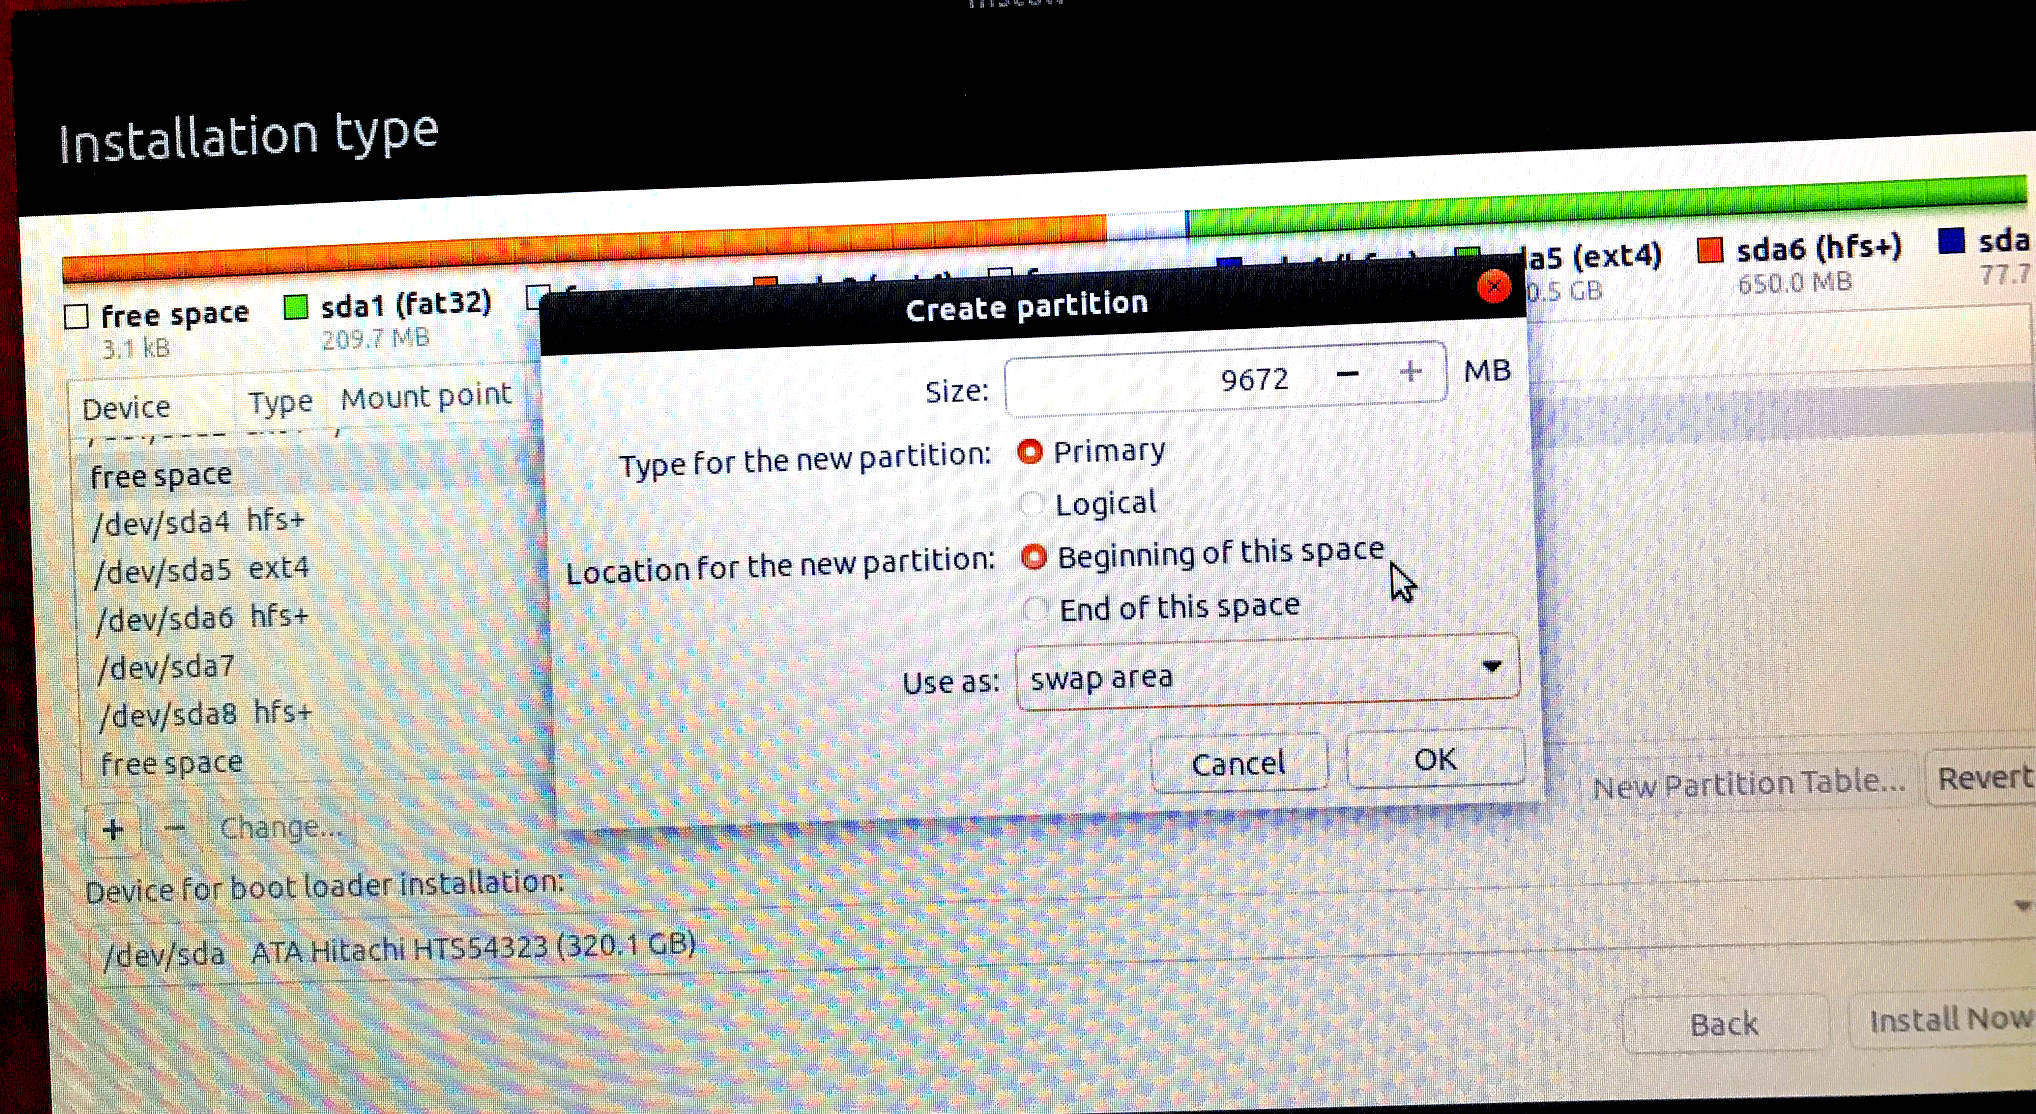
Reformat the freespace using + as Ext4 journaling file system with mount point /.
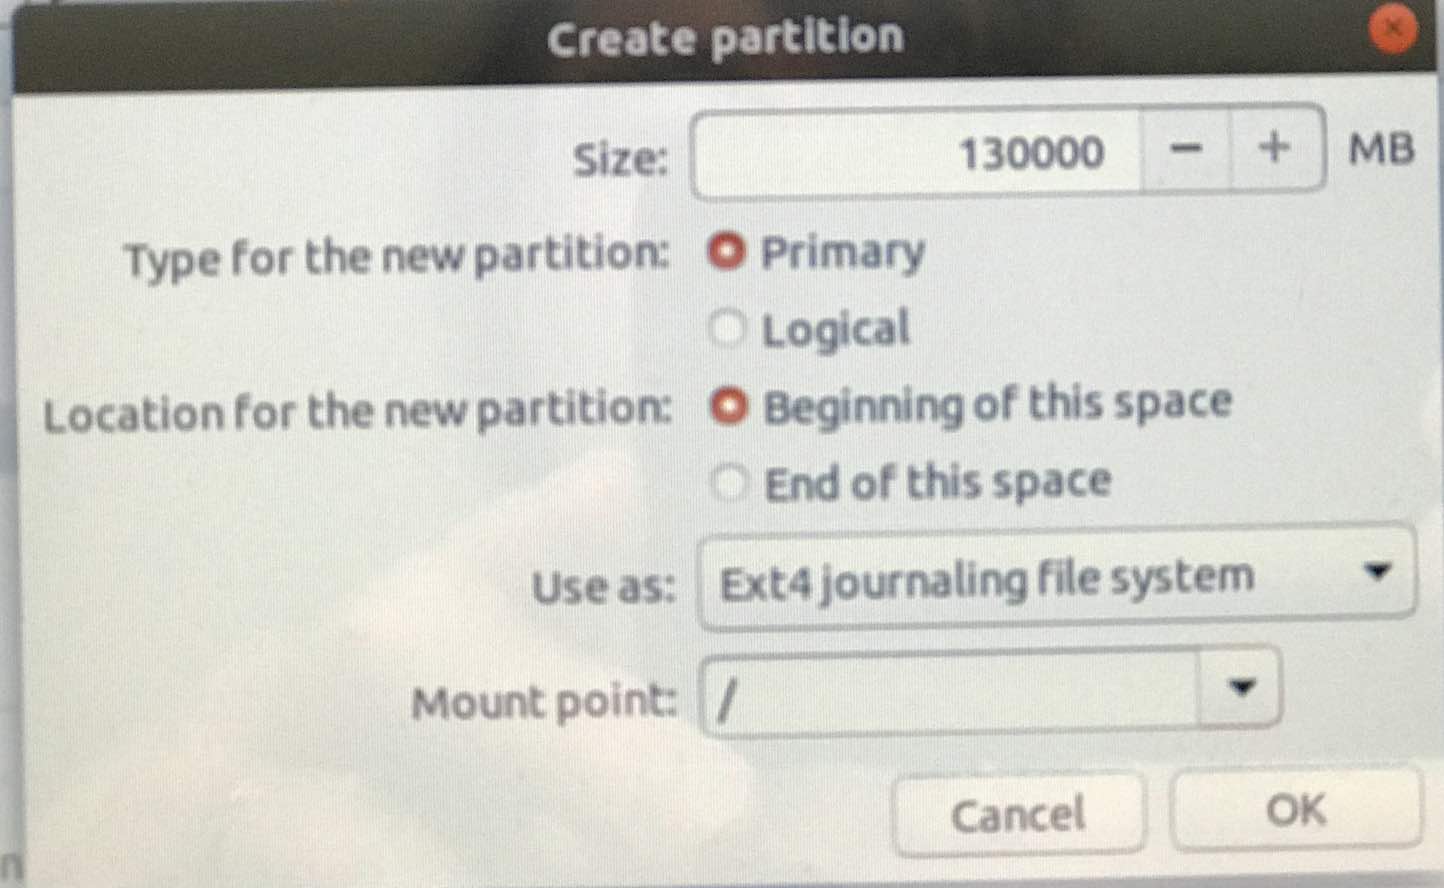
Do the same for Linux swap space, giving yourself about 10GB,
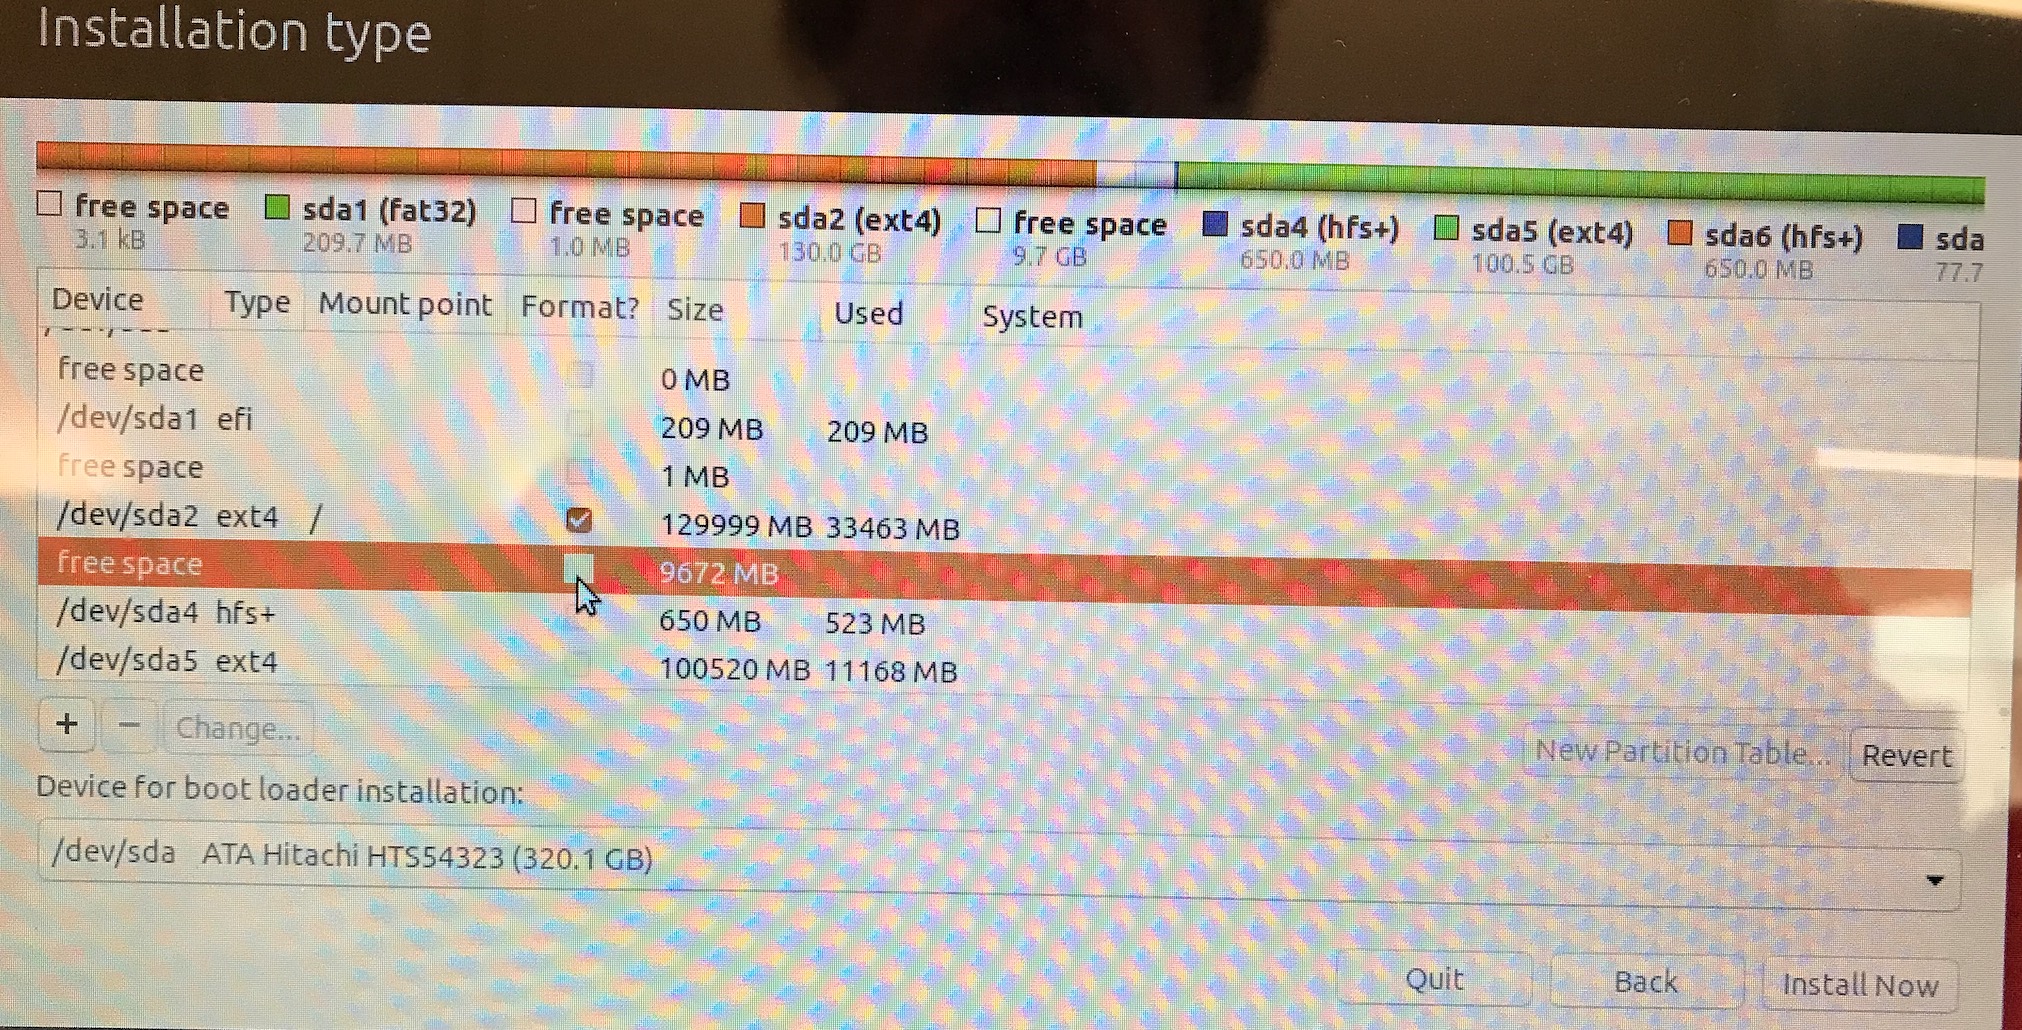
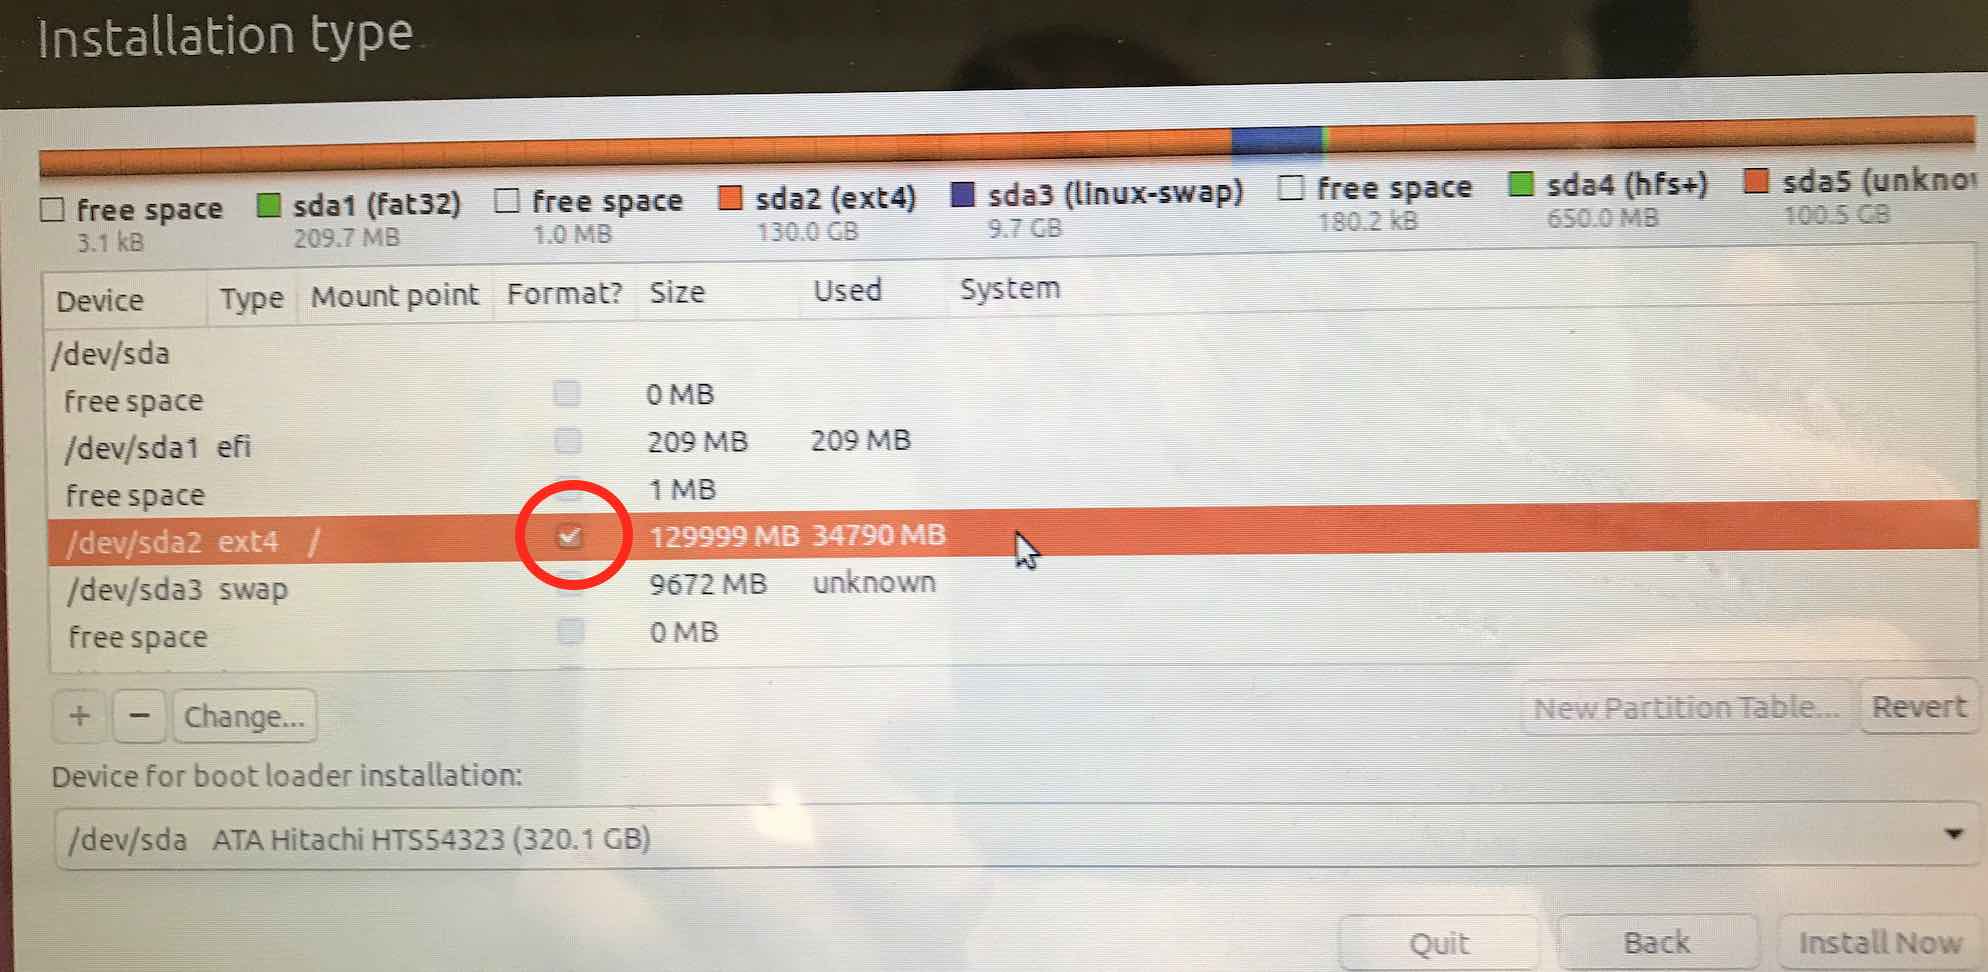
Finally, click on the Format ? box, then click on Install Now
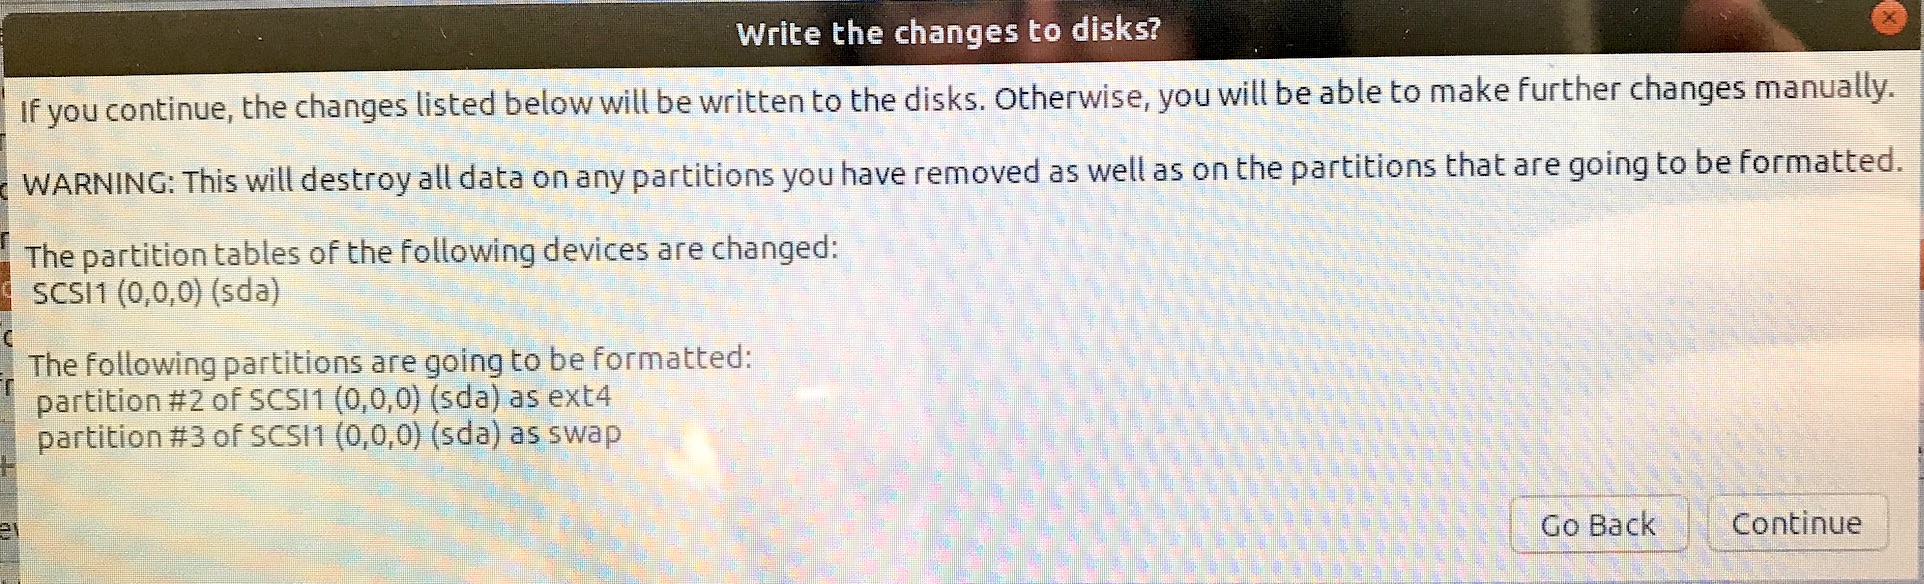
Your last chance, so double check what Ubuntu wants to do!
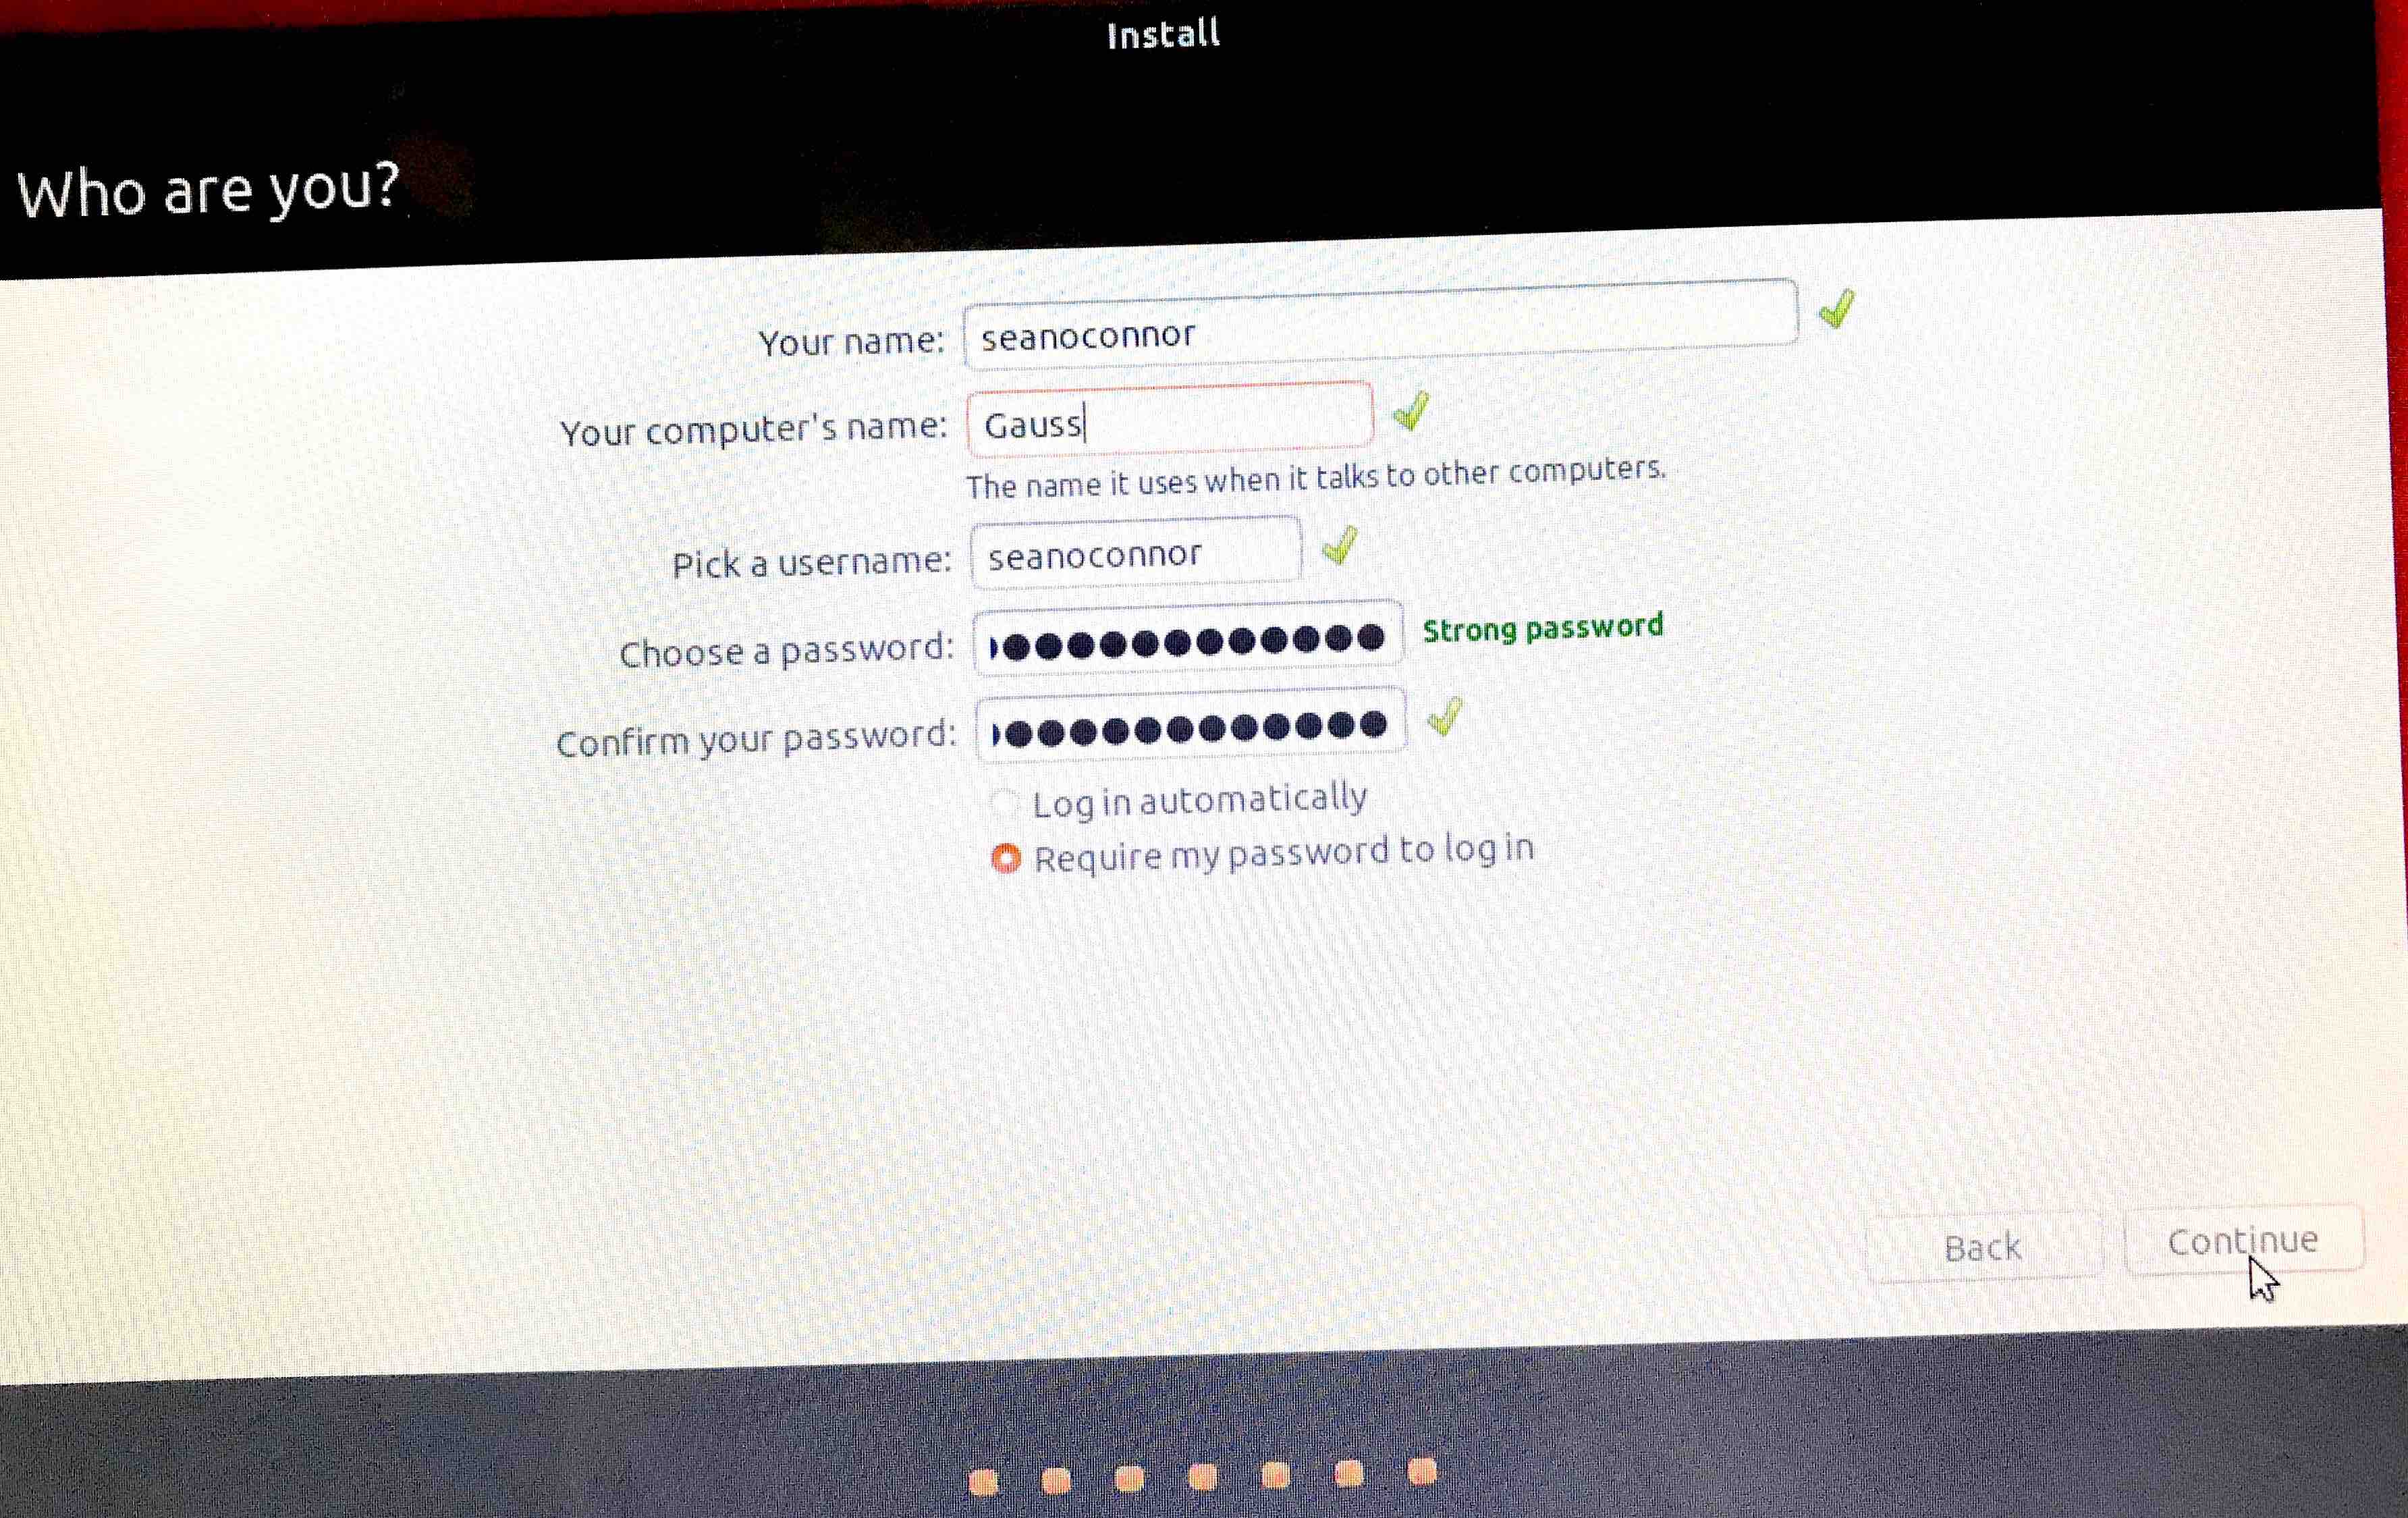
Now continue the installation. Ubuntu asks you where you are located. Next, enter user name and password. You will be the superuser.
Now let the installation complete, remove the thumb drive and reboot into Ubuntu automatically. Ubuntu asks if you want to update; say yes.
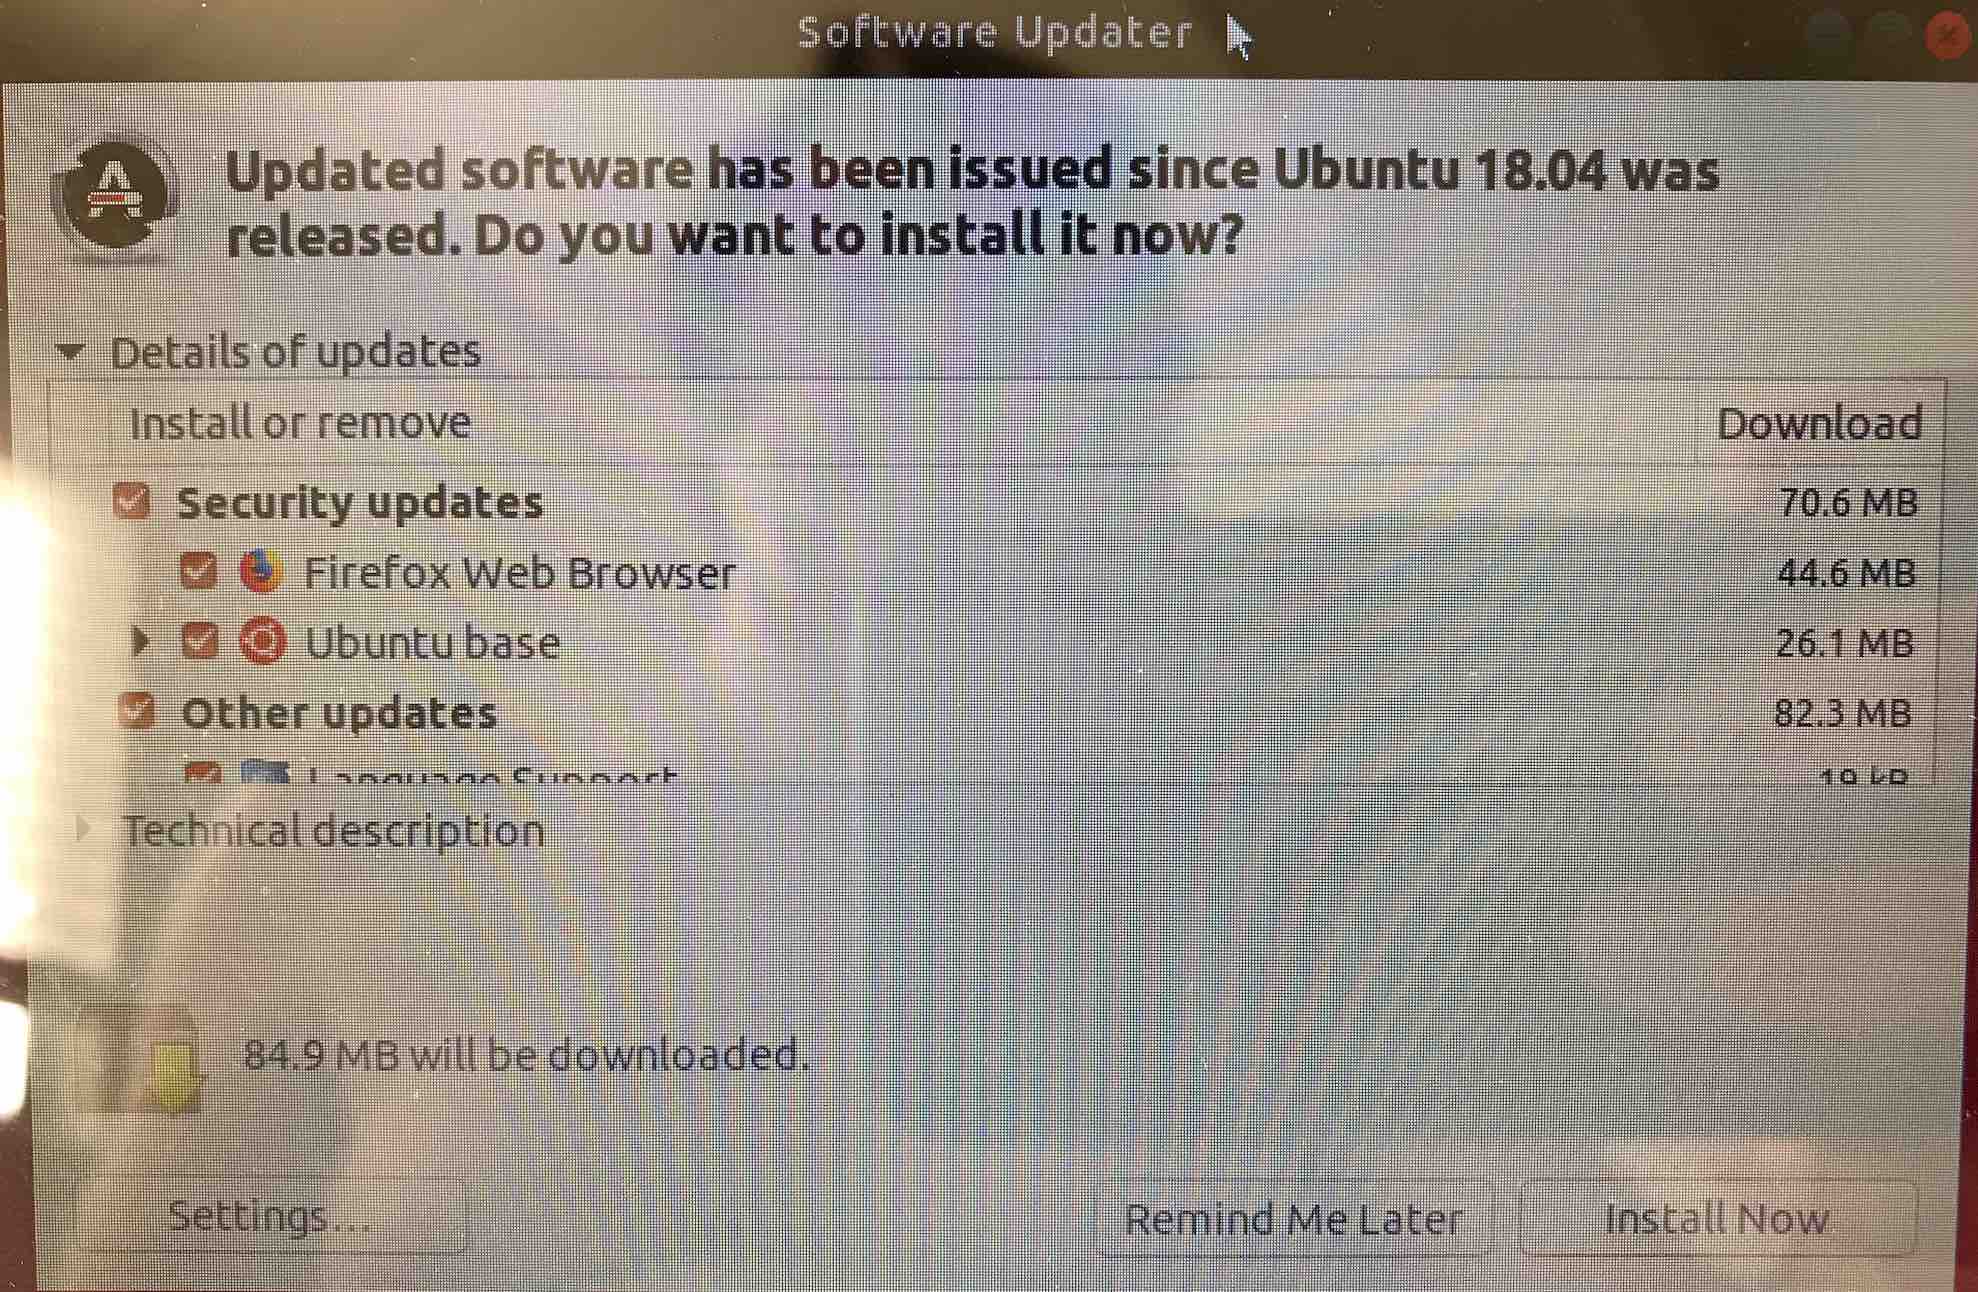
Just for grins, open Terminal and run a manual updating and upgrade all software, then remove unneeded software,
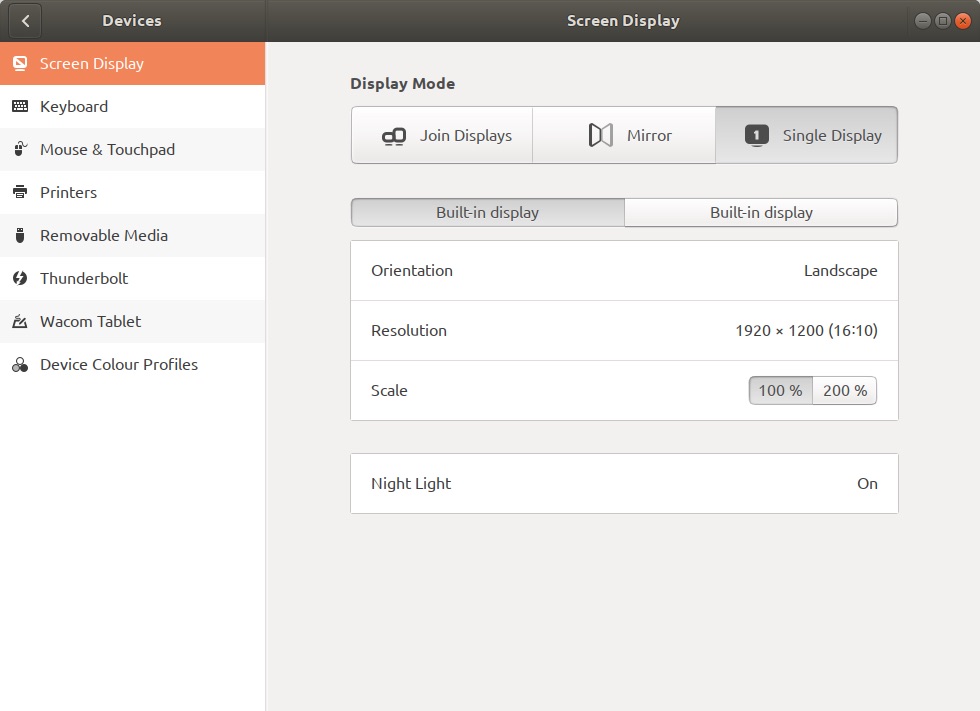
Two Display Screens Show Up Instead of One
The Mac comes up with two displays shown. Toggle one display to avoid showing one blank display when screen sharing.
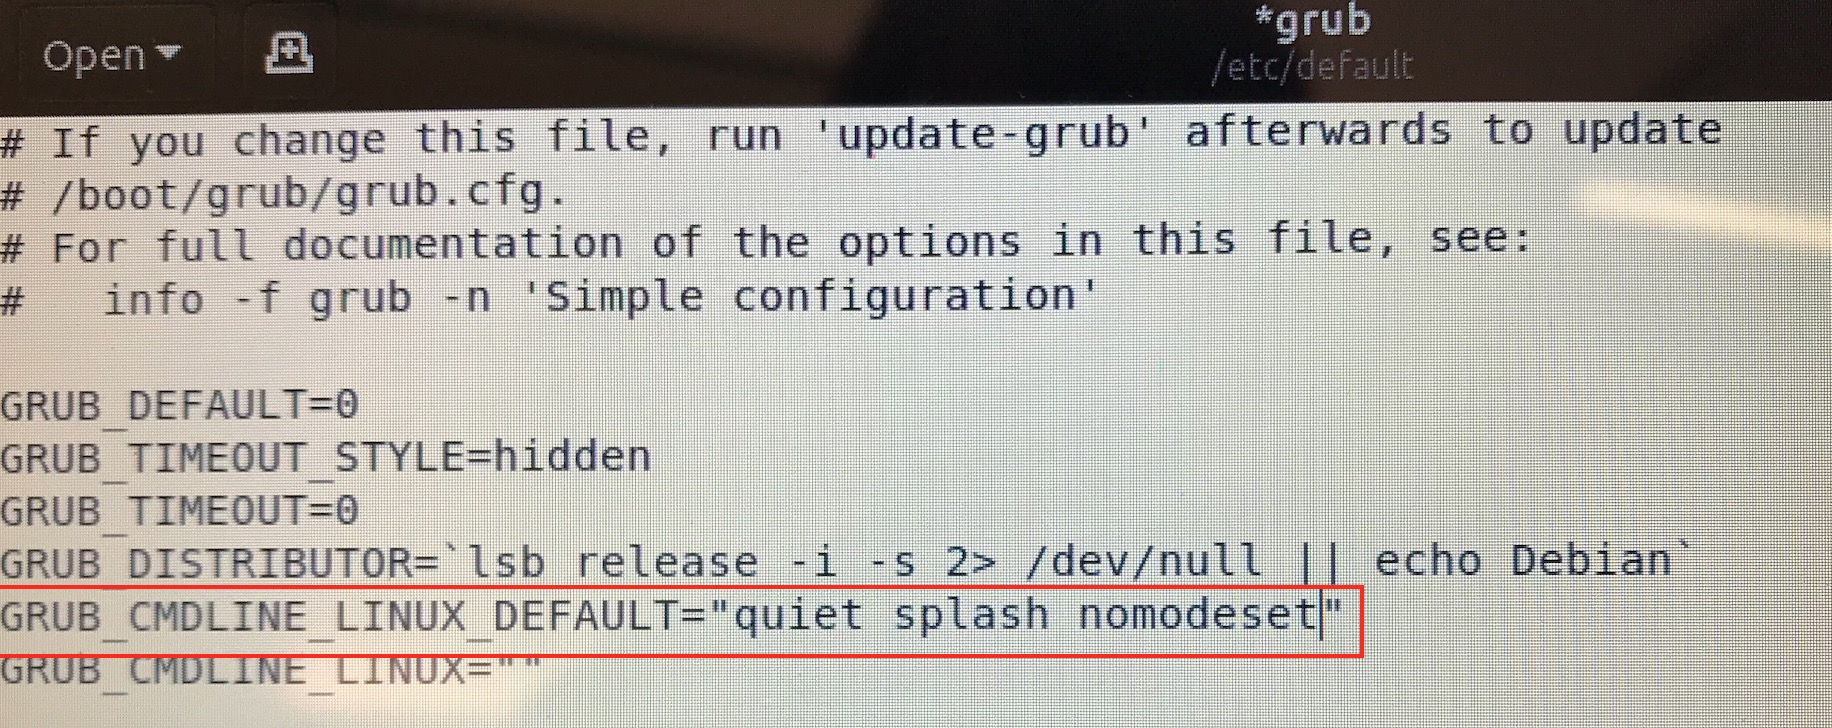
Ubuntu Freezing at Boot Time
My computer was freezing upon bootup. It's a problem with NVIDIA drivers, and you can fix Ubuntu freezing by turning them off at bootup. I'll repeat the instructions here with minor changes for my system. Upon bootup, hit the ESCAPE key once. You might have to experiment to get the timing right. You'll go into a boot menu,

Hit the E key to go into edit mode and add the option nomodeset after the the quiet splash in the linux line,

Then save and reboot. To make changes permanent, not just for this boot, edit the grub configuration file,
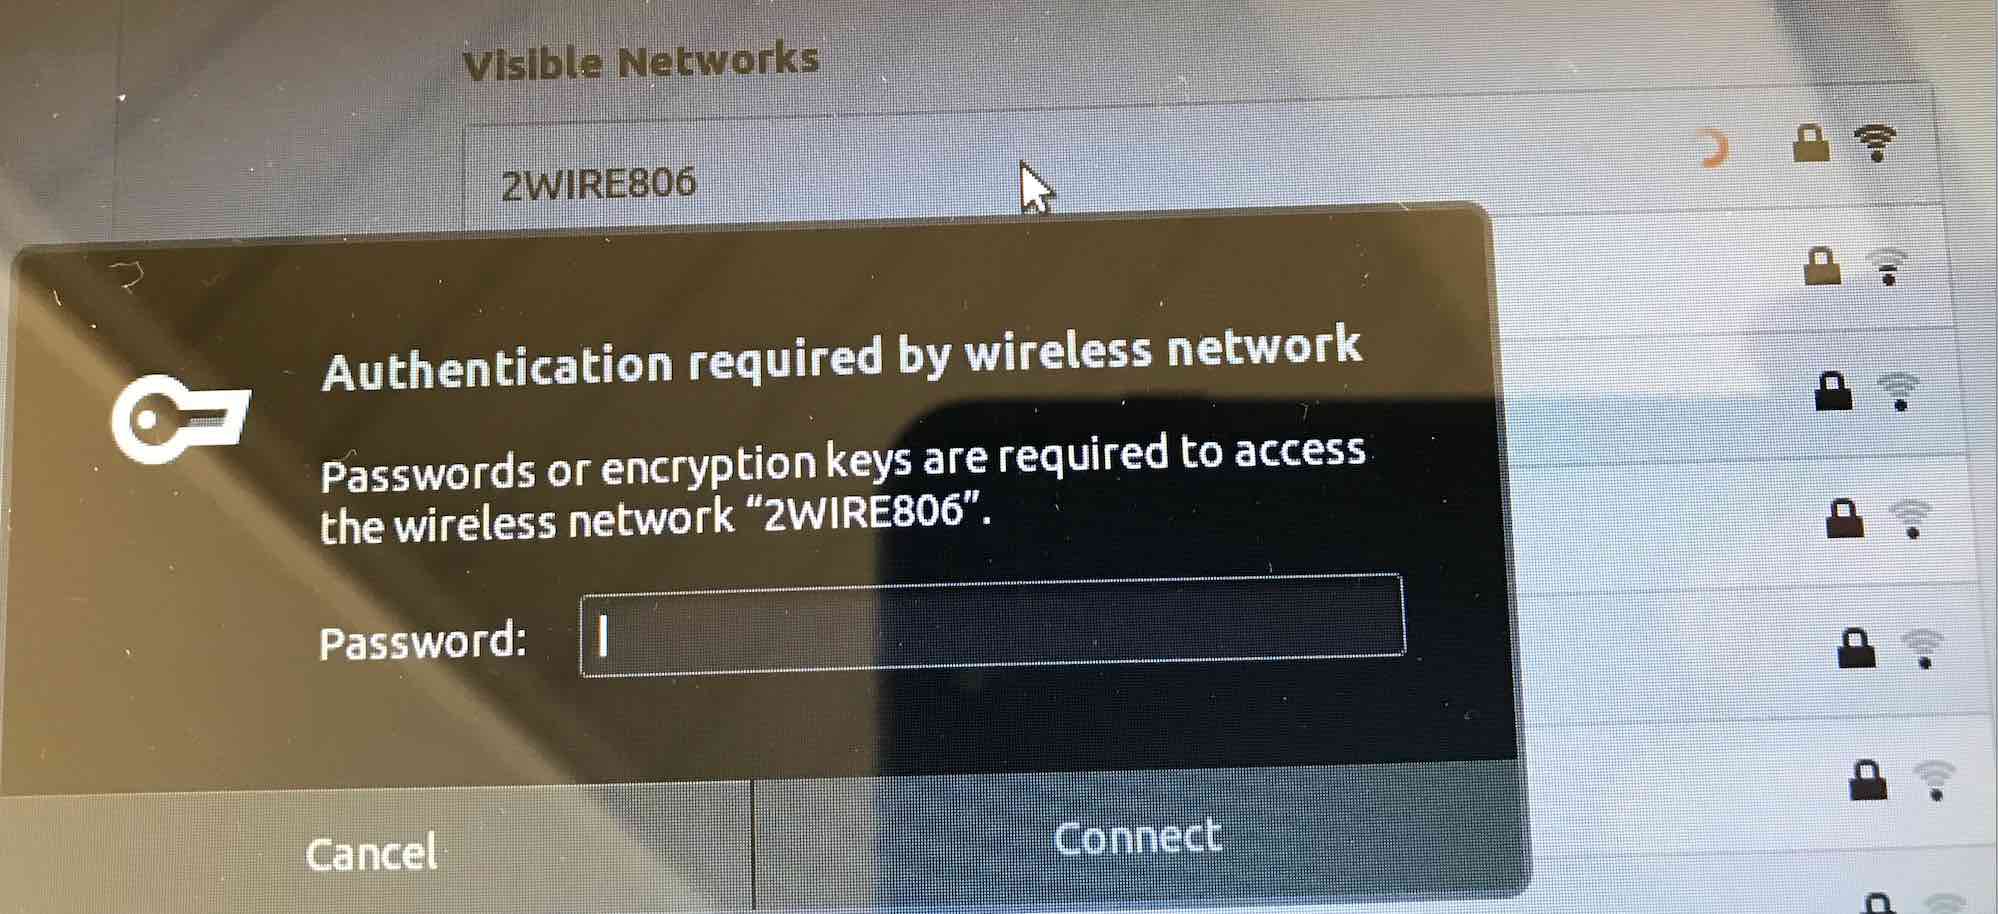
Wireless Connection
Connect to your local Wireless node by clicking on the top right menu bar settings.
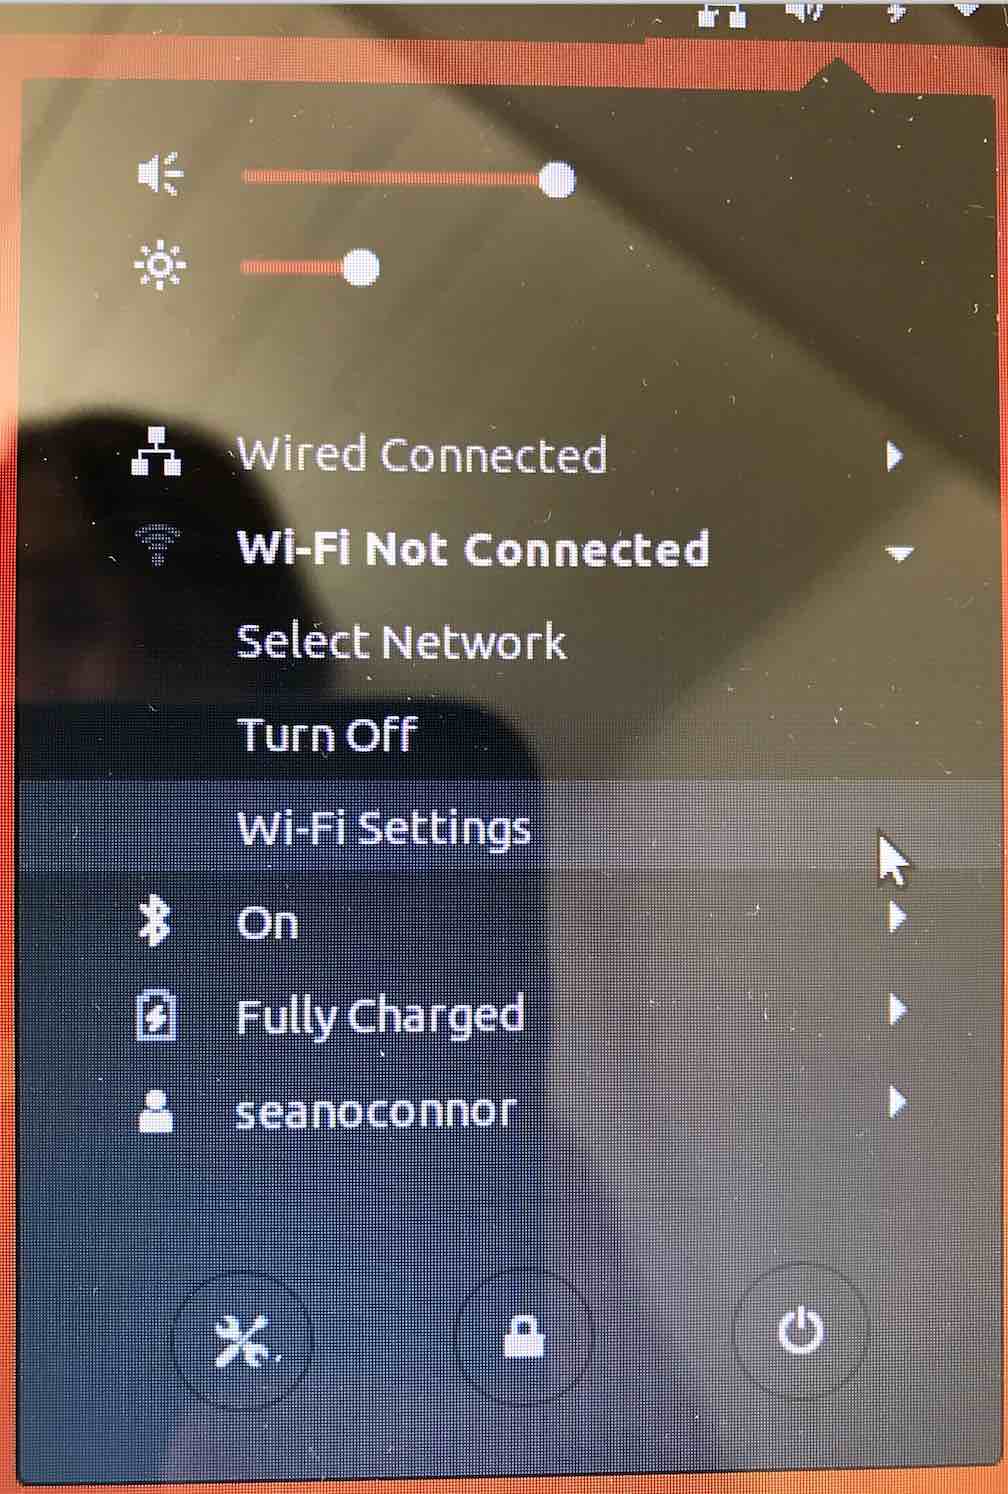
Select Wireless settings, and type in your Wireless Key and connect.
If you cannot connect to Wireless, you may need to install the Wireless driver. I found it by looking at Broadcom Linux Wireless Drivers Install using the line below and reboot after you install.
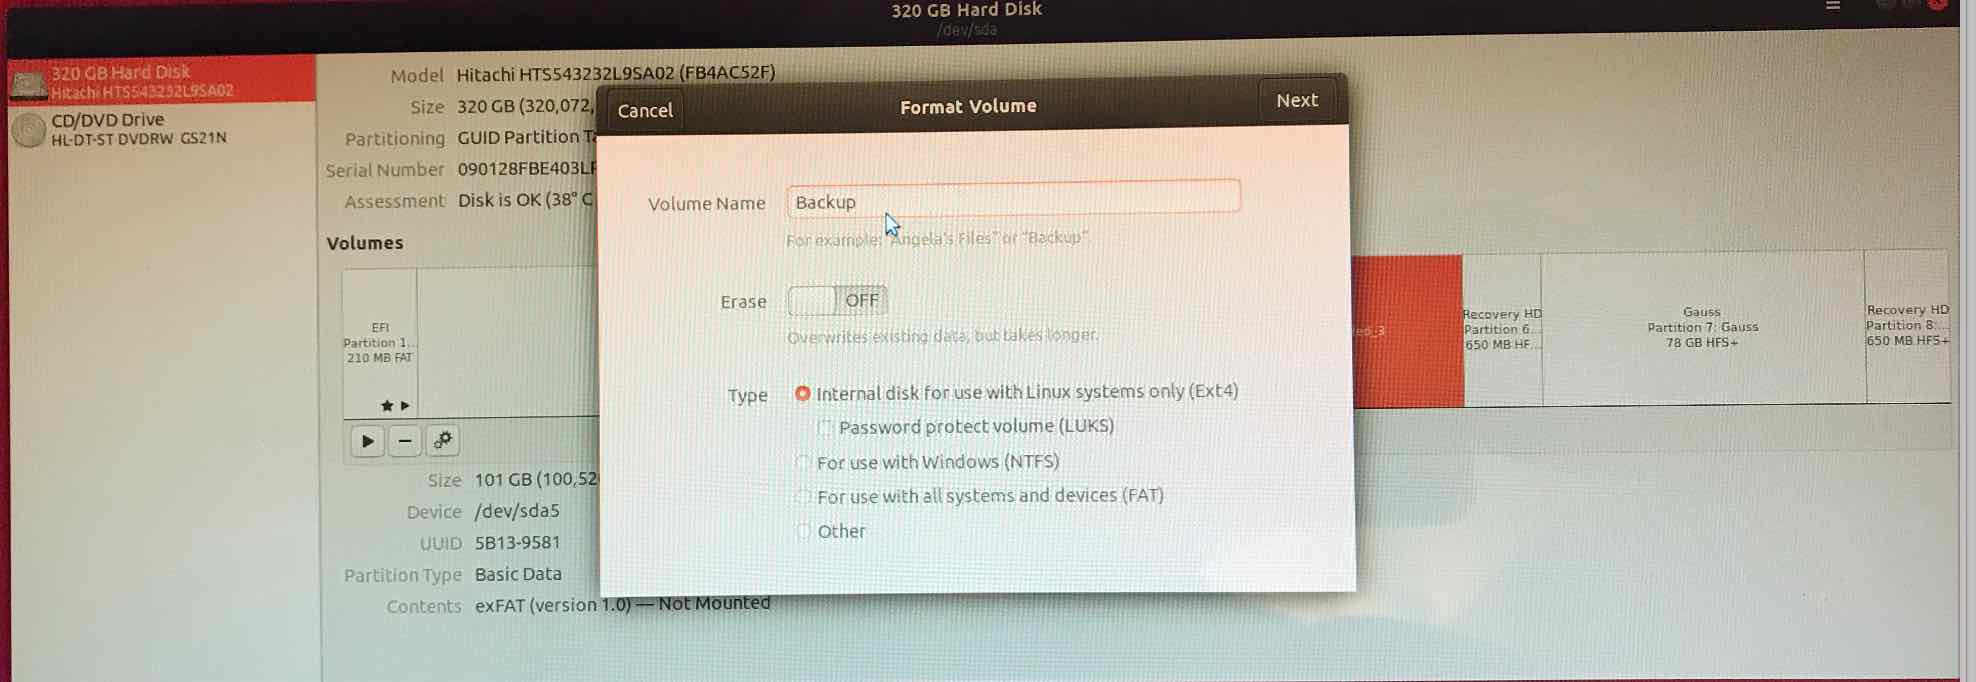
Mounting an Additional FAT Partition
I had an unused partition, so I launched the Disks application and formatted it as Extended FAT to be visible to Ubuntu. You might have to toggle the Right Arrow icon to mount it; it will say mounted at /media/sean/Backup
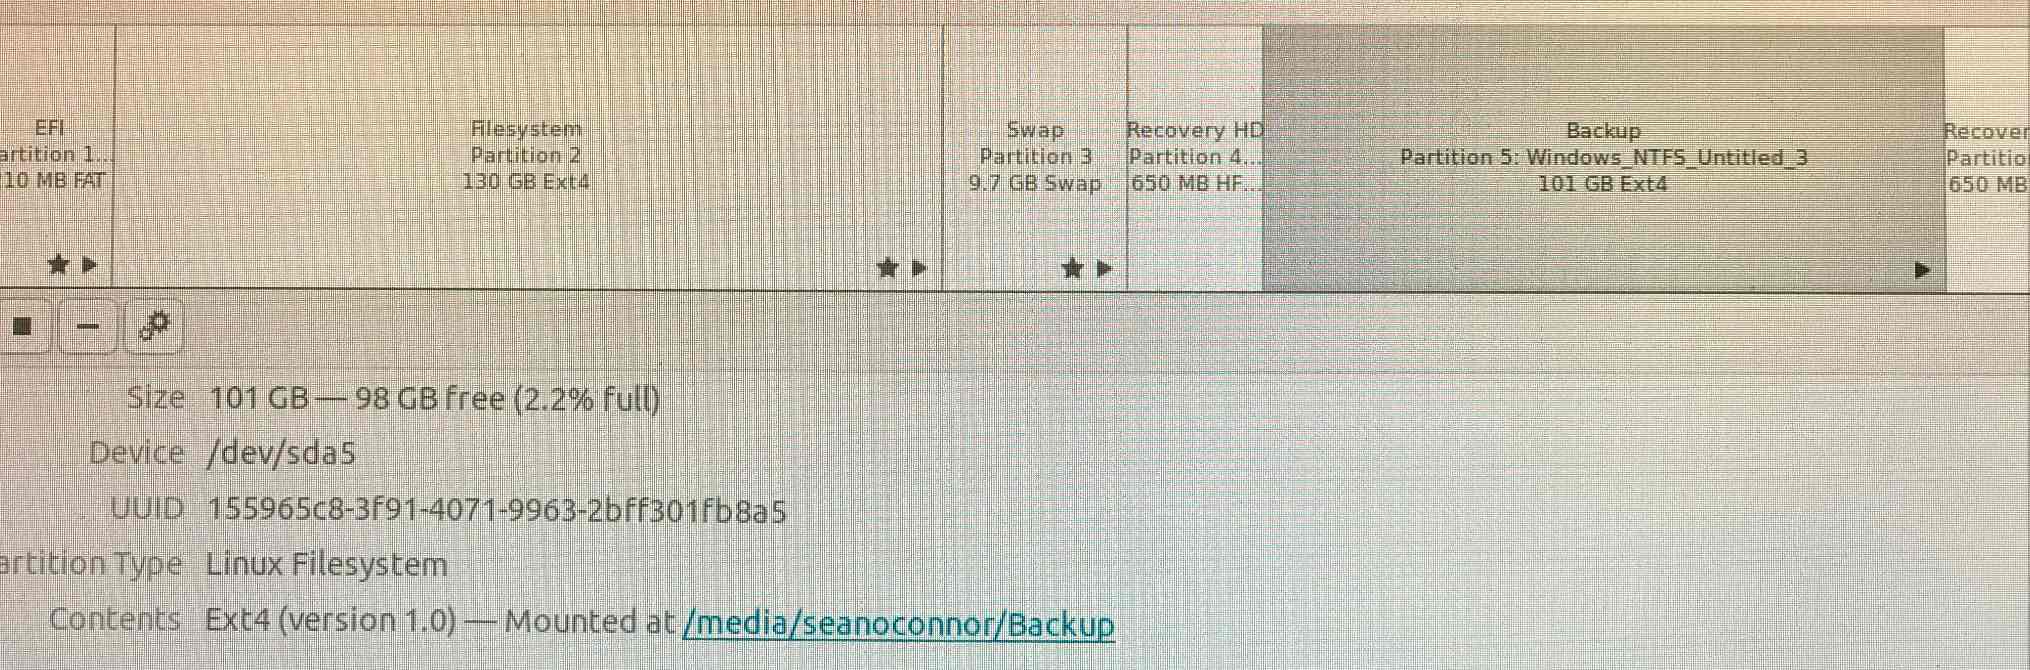 Here then is the final partition map,
Reading USB Drives Formatted in Extended FAT
To read a USB drive formatted in Extended FAT format, install the drivers.
Now you can format a USB drive as Ex FAT, plug it into your computer, and read it.